Focus on Food

Golftown Journal

Cutting Corners

A quicker way to homemade croissants

Story and Photograph by Rose Shewey

The ink on my freshly issued driver’s license hadn’t dried yet when four of my friends and I piled into my newly acquired VW Polo to pop across the border for a casual breakfast in France. A swift hour-and-a-half later, we sat in the courtyard of a little boulangerie in Wissembourg, France, sipping café au lait while enjoying freshly baked, oven-warm butter croissants.

Ah, such sweet memories. These trips were a weekend ritual for many years with an ever-changing cast of friends, and while I no longer drink milk coffees (espresso macchiato all the way), I am still, some 25 years later, utterly obsessed with flaky, buttery croissants.

Fortunately, the Sandhills have ramped up their offering of artisan croissants, I’m happy to report. But not all croissants are created equal, and truly authentically crafted ones sell out faster than you can get out of your pajamas to drive across town to snag a few. So, what’s a girl with a passion for properly laminated butter croissants to do? Make your own, of course. But therein lies the rub.

If you read any recipe for traditional butter croissants, you could easily be led to believe that making these pastries is simple. Time consuming, perhaps, but simple. Make a dough, fold in butter, refrigerate, bake, done. Well, I am here to tell you that a decent amount of practice goes into making croissants (for the casual baker, that is), and every single mistake will affect the end result. Many years back (when cupcakes were the height of sophistication for me), my first batch leaked copious amounts of butter in the oven, and the croissants came out oily and sad looking.

While I have dramatically improved my baking skills, why invest two or even three days of your life when you can have the same delicate, honeycomb-structured butter croissants in just a few hours with a simplified method?

Necessity is the mother of invention. With a toddler taking up most of my time, I searched, tried and failed, and searched some more until I found the perfect shortcut to making perfect croissants. In a nutshell, you can make delicious croissants with one easy alteration: Instead of laminating repeatedly (folding butter into the dough), you spread butter in between layers of dough, which miraculously gives you the same flaky, pull-apart texture of the time-honored but decidedly more tedious method. The best part is, nobody will know you cut corners. Unless you tell.


Easy Butter Croissants  

(Yields 10 croissants / Imperial measures are approximate)

Basic Dough

500 grams (4 cups) all-purpose flour or T65 (preferred)

50 grams (1/4 cup) sugar

1 egg

5 grams (1.8 teaspoons) active dry yeast

20 grams (1.5 tablespoons) butter

10 grams (1.75 teaspoons) salt

210 milliliters (0.8 cups) water 

Butter Layers

225 grams (8 ounces) butter


Place all ingredients for the dough into a large bowl and knead until a ball forms and no longer sticks to the side of the bowl. Allow the dough to rest in a warm place until it doubles in size; about 1-2 hours.

Place dough on a lightly floured surface, shape into a log and cut into 10 pieces. Roll out the first piece to a rectangle, approximately 8×10 inches, and cover with a generous amount of butter. Roll out another piece of dough, set on top of your first dough-butter layer and repeat, alternating dough and butter to create a dough stack, ending with a layer of dough. Refrigerate the dough stack until fully chilled, about 2 hours.

Roll out dough into a large rectangle, about 10×20 inches. Cut dough in a zig-zag pattern to create 10 triangles and, starting with the base of the triangle, roll into croissant. Tuck the tip under so the croissants won’t come undone while baking. Refrigerate once more for at least 1-2 hours (or overnight), then allow to rise at room temperature for 1-2 additional hours before baking.

Preheat oven to 400F, apply egg wash if desired and bake for 20-22 minutes.  PS

German native Rose Shewey is a food stylist and food photographer. To see more of her work visit her website, suessholz.com.

Focus on Food

Focus on Food

You, Me, Après-Ski

The art of smørrebrød

Story and Photograph by Rose Shewey

From St. Moritz to Sugar Mountain, after-ski traditions are as varied as the topography of the mountains themselves. You might find yourself in a tavern with sticky floors, communal tables and craft brews on tap, or you might lounge on a secluded sun deck draped in a wool blanket, overlooking picturesque hillsides. Whatever your situation, one thing is for sure: After a day’s vigorous outdoor activity in the frosty cold, you will be in the market for some serious chow. Move over, moringa smoothies and açaí bowls, this is a job for pickled herring, Alpine fries, potato rösti, cheese fondue and goulash soup.

Or, for the culinary adventurous and fellow Scandiphiles, wander off the beaten path and explore the rich and colorful world of smørrebrød. The possibilities are endless, but let’s start with the basics: Take a slice of freshly baked rye bread, spread butter on it and layer with smoked, pickled or fresh meat or fish, then balance out flavors and textures with spreads, cheese, herbs, veggies or fruit.

Smørrebrød literally translates from Danish to “butter bread.” It is always open-faced and iconic in all of Scandinavia and many parts of Europe, and for good reason. While other European countries have similar traditions (Germans love their “Brotzeit”), there is something rather intriguing about the Danish version of it.

There are some rules to observe (or deliberately ignore), but hands-down, the most important one is: Smørrebrød needs to be appealing to the eye, even sexy. It’s an art form and, at its best, it draws you in with appetizing compositions of fresh (or freshly preserved) ingredients, a mixture of colors and carefully curated garnishes. In Denmark, entire restaurants have dedicated themselves to creating the most enticing open-faced sandwiches with artisan ingredients. For an authentic experience, eat with a fork and a knife and never, under the penalty of public ridicule, fold your smørrebrød to eat as a sandwich.

Bizarre, but true: In Denmark, you can become a “smørrebrødsjomfru” — literally, a “butter bread maiden,” which is a recognized three-year apprenticeship and qualifies you to work in respected restaurants as a smørrebrød chef. While this culinary heritage became less popular sometime during the second half of the 20th century, it is now experiencing a renaissance, and not just in Denmark. More often these days, you will find smørrebrød on the menu of après-ski locations around Europe as a nourishing, wholesome meal option. While this delicacy is a year-round offering, it has special appeal during the winter months, particularly to those who like to eat in-season as it is an excellent reason to raid your root cellar for all things smoked and pickled.


Rollmops, Egg and Beet Smørrebrød   (Serves 2)

3/4 cup pickled red beets, drained

1/2 cup sour cream

1-2 tablespoons prepared horseradish, or to taste

2 slices rye bread

A handful leafy greens (e.g., arugula)

2 rollmops (pickled or salted herring)

2 boiled eggs, halved or sliced

1 small apple, sliced

2 tablespoons capers

Red onion, thinly sliced

Chives or sprouts for garnish

Combine red beets, sour cream and horseradish in a food processor and blend until you have a smooth cream. Spread a generous layer of red beet cream on the slices of bread, add leafy greens, rollmops, eggs, apple slices, capers and onions and arrange to your liking. Sprinkle with chives and serve right away.   PS

German native Rose Shewey is a food stylist and food photographer. To see more of her work visit her website, suessholz.com.
Focus on Food

Aw, Shucks!

Oysters for breakfast

Story and Photographs by Rose Shewey

If you think oysters are for people in pink polo shirts with designer haircuts, chances are you have not attended an oyster roast in the South. Not only were these mollusks considered poor man’s food at varying times throughout history, oyster roasts have been a celebrated low country tradition in many Southern states for folks of all walks of life.

Which begs the question: Raw or cooked? How do you prefer your oysters? According to M.F.K. Fisher, one of the original food writers of our time, oyster-eaters can be divided into three camps: There are the oyster enthusiasts who will eat oysters any which way as long as mollusks are on the menu; there are the purists who will eat oysters raw and raw only; and lastly, there are those who will eat oysters cooked and no other way.

As for me, I like my bivalves raw as much as I like them cooked but will happily pass on oysters altogether if it’s summertime. As far as I am concerned, oysters are classic cold-weather fare even though the old adage that warns against eating oysters in months without an “r” no longer holds true. Despite good arguments that support safe and tasty oyster feasts year-round, I stand with tradition on this one.

“Oysters are the usual opening to a winter breakfast . . . indeed they are indispensable,” wrote Grimod de la Reynière in the Almanach des Gourmands in 1803. OK, oysters for breakfast might be pushing it a little, but I believe Reynière had it right nonetheless.

Consider this: Oysters are incredibly nutritious with unbelievable amounts of zinc — a trace mineral that will help your body fend off cold season maladies. Winter really does seem to be the perfect time to indulge in oysters.

As a “northern light” who grew up on the same latitude as Montreal, Canada (just a few thousand miles to the east), I cannot in good conscience say that North Carolina is cold during the month of November. However, having attended several Thanksgiving oyster roasts, I am definitely in favor of busting out the old oyster knife and doing some shucking this time of year. Besides, millions of French cannot be wrong — France boasts record sales of fresh oysters from late fall until the new year, every year. So, enjoy plump, briny and succulent oysters whenever you want, but celebrate them during the chilly holiday season.

Raw Oysters with Orange Fig Mignonette      (Makes 4-6 appetizers)

1/4 cup freshly squeezed orange juice

1/4 cup red wine vinegar

1/4 teaspoon salt

1/4 teaspoon ground pepper

2-3 fresh, ripe figs, peeled and minced

2 shallots, minced

2 teaspoon minced chives

1 teaspoon dried red chili flakes

24 freshly shucked oysters

Add orange juice, vinegar, salt and pepper in a small bowl and whisk to combine. Stir in figs, shallots, chives and chili flakes, and drizzle mignonette over oysters.   PS

German native Rose Shewey is a food stylist and food photographer. To see more of her work visit her website at suessholz.com.

Focus on Food

Peter, Peter, Waffle Eater

Everything doesn’t need to be orange

Story and Photograph by Rose Shewey

My husband cheekily calls me “the adopted daughter of the South” for no other reason than my fascination with big, loud pickup trucks. I will admit that my favorite vehicle is our old, mud-splattered, lifted four-wheel drive truck with 35-inch tires and rumbling pipes you can hear miles down the road. (I may or may not have taken this truck, just for kicks, through the porte-cochère at the Carolina Hotel. I mean, Sunday afternoons tend to be a bit slow.)

While I am a fan of robust vehicles, I typically prefer more delicate things in life. Take waffles, for instance. The ever-present Belgium waffle — the thick, fluffy, square (or round) waffle with deep, soggy pockets that hold ungodly amounts of maple syrup — is the waffle of choice for most. I, on the other hand, am a devotee of the thin and crisp Scandinavian waffle. The lacy, ornate, heart-shaped Nordic-style waffle with a light dusting of powdered sugar makes my heart sing.

The same way I adore delicate shapes, I have an appreciation for delicate flavors. So, despite it being October, the month of all things orange-tinted, pumpkins rank low on my harvest list. Yes, I love pumpkins as much as the next Boho-knit-cardigan-wearing, scented-candle-hoarding girl but excuse me while I mark this page safe from the annual pumpkin craze. Iconoclast? Not at all. Pumpkins are delightful in many ways, but when it comes to flavor, they aren’t much to write home about. What truly makes anything pumpkin-infused stand out is the supporting cast: a warm, comforting spice mix that is added to virtually all things pumpkin-related.

It’s hard to imagine October without stumbling over chubby gourds at every turn, but autumn has many beautiful heralds — juicy apples, chestnuts, mushrooms, pears or, for instance, hazelnuts. I learned quickly that Americans don’t share my enthusiasm for hazelnuts, a symbol of health and strength, and was recently told by a chef that it’s a Euro thing. Maybe, but I’m also here to tell you that you are missing out if you do not incorporate hazelnuts into your fall cuisine. Whether you enjoy them raw, roasted, covered in chocolate or ground up into flour, hazelnuts are exquisite and should not be missing from your autumn harvest spread.

Norwegian Hazelnut Cardamom Waffles   (Serves 2)

1/2 cup finely ground blanched hazelnuts

1/2 cup all-purpose flour

1/4 teaspoon salt

1 teaspoon baking powder

1/4 teaspoon ground cardamom (or 1 teaspoon cinnamon)

2 eggs

1/2 cup milk (or any non-dairy milk)

3 tablespoons maple syrup

3 tablespoons coconut oil, melted

Preheat your waffle iron. Combine all dry ingredients in a bowl and mix well. In a separate bowl, whisk eggs and add remaining ingredients. Add the dry ingredients to the egg mix and stir to combine. Pour batter into the preheated waffle iron and cook until golden brown and steam is no longer rising. Serve with toppings of your choice — berries, figs, chopped nuts, yogurt or simply dust with powdered sugar.   PS

German native Rose Shewey is a food stylist and food photographer. To see more of her work visit her website, suessholz.com.
Focus on Food

Truffle Treasure

Getting a kick from Champagne

Story and Photograph By Rose Shewey

If I were to change my path in life and choose a different craft, I’d become a truffle hunter. I would train a Lagotto, a curly-coated dog famous for its truffle hunting qualities, and move to the Piedmont region in Italy where I would happily spend my days roaming the outdoors, looking for subterranean treasures.

If you have ever tasted a fully ripened, wild truffle — not the second-rate, cultivated stuff — you’re likely on board. The musky, sweet and gamey aroma of truffles is intoxicating and has you scheming for ways to get your hands on more.

In fact, I would happily hunt for any wild edible fungi for the rest of my days even though, truthfully, I have never dared to go mushroom picking without an expert guide. I have it on good authority that even in the U.S. Army’s own SERE (Survival, Evasion, Resistance, Escape) school, students are instructed to avoid mushrooms at all costs as the chance of, well, survival is greatly diminished if you accidentally ingest the wrong kind.

Wild mushrooms are as mysterious and elusive as they are feverishly sought. Neither plant nor animal, mushrooms are a fascinating world of their own. With their velvety caps, tender gills and whimsical, almost otherworldly appearance, mushrooms have always held a special place in my heart.

When it comes to preparing mushrooms I take a page out of the Alsatian playbook. To some, it may seem decadent, but in the cuisine d`Alsace folks have known for centuries that modest, earthy crops shine like a star once infused with Champagne, as the pearly acidity rounds out their natural flavors. I have quasi-celebrity backup on this: Goethe, Bismarck and Voltaire, all staunch Champagne enthusiasts, would have given us the thumbs-up, no doubt about it.


Mushroom Champagne Tagliatelle with Truffle Oil   (Generously serves 2)

16 ounces mushrooms (wild if available or a gourmet mix), sliced or quartered

2 tablespoons oil

1 shallot, diced

Several sprigs fresh thyme

3-5 cloves fresh garlic, minced

1 tablespoon arrowroot flour or all-purpose flour

1 cup Champagne or sparkling wine (demi-sec for sweetness, otherwise brut)

1 cup chicken or vegetable stock

1/2 cup heavy cream or full-fat coconut cream

Salt and freshly ground black pepper, to taste

1/2 pound tagliatelle pasta, cooked to taste

Truffle oil or Parmesan cheese for serving

Mushrooms are best dry-sautéed: Heat a heavy skillet over medium to high heat, add mushrooms and stir frequently until they release their juices. Add oil, shallot and fresh thyme. Sauté until mushrooms are brown and tender, stirring occasionally. Add garlic and cook for an additional minute, then add flour and slowly pour in wine and stock, stirring to scrape browned bits from the pan. Simmer until liquid is reduced by half. Turn down the heat, stir in heavy cream and season with salt and pepper to taste. Serve over cooked pasta with grated Parmesan cheese or truffle oil.  PS

German native Rose Shewey is a food stylist and food photographer. To see more of her work visit her website, suessholz.com.
Focus on Food

Chocolate Ice Pops?

Black Forest cake anything!

Story and Photograph by Rose Shewey

Oh, how much I wanted to taste my mom’s homemade Black Forest layer cake when I was a child. “Why not?” I would ask indignantly, my arms crossed over my fuzzy polyester sweater. (It was the 1980s after all.)

“Because,” my mom would respond with a heavy sigh and the patience of a Catalan pack mule, “it has alcohol in it and you wouldn’t like it.”

The temptation was real. The silky, hand whipped cream; the spongy, rich chocolate layers; and the luscious, lip-staining sour cherries spiked with fragrant cherry brandy, “Kirschwasser.” Any time Black Forest cake made an appearance on the buffet, I would ask for a slice, but my mom’s response was typically a resounding “no,” and I’d be rushed off to the kid’s table with a piece of marble cake.

To be clear, most European parents aren’t terribly worried about their children ingesting a little bit of alcohol — to the contrary, the stereotype holds true. My mom simply assumed that my palate wasn’t refined enough to appreciate such grown-up treats. So, why let a precious slice of cake go to waste on immature taste buds?

To this day, I adore Black Forest cake. Aside from the fact that this dessert is the epitome of divine yet sinfully decadent pleasures, I am hopelessly nostalgic. “Schwarzälder Kirschtorte” was, and is, a festive staple in my German homeland during times of celebration.

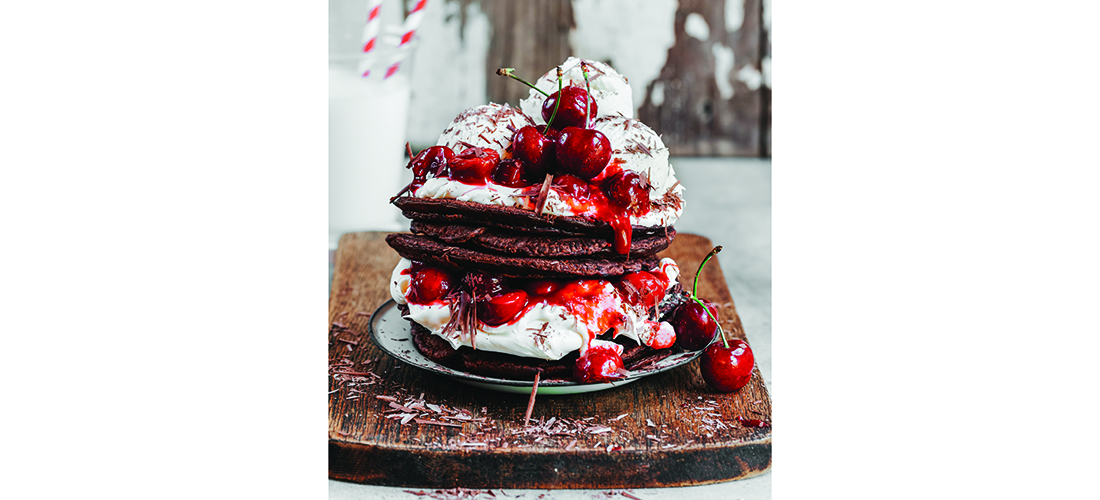
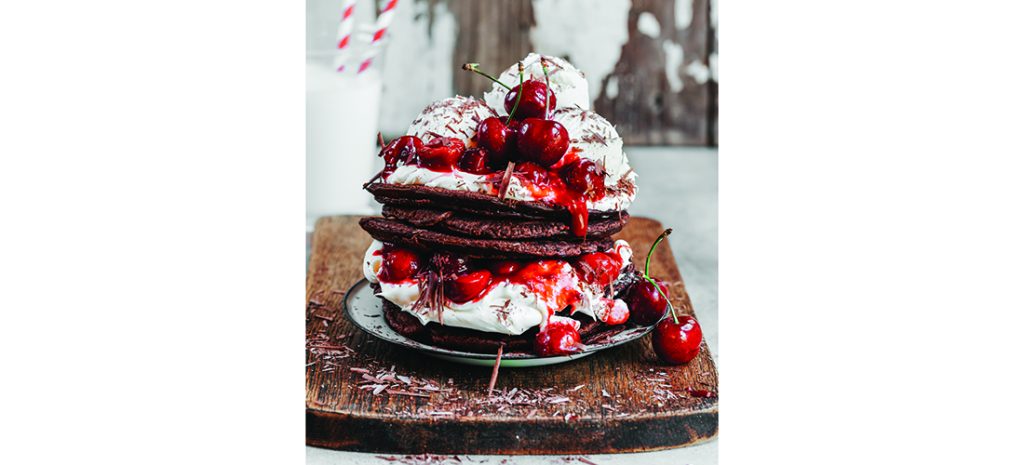
As baroque in nature as Black Forest cake may be, at its core it is a simple, yet epic, combination of flavors. You don’t have to make the prototypical layer cake to enjoy it — you can make Black Forest cake anything. The essential components of chocolate, cream and boozy cherries are incredibly versatile. My go-to quick fix over the years has been creamy Black Forest chocolate ice pops. With only five ingredients, this frozen treat tops any other ice cream-type dessert and adds a touch of glamour to the otherwise rather ordinary lineup of frozen pops.

By the way, my mom was wrong. When I finally laid my tiny, greedy hands on my first slice of Black Forest cake, it was love at first bite, and I scarfed it all down. Well, I ate all the parts that didn’t taste like cherry brandy. So what if I just licked the cream off the top? My mom was still wrong.

Black Forest Chocolate Ice Pops          

(Makes 6)

You’ll need six ice pop molds and sticks for this recipe.

Ingredients

1 1/2 cups yogurt, coconut cream or heavy cream

2 1/2 tablespoon raw honey (or more, to taste)

2 teaspoons vanilla extract

1/4 cup cacao powder

3/4 cup cherries, fresh or frozen, pitted

2 teaspoon Kirschwasser (optional)

In a bowl, combine yogurt (or cream), honey and vanilla extract and whisk until smooth. Divide into two equal parts; set aside one part and stir cacao powder into the other part. In a food processor, blend cherries to your desired texture; anywhere from coarse to puréed will work (or skip this step and continue with whole or halved cherries). Add Kirschwasser if desired. Add a couple of tablespoons of yogurt mixture to each mold, then add a couple of tablespoons chocolate mix and about one tablespoon of cherries; continue layering until the molds are full. Add sticks, then freeze.  PS

German native Rose Shewey is a food stylist and food photographer. To see more of her work visit her website, suessholz.com.