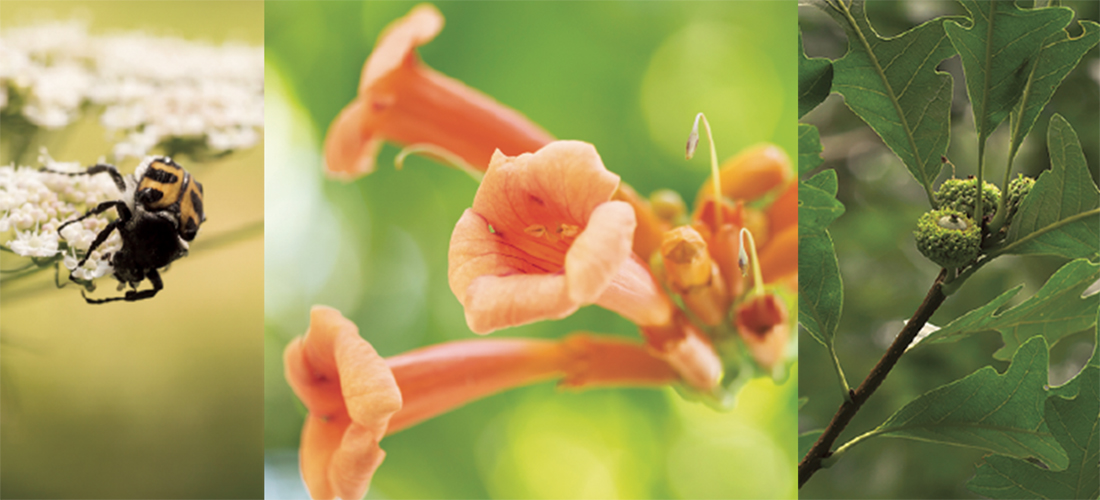
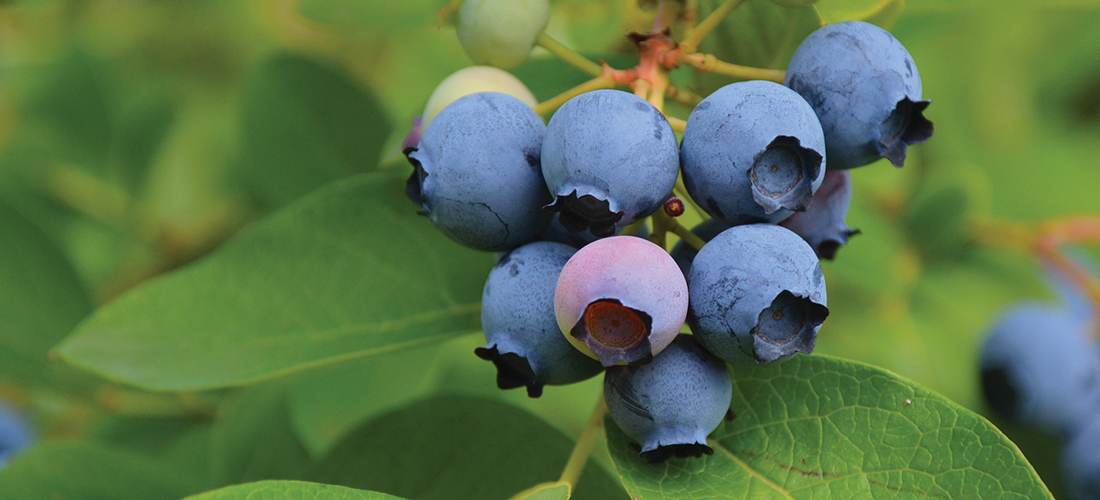
July Blueberries

A feast of healthy fruit

By Jan Leitschuh

Remember the scene in the movie Forrest Gump, where Private Benjamin Buford “Bubba” Blue recites the endless uses of shrimp? For whimsy’s sake, let’s substitute blueberries . . . Well, of course there’s blueberry pie . . . blueberry jam . . . blueberry vinaigrette salad . . . blueberry breakfast cake . . . blueberry pavlova . . . blueberry pancakes . . . blueberry wine and cordials . . . blueberry ice cream . . . blueberry muffins . . . blueberry baked custard . . . blueberry smoothies . . . blueberry cobbler . . . blueberry mole chicken . . . blueberry buckle . . . blueberry lemonade . . . blueberry cheesecake . . . blueberries and oatmeal . . .

Hope you aren’t hungry.

One of the most beloved local fruits is coming into its abundance season this month — rabbiteye blueberries.  You should be able to find them in area markets and Community Supported Agriculture boxes, or search them out on a family outing at Sandhills pick-your-owns. This sweet, popular and versatile fruit is loaded with heart-healthy antioxidants, so scarf down a bowl and the health halo remains undiminished.

If you’ve been watchful, you might have seen its earlier cousin, the Southern highbush blueberry, as early as June. The Southern highbush are not as common among home growers, being less carefree than the vigorous rabbiteye.

Rabbiteye blueberries are one of the easiest fruits for backyard gardeners to grow organically. Best of all, they can blend seamlessly into existing landscapes with a little forethought. To your neighbors, it’s just a nice hedge; to you, it’s an attractive, three-season fruit basket that fills the freezer with highly nutritious and delicious berries.  It could be a three-bush “island” in the yard, perhaps near a sunny driveway or an accent fence. And from a landscaping point of view, what’s not to like? Tiny white pendant bells of flowers in the spring, lush hedging and blueberries in summer, and scarlet leaves in fall, with many remaining for winter. To start your blueberry patch all you need to know is how to prepare your site and which varieties work best around these sandy parts.

The rabbiteye blueberry is hardier and tougher than the Southern highbush that our area blueberry farms grow. Rabbiteyes are adaptable and less finicky, so, if it’s your first time, purchase them for the best chance of Sandhills success, and plant from October through March.

Though it’s too hot to plant now, preparing a suitable home right now is helpful.  Site selection is the first step in growing your bushes. If you have full sun, that’s where they will be the happiest — and a happy blueberry bush is a productive blueberry bush. But if all you have is tall pines and dappled shade for part of the day, fear not. Rabbiteyes will produce a reasonable crop even when grown in part shade — as long as they receive at least four hours of full sunlight each day. 

Plan for space. Rabbiteye blueberries can sprout into substantial bushes, usually 6-to-8 feet tall and wide. Left unpruned, they might even stretch up to 12-15 feet tall. I usually prune ours shorter after the last berries have been picked each summer, and my 14-year-old bushes mostly remain at waist to chest height. 

Blueberries need acidic soil to grow well, preferring a soil pH of 4.0 to 5.5. This is lower than many plants will tolerate, even camellias and azaleas. Though our soil is already acidic, you may have to make it somewhat more so.

To learn your soil’s pH, take a sample to our local cooperative extension office for free testing. They have kits there, and instructions on how to gather the sample. Samples are sent to the North Carolina Department of Agriculture’s soil testing lab in Raleigh. The results are posted online, usually within three to six weeks. If you need to lower you pH, your local Extension horticulture agent can advise you how to carefully apply sulphur to your soil. They can also help you get the important soil phosphate levels correct.Blueberries prefer a soil with a high organic matter content. Start now by mixing in organic materials such as old leaf compost, pine bark, aged pine sawdust, rotted wood chips or mushroom compost. Organic matter will promote better root growth and better plant survival.

Buy at least two different named varieties, preferably three or four, for best crops. Rabbiteye blueberries need “friends” to pollinate — another variety must be growing close by to produce fruit. Plant two or more varieties within 100 feet of each other.

Choose a wider variety to ensure a longer season. Reliable varieties for our area include “Climax” and “Premier,” two early bearers, ripening in mid-to-late June. “Columbus” and “Onslow” are mid-season bearers, and the lovely, dusty  “Powderblue” ripens late in the season, usually from July through early August.

Blueberry plants are very shallow rooted. Never plant them deeper than they were growing in the nursery or in the container. Mulch the plants after planting. This keeps soil moisture even, helping them grow and survive our hot summers. Use bark, aged wood chips and pine needles for attractive and helpful mulches. Your new plants are vulnerable, and for the first few seasons, water twice a week if the rains don’t come.

Mature blueberry bushes are very productive, and can produce 18-25 pounds of fruit per bush. Six to 10 bushes will provide a family of four all the berries they can eat for fresh use, with a surplus for freezing, jelly or jam — though you may want to plant a couple of extra bushes for the birds. 

Speaking of birds, I don’t worry about them. We have plenty of bushes at our house, and always more berries than we can eat alone. The birdsong in the mornings as we pick, coffee cup in hand, balances the equation for us. But if your bushes are fewer, there are bird nets you can purchase and drape over the bushes. If you go this route, commit to checking your nets several times a day, as small birds can become entangled, overheat and die.

When harvesting rabbiteye blueberries, be aware that the berries turn blue well before they fully ripen. For sweeter fruit, wait 7 to 10 days after berries turn blue to pick. This gives the sugars time to accumulate.

From the state Extension website: “When setting out new plants it is recommended that you remove all of the flower buds during the first growing season. In year two, remove weak shoots and attempt to keep four main upright canes. Some flower buds may be kept to produce fruit in year two if the bush put on vigorous growth the previous year. Bushes may be allowed to produce a full crop starting the third growing season.”

But on to the good part — eating.

Besides fresh eating, you can toss blueberries into many ordinary things: your pancakes, waffles, oatmeal and muffins, your lettuce salads, over cakes, custards, desserts and cheesecake. Extra berries freeze easily, in a single layer on a cookie sheet, then packed away in bags.

Other than pie, probably the best known blueberry dessert is cobbler. So let the feasting begin:

Easy Blueberry Cobbler

1/2 cup butter

1 cup self-rising flour

1 cup sugar

1 cup milk

4 cups fresh blueberries

Preheat oven to 350 degrees. Place butter in an 8-inch square baking dish. Melt butter in the preheating oven, about 5 minutes. Remove from oven. Mix flour, sugar, and milk in a bowl until combined; pour batter over melted butter. Scatter blueberries over batter. Bake in preheated oven until a toothpick inserted into the center comes out clean, about 1 hour.  PS

Jan Leitschuh is a local gardener, avid eater of fresh produce and co-founder of the Sandhills Farm to Table Cooperative.

Summer Sweet

Something decorative and delicious (and so very good for you)

By Jan Leitschuh

It’s not too late to plant sweet potatoes.

I know, right? 

You’ve got June harvests of summer squash, garden cabbage, cucumber, zucchini and the earliest blueberries and sweet corn on the brain — not sweet potatoes. You’ve harvested your spring-sown sugar snap peas, your kales and lettuces, your spinach and chards, your asparagus, dill, chives and green garlics. You have the tomatoes staked out in the garden, the first clusters already hinting at ripening next week, or the next. The peppers are promising. The okra went in the ground last month.

You could try planting sweet potatoes now. The vines can be quite decorative in a planter. And 150 days from now, in October, what will you harvest that will fill your bellies with a sweet, satisfying bulk, that will form the basis for a healthy, seasonal fall meal? Your area farmers began in May.  But since you are not counting on sweet potatoes to pay the taxes and mortgage on your farm, you can begin today if the fancy strikes you. 

Why not grow them in planters on your deck, taking advantage of the pleasant, cascading streamers of foliage? Come frost, you could just tip your planter over and harvest the fat tubers — decorative planter in summer, sweet potato ragout in fall. Don’t be confused by “sweet potato vines.” The white tuber ornamental sweet potato sold in garden centers is different from its orange-fleshed vegetable cousin, selected for foliage, not flavor.

Whether you use a planter or not, we live upon some of the best sweet potato ground in the world. The light, sandy loams of this area favor the production of sweet potatoes. The tubers expand readily in the light soils, producing good harvests.

In fact, North Carolina leads the nation in sweet potato production, growing over 45 percent of the U.S. supply.  It’s our N.C. state vegetable — for those keeping score at home — thanks to some fourth-graders who suggested it to the General Assembly in 1995.

Some call it a superfood, with its readily available forms of Vitamin A and C, and their generous potassium and B6 content. It is lower on the glycemic index than regular potatoes. Its plant chemicals help support your skin, fight cancer and cholesterol levels. I call it the world’s easiest side dish. Several times a week, my husband and I rinse off a tuber, slit the side, wrap it in a paper towel and microwave for a few minutes until soft. Simply open and top with butter, coconut oil, applesauce, salsa or your favorite sweet or savory. Bam! One of the “5 A Day for Better Health” knocked down in the time it takes to check your phone.

That’s ignoring all the good things like sweet potato fries, sweet potato bread, sweet potato stew, sweet potato pie, sweet potato chips, sweet potato noodle kugel, maple-pecan sweet potato mashes and so much more.

But this is summer, and we have summer things on our minds. So let’s return to the growing:

The sweet potatoes you find in stores will likely be Covingtons (developed in N.C.) or Beauregard, perhaps a Jewel or a Ruby. A sweet potato starts as a simple sprout. 

Do you remember suspending a sweet potato in a jar with toothpicks as a child? With half the sweet potato covered with water, and placed in the sunshine, it will produce several large leafy upwellings. In a month or so, that suspended sweet potato will have produced slim vines of 8 to 10 inches. Organic sweet potatoes are often best for this, since they have not been treated with a sprout retardant for long shelf life. My grandmother used to tuck one in a jar just for the pleasure of seeing that long vine grow and trail up her kitchen window.

Perhaps you have some older, unused sweet potatoes already beginning to sprout on their own. By all means, help them along. You can bury tubers halfway in a moist, warm bed of sand, lying on their side, to grow more sprouts. Local producers like to form neat, raised planting beds, prepping the soil with, say, an 8-8-8 fertilizer and adequate lime to make a neutral or slightly acidic soil.
I
take my chances with a well-aged compost and lightly dig into a loose soil.

It seems impossible, but leafy sweet potato sprouts are tough, imbued with a strong will to take root and grow. As long as the soil is moist and warm, your sprouts will take root. If you grow your own on tubers, give them a twist at planting time to remove them from the parent sweet potato. Plant sprouts 8 to 10  inches apart, and water them in well. Keep your beds (or your planter) well watered until the sprouts begin to root, never letting them dry out that first 30 days.

In about a month, the shallow, expanding roots will demand another feeding. Side dress again with a little fertilizer or aged compost. Keep an eye on weeds that sprout among the expanding foliage. In time, the sweet potato’s leaves will cover the ground. I like to use simple garden scissors, weeding by snipping off the offender, not disturbing the shallow roots one bit. Keep up the watering and gentle fertilizing but be warned — deer love to nibble the tender sweet potato leaves. (Maybe a vote for a planter there?) Perhaps the third week in October or so, the first killing frost will come to the area and blacken the vines. It’s harvest time!

Either tip over your planter onto a tarp and pick out your tubers, or dig gently into the ground around your plants, exposing the crowns and following the roots downward to reveal your treasures. If you started early enough there will be big ones, and lots of small ones. Children, especially, love this part. If you carelessly stick a fork through a root, don’t be overly alarmed, they have the ability to form a skin over an injured area.

Remove your sweet potatoes from the field so that they are not exposed to the blazing fall sun. You’ll want to cure yours for the sweetest taste. Do this by spreading them out on newspapers in a warm dry area, airy, not exposed to direct sun. Your garage or shed or basement might just do the trick. Some of the starches will convert to that delicious sweet potato sweetness.

Some people wash their tubers off with a garden hose in the backyard. While that is satisfying — revealing the horde, in all its glory — it also starts the clock ticking on the possibility of rot. In our sandy soils, better to brush them off lightly, let them cure, then brush with a whisk for more cleaning. Commercial operations grade them, send them through a wash bath, then dip them in a fungicide to prevent rot. One of the advantages of homegrown is controlling exactly what chemicals go into and onto your food.

Store them in a cool, but not cold, place. Fifty-five degrees is about perfect. Place them in a paper-lined box, and put paper between the layers to better store your homegrown sweets. Rinse thoroughly just before baking. You’ll have sweet potatoes until Christmas, maybe longer if you took care during the curing and storing process. Or if you haven’t eaten them all up first.  PS

Jan Leitschuh is a local gardener, avid eater of fresh produce and co-founder of the Sandhills Farm to Table Cooperative.

How Green Is My Garlic?

Searching out a savory seasonal specialty

By Jan Leitschuh

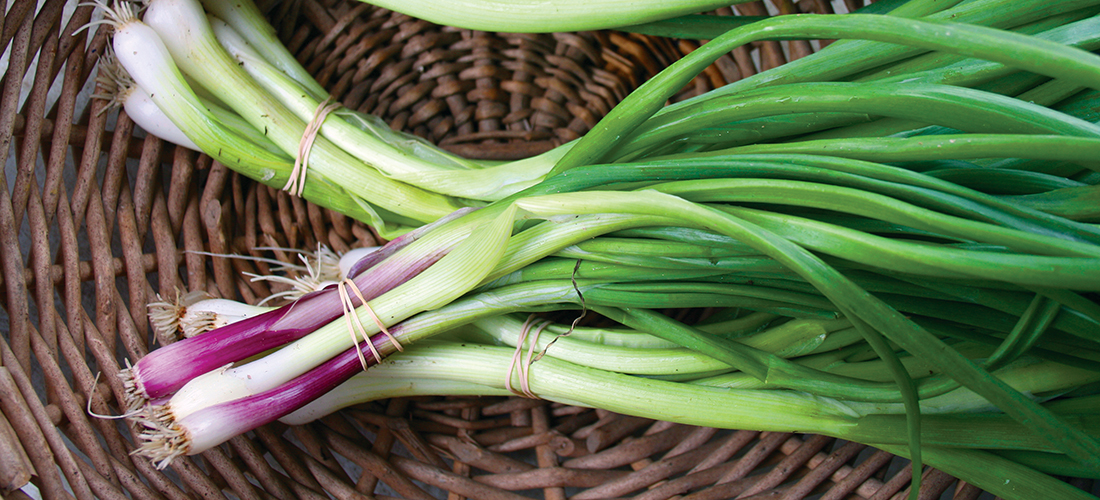
There is a rare treat available this time of year, and it is green garlic. You may have to hunt it down, but if you’re lucky enough to find it, it can be a savory treasure.

At least one local chef seeks it out. Chef Karen Littlefield, of Filly & Colt’s Restaurant at Little River Golf and Resort, says, “We use it in the restaurant like scallions and sauté it for a milder-than-onion flavor. The (green garlic) dressing is always a big hit.” (See her recipe below.)

You’ll find green garlic only in the spring, and generally only at the local level. Scout out farmers markets, or check your community supported agriculture box for a slim green, stalk-y item with a pale white bottom. Green garlic joins the spring parade of other healthy alliums like scallions and green onions, leeks, green shallots and such. It’s one of our earliest fresh produce options locally.

Why hunt down this odd, strappy-leaved stalk every spring?

Green garlic is prized for its fresh, spring-tonic, garlic flavor. You don’t see it often in grocery stores because green garlic is the immature form of your common garlic, before the bulb has time to mature. As it matures, the onion-like bulb at the bottom separates into individual cloves that then grow in volume. When a farmer picks his or her crop before maturity, there is less to harvest so, naturally, they might want to carry a crop to fruition.

However, exceptions are made because produce hunger is strong in the spring, and our local producers aim to please, prizing good relations with their Sandhills neighbors. This time of year, people want fresh flavors, and the mild allium taste of green garlic does just that.

Whether you have in mind something simple like chopping your green garlic to zing up scrambled eggs or quiche, or something fancier like Angel Hair Pasta with Shrimp and Green Garlic in Cream Sauce, preparation is similar.

Select slender, young and tender stalks. Green garlic still has its green “food factory” stalk attached. Much like green onions, all parts of the plant are edible. The topmost green is a bit chewy, so cut off over half of the green tops for optimum texture and garlic flavor. The tougher tops can go to flavor soups, to be fished out before consumption, much like a bay leaf — your grandma would have understood this thrift.

Chef Littlefield’s popular green garlic dressing starts with a stalk of green garlic, trimmed with about three inches of green stalk included, then rinsed, then rough-chopped. She adds a cup of vegetable oil (such as olive), and gives it a whirl in the food processor until a pale green liquid emerges. Finally, she adds 1/4 cup of vinegar, 1/4 cup of orange or lemon juice, a tablespoon of sugar, a tablespoon of either whole oregano or herbes de Provence, and a tablespoon of grated citrus rind, reblends, then salts and peppers to taste. Toss with baby lettuce and spinach leaves, and savor the season.

Green garlic can be used anywhere you’d use regular garlic. But the extra green bits give the resulting dish a verdant, fresh-spring aspect. It won’t be as intense as regular garlic.

According to the respected website World’s Healthiest Foods, “Garlic has long been recognized for its potential to reduce our risk of certain cancers,” and “The benefits of garlic intake for decreased risk of cardiovascular disease have now been extended to each of the following conditions: heart attack, coronary artery disease, high blood pressure, and atherosclerosis. The everyday flexibility of our blood vessels has been shown to improve with intake of garlic, and the likelihood of blood vessel damage due to chronic excessive inflammation has been shown to decrease when this allium vegetable in consumed on a regular basis.”

In that case, a little medicinal nosh might be in order . . .

Green Garlic Dip

2 cups cooked or canned garbanzo beans

1 tablespoon fresh lemon juice

Green garlic with 3 inches of stalk, chopped

1/4 cup chicken or vegetable  broth

3 tablespoons extra virgin olive oil

Sea salt and pepper to taste

Serve with sugar snap peas, cut cukes, carrots or celery for a fully
healthful snack.

What is it about spring that makes us crave its fresh flavors? Is it that long winter of heavy stews and hearty meals that sets us on a course for lighter fare?

Below is a wonderful springtime dish using green garlic and other products of the spring. With company coming, busy cooks can do the peas and the quinoa a few days ahead (though the peas will lose much of their sweetness) and keep in the refrigerator.

Quinoa Pilaf with Green Garlic and Sweet Peas

(From The New York Times)

3/4 cup shelled fresh peas (1 pound unshelled)

2/3 cup quinoa

Sea salt to taste

2 tablespoons extra virgin olive oil

1 leek, white and light green part only, halved, cleaned of sand and sliced thin

1 bulb green garlic, tough stalk cut away and papery shells removed, sliced thin

1 tablespoon chopped fresh mint

1 tablespoon chopped chives

2 tablespoons chopped fresh parsley, or a combination of parsley and tarragon

Freshly ground pepper

Bring a medium pot of lightly salted water to a boil and add the peas. Turn the heat down to medium and simmer until tender, 4 to 10 minutes, depending on the size and freshness. Put a strainer over a bowl and drain the peas. Measure out 2 cups of the cooking water (add fresh water if necessary), return to the pot, add salt to taste, bring to a boil and add the quinoa. When the water comes back to a boil, cover, reduce the heat and simmer 15 minutes, or until the quinoa is tender and, in the case of white quinoa, displays a thread. Remove from the heat, drain through a strainer and return to the pot. Cover the pot with a clean dishtowel and return the lid. Let sit 15 minutes.

Heat 1 tablespoon of the olive oil over medium-low heat in a wide, heavy skillet and add the leek and sliced green garlic. Add a generous pinch of salt and cook, stirring, until tender, fragrant and translucent, 3-to-5 minutes. Add the quinoa and peas to the pan and toss together with the remaining olive oil for about 2 minutes, taking care not to mash the peas. Add the fresh herbs, grind in some pepper, taste and adjust seasoning, and serve.

Yield: 4 to 6 servings.

Advance preparation: You can cook the peas and the quinoa up to a few days ahead (though the peas will lose much of their sweetness) and keep in the refrigerator.  PS

Jan Leitschuh is a local gardener, avid eater of fresh produce and co-founder of the Sandhills Farm to Table Cooperative.
The Big Freeze

Waiting for the other shoe (and temperature) to drop — as April comes (way) early to the Sandhills

By Jan Leitschuh

Are you a betting man, or woman, as the case may be?

Though no psychic, I predict we’re in for a bruising from the weather. I’m not happy about those odds, and only hope it’s “not that bad.”

My speculation is based on long observation of the land and the weather here. Along with the profound, gut-level understanding that Sandhills strawberries and peaches are unique things, veritable sweet ambassadors for this marvelous region.

By now, you’ll know if I was right or wrong. Maybe. You’ll possibly have me at a disadvantage. Or not. As I write, it’s near the end of an unusually warm February. You’re reading this in April. By now, what’s happening will have happened.

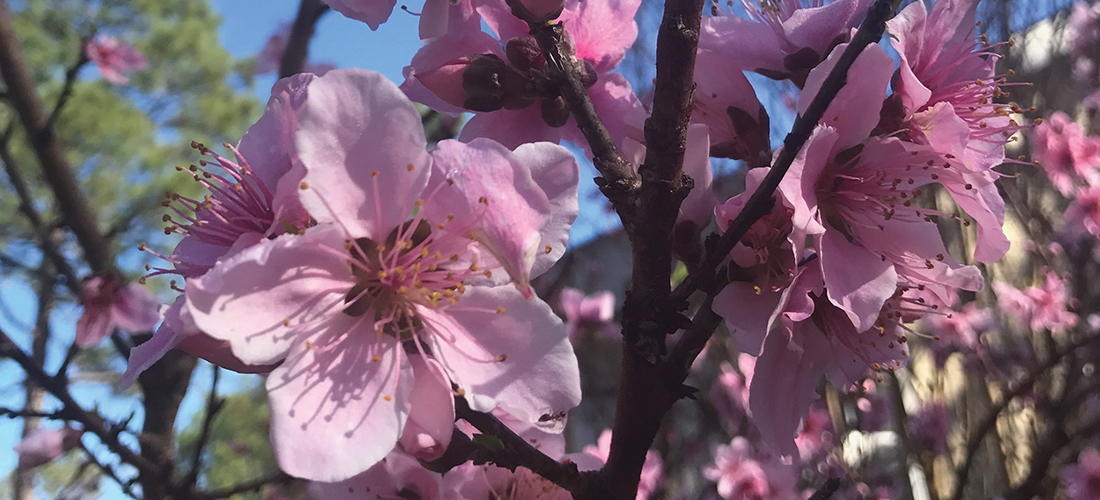
So. Here’s the thing. My peaches are in full bloom on Feb. 22. Not all varieties, but the majority of the peach trees here are blowsy with bees and stunningly gorgeous, sheathed as they are in salmon-pink loveliness. My spring-craving soul rejoices in this gift, photographing the blossoms from all angles, in all light.

But the gardener in me — as well as the produce coordinator in me (for Sandhills Farm to Table Co-op, a community-supported produce box distributing organization) — says, “Yikes!”

“I love this warm weather,” a friend confided in me today, which topped out at 78 degrees. “But it’s so unsettling because it’s so unusual. It’s spooky. Plants can’t go inside and sit in the air conditioning.”

A February headline in the Washington Post said, “Fast-Forward Spring; February’s Warmth is Extreme, And It’s Just Getting Started.” This month, the temperature has averaged at least five degrees above normal over the lower 48. It’s April-in-February.

But it’s not April . . .

The USA National Phenology Network tracks spring’s arrival by reporting on the timing of leaf-out, flowering and other phenomena. According to this group, plant spring came in February this year: “Spring has arrived three weeks early in Virginia and Kentucky . . . continuing a pattern we see across the Southeast.”

Our average last frost date for the Sandhills is typically around April 9. It’s been earlier in recent years.

But when have we ever had a last frost date in February?

I’ll spare you the looking: Never.

That means those fragile pink blossoms, those happy pollinators, the potential young fruit are all vulnerable to a hard March freeze. No young fruit? No Sandhills peaches. Not a happy thought. As one of my peach-farming friends told me, “I’ve had peaches in full bloom once on Feb. 26 and still made a good crop. But only once. It’s not really looking good for the home team right now.”

The good news is that peach trees, as a rule, are exuberant lovelies. They throw off far more blossoms, and set far more fruit, than is needed for a decent crop. I’ve heard peach farmers say that even with only 17-18 percent of a crop left undamaged in an orchard, a grower can still manage enough bank to keep the farm alive another year. Most years, they have to thin the fruit. How likely this year? Unknown territory.

We’ll have a freeze. I’d bet those odds. But how bad?

If the freeze is not too hard, say 27 degrees, or perhaps even down to 26, producers bring various helpful mechanisms to bear. You may remember old photos of smudge fires and tires being burned; those days are gone. Today farmers harness the wind, using machines that mix the ground’s rising warm air with the descending frost. It only changes the temperature at tree level by a few degrees, but often that’s all that’s needed to keep delicate cells from freezing and bursting.

Others use clever site selection to overcome frost pockets, since the heavier cold air rolls downhill and pools at the base of slopes.

One last bit of good news. Despite the warm winter, experts say there have been just about enough chill hours — that is, degree-hours below 45, basically — that the peach trees can make fruit, should the weather gods allow. The lowest-chill-hour varieties are the earliest, at about 550-600 hours. The early clingstone Rich May is at 650 hours. The North Carolina varieties like Derby, and Windblo and Candor are in the 800 to 1,000-hour range. According to one of my peach growers, his site has accumulated 1,080 chill hours this year. The wildly popular freestone Contender, China Pearl and Carolina Gold all clock in at 1,100 chill hours. “We’ll see, but I think we’ll be OK there,” he says. “So, as far as chill accumulation, we’ve pretty much jumped through that hoop.”

But not a hard freeze.

Me, I watch the weather and get out my extra blankets in the late afternoon, before the heat is entirely gone, and swaddle my little babies. Sometimes it works, sometimes it doesn’t. But I don’t have to bet the farm on them.

I mention peaches, but the same issues affect other fruit crops, such as strawberries, plums, blueberries, and later blackberries, figs and apples.

Strawberries are big around here. Local families adore visiting pick-your-own fields, snacking on the tender and juicy Sandhills strawberries, bred for taste and sweetness rather than the ability to be picked half-ripe and shipped across the country without going bad. So, yes, your Sandhills strawberries need to be eaten quickly. But that fresh flavor . . .

As of February, the plants are already blossoming and setting fruit. It’s unlikely these blossoms and set fruits will survive a hard frost. If each plant only has so many arrows in its quiver, a few are being loosed now, reducing spring yields.

Strawberry farmers are used to dealing with frosts, and receive daily frost bulletins from strawberry specialists watching the weather. You may have seen long, white strips of fabric in farm fields — these are spun poly covers that deter a few degrees of frost. Again, they can survive an easy frost. But 17 degrees would bring a big hammer down on the area.

And here’s the “maybe” part. Depending on when you’re reading this in April, we may not be out of the frosty woods yet. So, you may still be in the same boat as me — wondering, hoping. Salivating.

“I worry about the last week in March and the first week of April more than anything,” said one orchardist. Another mentioned the hard April 10 freeze last year that cut deeply into his crop. Some hard and dangerous freezes have been even later. “All the worst freezes I’ve ever had have been in April,” said that grower.

So, we know we love our local farmers. Many of them have become familiar faces, the neighbors we buy our food from. We know the value of circulating money within the local economy. We love the green space of farms clustering around our little towns. So here’s the question, or rather two questions:

If the worst happens, and only a small crop is harvested, are you going to support it even if the prices rise to reflect the scarcity?

And, the bigger of the two:

How many seasons can a producer lose a crop and survive?

Think about it. If we value our local producers, if we value the flavor, green space and economic boost that comes with having fantastic fresh produce-growing experts in our community, how are we going to show it?

Are we going to pull out our wallets and subscribe to the farmer’s co-op, Sandhills Farm to Table? Will we visit their farm stands? Will we go to the farmers markets, and pay the prices without giving the producers a hard time?

If I were a betting person, I’d take those odds. I’d back local.  PS

Jan Leitschuh is a local gardener, avid eater of fresh produce and co-founder of the Sandhills Farm to Table Cooperative.
Can Biochar Boost the Sandhills?

Secrets of pre-Columbian soils might hold a key to better harvests

By Jan Leitschuh

Spring beckons. Garden digging commences. Some will work organic matter and cover crops into their soil; a few innovative others will also use powdered biochar, an intriguing new” substance with history dating back thousands of years — and a whole lot of worldwide interest and research.

To some, that soulful, springtime urge to root about in rich dirt is an exquisite, primal thing. We in the Sandhills can do it too. Lucky us. In March, others with sticky, clay-based soils have to wait. Our native sandy soil has many blessings — easy to work, drains well with a structure that’s hard to destroy, and our dirt doesn’t stain everything orange like clay.

But, and it’s a big but, our sandy soils have significant drawbacks. They don’t hang on to nutrients or water very well. They . . . drain. Fertilize your vegetable garden and — whoosh! — one of our typical growing-season deluges will rinse those expensive nutrients right out of the root zone and down into the water table. Farmers find they have to re-fertilize frequently, and irrigate often during dry spells, driving up costs. Our soils are also acidic, in part due to this “rinsing” action of frequent and hard rains. The Sandhills were among the last areas of the state to be settled, due to poor soils.

Organic matter will help all these issues.

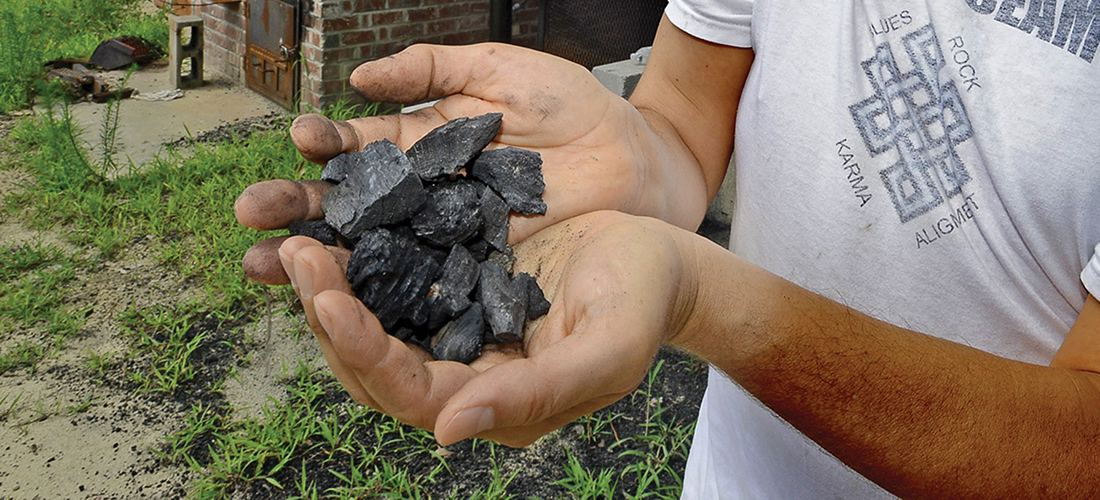
And so will biochar, say local growers Mark Epstein and Billy Bullen of Flow Farms of Aberdeen. They make their own biochar and amend their very sandy soils with this special charcoal-like substance. Extremely porous, biochar shares many beneficial properties with organic matter — and best of all, it’s very stable and lasts far longer than compost. In fact, thousands of years longer. Studies have reported positive effects from biochar on crop production in “degraded and nutrient-poor soils,” that is, sand.

Could biochar become an essential tool in our Sandhills gardening — and even agricultural — tool kit?

“It’s an exciting approach,” says Taylor Williams of Moore County Cooperative Extension. “There is some new research on it about to commence right here in Jackson Springs, at the Sandhills Research Station.” Mike Parker, a NCSU tree fruit specialist, was recently was awarded a $63,000 Specialty Crop grant to study the effect of soil biochar incorporation on peach production at the Sandhills Research Station.

Take organic matter (OM) first. Work in some old compost, rotted manure or leaves, being exquisitely careful of the source. We don’t want any residual herbicides, heavy metals, weed seeds or pesticides. Voilà, you just increased your soil’s water — and nutrient — holding capacity. This is worth restating. In droughty, sandy soils, this ability to capture water and fertility is critical to making a crop. OM also feeds the soil life and microorganisms, which help make nutrients available to plants. Fabulous stuff all around, except for one sent. little problem. Assuming you can find a clean and affordable source, OM burns up fast during our hot, humid Southern summers, often before a crop is finished fruiting.

This is where biochar seems to offer benefits. Biochar is not just charcoal like your BBQ grill briquettes. Biochar refers to a specific sub-type of charcoal made under particular temperature and low oxygen conditions, called pyrolysis. It becomes “thermally modified biomass.” Biochar is what is left after the volatile material in wood is cooked off without much oxygen. The end result is impervious to microbial breakdown, even as it provides soil microbes with open-armed living conditions, a kind of “Hotel California” for soil life. It is more effective than OM at improving soil fertility over the longterm. Some reports have biochar increasing crop yields by significant percentages, especially as a field mellows.

Epstein and Bullen make their own biochar, torching waste from their woods in a specially built burner called an Adam retort. “Everything for us is so far experimental,” explains Epstein. “Last year, we did 15 to 20 burns. Every time we do it, we learn more.” Epstein is a veritable connoisseur of soil. As a longtime vegan, as well as a produce grower, he eats what he grows. That led him naturally to research the most nutritious soils to cultivate in the Sandhills.

The biochar story is a marvelous one, stretching back thousands of years, deep into the South American Amazon rain forest. Early Spanish conquistadors exploring the Amazon reported large, shining cities, with vast and productive fields, El Dorado. But later explorers found only jungles and poor yellow soil, and only small villages with subsistence plots. Rain forests share some of our local issues — frequent hard rains wash nutrients from the soils, and create poor fertility and acidity. It didn’t look as if there was enough fertile soil to support a large “shining city,” much less a culture of them.

We now know that wasn’t so.

Archeologists discovered and mapped certain black, fertile patches of soil they labeled “terra preta,” a Portuguese term meaning black earth. These surprisingly fecund areas were created by the pre-Columbian Amazon Indian culture through certain slash-and-char, low-oxygen techniques — charring (as opposed to combusting), then mixing the black, pounded result with the poor local soils. This prehistoric, man-made soil was found to be higher in nitrogen, phosphorus, potassium and calcium than adjacent soils. It held water and reduced leaching of nutrients. Scientists have referred to it a “microbial reef” that promotes mycorrhizae growth and other beneficial microbes. The Amazonian terra preta, all together about the size of Great Britain, could support large-scale agriculture. They had turned some of the world’s worst soils into some of the best.

And, most intriguingly, it has retained its fertility for thousands of years. These terra preta soils are understandably popular with the local farmers producing cash crops such as papaya and mango, which are said to grow about three times as rapidly as on surrounding infertile soils. (For archeology buffs who wish to look deeper into this fascinating story, Google a program on YouTube called “The Secrets of El Dorado”).

Modern writers have called it “the magic soil.” Could it help the Sandhills too?

“I think it’s an important piece of the puzzle,” says Epstein.

Scientists speculate that two of the greatest problems facing the world — climate change and the hunger crisis — might be alleviated, in part, by biochar.

Biochar increases crop yield several ways. The production process leaves a stable product with a massive amount of micropores, like an organic sponge that won’t biodegrade. While not fertile in itself, biochar’s tiny openings help grab nutrients that might otherwise rinse away to downstream pollution, and bank them for future use, keeping the goodies in the root zone where plants can pull from them as needed. Biochar increases water-holding capacity, maintaining soil moisture over a wide variety of climate conditions, and doesn’t burn off like organic matter. Remember those fertile Amazonian patches, over 1,000 years old? The Pre-Columbian material is still there, acting as a water and nutrient bank, still fertile.

Epstein agrees on both counts. “We’ve noticed our soil holds water better now,” he says. “We have ‘sugar sand’ here on our property, with very little natural organic matter. It’s classic Sandhills sand.” Since adding ground biochar to his soil, he’s noticed that, “we don’t have to irrigate as much. Go into the middle of our fields — it’s very high in organic matter. We still use cover crops of legumes and grasses that are an important factor in tilth. Yet, at the end of the season, we still have good soil.”

Biochar also adds carbon to the soil. Normally, cropping the same piece of ground year after year leads to a reduction in soil carbon. Carbon makes up about 50 percent of a plant’s material, so when a crop is harvested, the carbon leaves with it. This can be mitigated with “green manures” and cover crops that are tilled in spring, but again, OM burns off. Loss of soil carbon decreases productivity.

Not the soil on Flow Farms. Anecdotally, crops are good. Scientifically, soil tests show increasing CEC, or cation exchange capacity — a measure of a soil’s ability to grab nutrients. Soil tests also indicate ample fertility remaining in the soil. “With an immense surface area, biochar holds on to enormous amounts of ions,” says Epstein. “It’s a magnet to nutrients, grabs them up like a sponge. We’re not losing our soluble materials year after year.”

Biochar as stable, fixed carbon can store large amounts of greenhouse gases in the ground for centuries, potentially reducing or stalling the growth in atmospheric greenhouse gas levels, say some scientists. From 2005 to 2012, there were 1,038 articles referencing the word “biochar” or “bio-char” in the topic indexed in the ISI Web of Science. Institutions as diverse as Cornell University, the Agricultural Research Center of Israel and the University of Edinburgh have dedicated research units.

Flow Farms has finally produced enough of its product for its own fields, and will offer biochar to the public for the first time this year, price still unknown. “We’re trying to make it affordable to people and still make an honest return,” says Epstein. Because of the soluble nutrient capture, “It’s an upfront cost that lessens over the years,” he says.

The economics have yet to be determined. According to one source, application rates of one to eight tons per acre may be required for significant improvements in plant yields. Biochar costs in developed countries vary widely. With few producers, prices are often too high for the farmer/horticulturalist. An alternative is to use small amounts of biochar in lower cost biochar-fertilizer complexes.

Biochar is not fertile in itself, but collects nutrients from its environment, leading some users to pre-soak their biochar in fertilizers or compost. Epstein prefers to mix his into the top few inches of soil, “and let it age in its natural environment.”

As an organic, or as Epstein puts it, “veganic” grower, he also adds many beneficial natural elements, such as chopped leaves, gypsum, azomite, kelp meal, green sand, Tennessee Brown phosphate and lime. “We’ve done everything but come in and kiss the soil,” he jokes. But then, turning sand into black gold is his hobby and passion.

In springtime, any gardener understands this at gut level. Stay tuned to biochar. The char of the past may become a tool of the future here.  PS

Jan Leitschuh is a local gardener, avid eater of fresh produce and co-founder of the Sandhills Farm to Table Cooperative.
The Quickening Time

Scratching the winter gardening itch

By Jan Leitschuh

This time of year, produce hunger often creeps in. After the heavy sugar, meat and cream-rich holiday indulgences, we often crave the clean, simple flavors. A squirt of fresh lemon juice. A crushed garlic clove. Fresh, tender young greens.

If salad is wanted, the usual option is to head to the grocery store. A few gardeners may be lucky enough to have a raggedy collard patch or a frost-pounded row of kale or chard nearby, but those are the more hearty greens; best for stewing and steaming, harder to incorporate mature leaves into a fresh salad.

But for the Kitchen Gardener with itchy fingers, the first thought is . . . what can I grow? Well, even in February, there are ways.

Winter gardening guru Elliot Coleman of Maine, famous for his northward winter market garden, calls these long night/cold times “the Persephone days.” One need not be a Greek mythologist to decipher the meaning: tough times for outdoor plants, even in the sunny South.

Clearly, it’s cold enough to inhibit growth, but icy temps are not the only factor. Many growing things require 10 hours of sunlight to flourish. Active plant growth slows down dramatically during the low-light months, even sturdy, cold-hearty items with lesser light demands — greens such as fall-planted spinach or arugula.

Luckily, we gain almost an hour of daylight in February. The Earth, though not fully throwing off slumber, will quicken throughout its second-month days. Eager gardeners may then plant February sugar snap peas mid-month — if brave and willing to replant. It’s normally an excellent late-winter strategy. Peas can come through some nasty hard freezes surprisingly well, especially in our well-drained soils that prevent rot.

Some brave gardeners might even venture to sow some — not all their seeds, but some — Asian greens, fava beans, lettuce, turnip greens, mache, arugula, carrots, chard, green onions, beets or spinach at month’s end. That’s for the eager. The more cautious/time-pressed can wait until later in March.

One fine strategy takes forethought in September. Grow a sturdy fall greens crop to healthy adulthood, then simply protect it from frost with low tunnels of spun fabric, making a handy, backyard fresh market or “living refrigerator” you can dip into at will. Fresh spinach in January? It can happen, but not without care. But, we didn’t do that, did we? The 2016 barn door has already closed. And we’re hungry now.

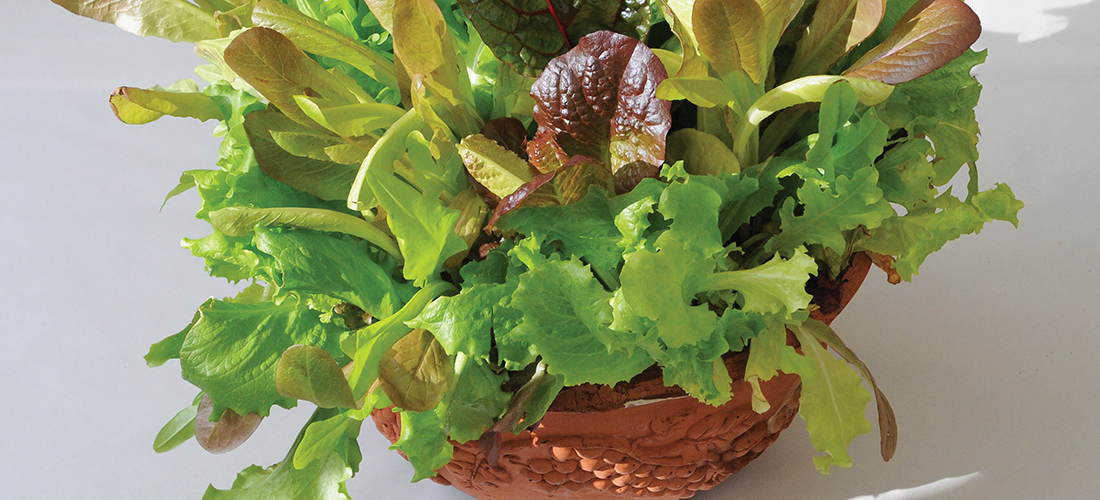
The solution is easy enough. Grow a bowl of greens now. Indoors. In a bowl, a small window box or pretty container. Use ordinary plastic flowerpots if you want, and tuck them in an old basket with a dish to catch drips. Greens require a bit less light than other veggies, are packed with vitamins K, A and C, have that sweet fresh crunch and offer a satisfying, off-season chlorophyll hit — besides scratching that kitchen gardening itch.

Besides fresh greens, best thing about it? No deer ravages! Sorry, Bambi — go graze the neighbor’s pansies instead.

Start by ensuring your container has a drainage hole and a dish to catch excess water. Folks have grown greens in fancy urns, tin cans, moss-lined mesh circles, old yogurt cups, black nursery pots and more. As long as it holds a small volume of soil — three or four inches, as lettuces are shallow rooted — and has a good drain hole, it will work.

Fill with a simple potting soil, preferably one with a little fertilizer. If you are going to harvest right from the bowl, the plants will need nourishment over their two-month lifespan. Moisten the soil, let it expand and drink for a while. You can also use organic fertilizers, but this is trickier.

You can plant a variety of greens — lettuce, arugula, mache, chard, kale — in your container, but they will have different germination rates. For the most gratification, try a lettuce mix first. Lots of color and variety and similar growth patterns, lettuce should satisfy that salad lust.

Once soil is evenly moist, sprinkle your lettuce seed on the surface. Press the seed into the soil gently with a thumb. Seed-soil contact is critical. Then scatter the slightest dusting of soil atop. Too deep will smother the fine seeds, and too shallow will allow them to dry out. Like Goldilocks, you want it “just right.” Like sprinkling salt on popcorn, use about that much soil.

You’ll need care when watering, or these tiny fine seeds will wash into a clump and compete for space. A daily gentle mist from a household sprayer should suffice. Keep damp but not soaking, and don’t let them dry out. Once plant growth takes off, check soil regularly, as the growing roots will be pulling moisture hard to make new leaves.

A cool room in the house is perfect for germination. It doesn’t need a lot of light until the seeds sprout. Lettuces won’t germinate well above 80 degrees, so skip the water heater or heat pad where you start your tomato, eggplant and pepper seedlings. A sunny windowsill makes a perfect growing spot.

The good news is you can be a slacker on many of these suggestions and still grow a crop.

On pretty, sunny days, you can set your lettuce container outside and let it dress up your porch. On bitter, bone-cracking cold nights, you pull it inside. With the right container, it’s a visual asset as well as a culinary one. I’ve been to spring parties where, in a pretty container, a bowl of greens served as a terrific and heartening buffet or centerpiece.

Baby leaves are the most tender. Thin out the leaves for salads as the container begins to fill out. Just snip a few leaves down low on the stem and add them to your existing salads while waiting. I admit, I often just graze my pots, eschewing bowls and salad dressing. Sweet young greens are delicious in their own right.

Thin the heavy spots, to ensure continued production. When the weather warms, you have options. You can harvest right from the bowl, or break up the party and plant clumps in the garden in later March, when the weather softens. There, you’ve got a head start on spring!

If you plant outdoors, you’ll need to “harden” the young plants off so that they may survive. If you’ve been putting the container outside in the sun on the nice days, you’re practically there anyway. Lettuces are even fairly freeze-hardy, if protected.

Unlike tomatoes, squash, eggplant and other heat lovers that would live in a container during challenging and extended conditions, you won’t be keeping your plants indoors or confined long. Lettuce grows to baby-harvest size in as early as 30 days for some varieties, 45 days for others. Better to harvest early, rather than late, for sweetest taste.

Remember, you can sow directly in the garden about six weeks before the last frost date, which is around mid-April here. In March one can attempt to begin sowing, or replanting, outside. Sow a little every two weeks, rather than all at once.

Cold soil will cause slow germination and growth, so I propose that the avid gardeners, eager for spring, do both. Why choose? Doing both will get you maximum production. You can have your indoor garden and eat it too.  PS

Jan Leitschuh is a local gardener, avid eater of fresh produce and co-founder of the Sandhills Farm to Table Cooperative.
Saved by the Dark Side

A family farm goes fungi

By Jan Leitschuh

Mushrooms add a depth of flavor to any number of dishes, meaty, with a hearty umami taste. Growing in dark, damp woodland places, who expected them to save the family farm?

Anyone with eyes has witnessed the shifts in rural agriculture, as the young folk and their young energies leave the farm for opportunities elsewhere, markets wither and long-stewarded properties sell out to housing developers. But some are bucking that trend. Welcome to one 21st century family farm in central North Carolina that has grabbed onto innovation as a way to survive.

Walk into one of the several “barns” on the pretty, rolling acreage here at Carolina Mushroom Farm in Willow Springs. No pink snouts or leathery golden leaves here anymore; hogs and tobacco have given way to at least three types of edible fungi.

Oyster mushrooms, pale and broad, aren’t hard to grow, says Shahane Taylor, 32, one of the four partners in the farm’s mushroom project. He walks to the sterile “prep” building, where special bags of straw are inoculated. Lined up like soldiers in a special 78-degree room are the bags of damp sterilized straw on which the inoculent thrives.

Oyster mushrooms double in size every 24 hours. They have broad, flat, upward-facing layers, and there is indeed a slight oyster-like appearance, unlike the more familiar button mushroom. You can grow oysters yourself, easily, in your kitchen. Besides the actual mushrooms, Carolina Mushroom Farm sells the grow bags too; if you don’t want to do your own research, gather materials, do the sterile prep and inoculation.

The taste of oyster mushrooms? Delicate and sweet. “Like chicken,” Taylor jokes, then adds, seriously, “like a chicken-seafood-y cross.” He likes a vegetable soup with oyster mushrooms.

Valuable shiitake mushrooms are a little trickier and slower to raise. Here, we move to another building where a sterilizing footbath awaits outside the door. Inside, there is another footbath, as well as a hand wash and special ventilation systems with HEPA filters to keep out molds and other contaminants, like foreign spores.

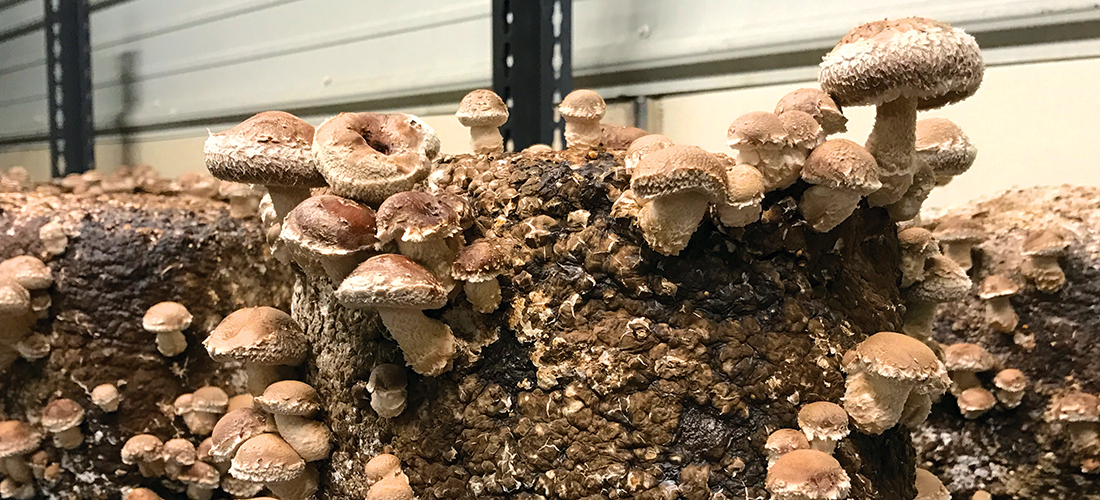
Step into yet another humid, warm room, and metal racks stacked with special blocks of compressed sawdust grow the umbrella-shaped brown caps of the delicate shiitake mushroom, famed for its savory taste and medicinal properties.

Shiitakes have a steak-like flavor that is prized in Asian cuisine, notably miso soup. Very umami, shiitakes are used to top meat dishes, added to stir-fries and used in soups. Shiitake pizza is Taylor’s favorite.

Shiitakes are one of the more popular forms of protein in China, and have a long tradition of medicinal use as well. Apparently, shiitakes have a strong antiviral effect due to natural interferons that inhibit viral replication. It has also been reported that the consumption of shiitake mushrooms lowers blood cholesterol levels.

In Asia, shiitakes are used to support cancer treatments. “Japan has developed an extract from shiitakes known as lentinan. The extract is used with patients undergoing traditional cancer therapy. In fact, in Japan mushroom extracts have become the leading prescription treatment for cancer. Lentinan may also prevent chromosomal damage induced by anti-cancer drugs. There are no known serious side effects,” reports the Mississippi Natural Products Association, a rural farmers’ cooperative.

But trickiest of all to grow are the baby portabella mushrooms.

Here at CMF they are reared on heavy trays of pasteurized compost, alive with beneficial microbes. “They are the most labor-intensive mushroom we grow,” says Taylor. “Baby bellas are especially sensitive in the early stages.”

But portabellas are very popular, so grow them they do. The smaller form, called cremini, is brown and a bit larger than a white button mushroom. They are mild, and can easily sub for the smaller white button ’shrooms in a recipe.

In their most mature form, the creminis grow out to the hefty, popular brown caps we know as portabellas. The large, beefy caps are terrific to grill, fabulous stuffed, and often substituted for meat among vegans. 

Among the three varieties, Carolina Mushroom Farm currently produces 500 pounds of edible fungi a week. They are scaling up quickly to 1,000 to 1,500 pounds in the near future. The quality of the product is excellent, and packaged professionally. Yet, this ambitious venture only came into being in late 2015.

How did this happen to a small family farm in mid-North Carolina? You could start this tale with the farm itself, or begin it in the Marines.

In the Marines, Dion Heckman, 28 and the second of four partners, was a roommate and good friend of Taylor. When they got out of service together in 2010, they continued to hang out.

“We got along really well, it’s just one of those things,” says Taylor. “Dion had a girlfriend who lived near Raleigh, so I’d come visit. And when we got out, Raleigh happened to be where we landed.” There is muffled conversation, and then Taylor comes back with a laugh: “Dion says to tell you he’s the brains of the business.

Both went to Wake Tech on the G.I. Bill, and that’s where Taylor met dark-haired Sabrina in late 2010. Now his fiancée, Sabrina is the daughter of agricultural speaker Jerry Carroll. Jerry is the third of the four mushroom farm project partners. The fourth, Steve Carroll, is Jerry’s brother and a research scientist for BASF.

Dating Sabrina, Taylor naturally got to know her dad Jerry, and got on well with both parents.

Jerry Carroll had been a farm producer, with 6,000 hogs and fields of tobacco on the family land, but saw the agricultural writing on the wall. Ask him why he got out of hogs, and he’ll shoot back, “Twelve cents a pound!” He says at the end he was losing 40 cents per pound and it was the last hog operation in his growing county. With the tobacco buyout in the early 2000s, the golden leaf also left the farm rotation.

There they were, a family farm with 85 rolling acres and several stoutly built farm buildings, the latter nearly paid off. And no crop.

Eventually living on the farm, Taylor hadn’t thought about working there, even with his horticultural experience. His studies had been in business and accounting, and working in media communications. He also worked at a specialty gardening store, and at a hydroponic lettuce farm. 

Heckman was drawn to the farm too. In their free time, they’d go fishing or target shooting there together, talk about the farm, especially the empty buildings. The expensive hog barns were just sitting there, used as farm storage. “We wanted it to be a working farm again,” says Taylor.

Pam Lockamy — Jerry and Steve’s sister — did her research and decided to build a new event space for weddings, to bring agritourism dollars to the throttled-back farm. Her husband, Ray, was looking to retire, and a wedding venue was their retirement plan. A beautiful red barn event space now marks the entrance to the farm, smelling of fresh pine lumber as the family works to complete the lofty interior.

With that plan in the works, the guys returned to look at production again. But producing what?

Jerry Carroll kept staring at the hog buildings. They were strong, well-kept and built to be sterilized. He wondered if there wasn’t a way to use this wasted asset. One day he turned to Taylor and asked the critical question: “What do you know about mushrooms?”

The answer “not much” was no deterrent. “The buildings they grow mushrooms in look just like what we have,” Carroll said.

“We had looked into strawberries,” says Taylor, “but there are a lot of strawberry growers and we wanted something unique. We looked up the top 10 most profitable greenhouse enterprises, and mushrooms were in the No. 2 spot.”

What was No. 1? “Marijuana,” he laughs. “Wouldn’t work here.”

Taylor started on a steep course of research, pulling his buddy Heckman along with him. “To do the scale we wanted to do, we knew we’d need a good team. We’d been best friends, Heckman knew the farm, so it seemed like a natural fit.” So in an era when the average age of the farmer in North Carolina is around 60 years, these two young Marine buddies joined their energies with brothers Jerry and Steve to form a partnership.

Taylor and Heckman began their research at the end of 2015. “When I say we immersed ourselves in it, I mean, we immersed ourselves in it,” Taylor laughs. “It was like going back to school. We’d all been in ag or hort backgrounds, but none of us had grown a mushroom.”

Turns out, the buildings were a perfect fit. Production began in 2016, and by autumn their product was not only showing up in restaurants but in the produce boxes of the local community cooperative, Sandhills Farm to Table, to great acclaim. On the very day of their first SF2T delivery, Sabrina also gave birth to their son, Addelynn.

The family farm, at least on this patch of ground, is not dying out. There is new life on these 85 acres, as the next generation reverses the trend and puts its energy into the age-old business of growing a crop for market.

Cream of Mushroom Soup

2 tablespoons butter

1/2 pound sliced fresh mushrooms

1/4 cup chopped onion

6 tablespoons flour or arrowroot 

1/2 teaspoon salt

1/8 teaspoon pepper

2 cans (14 1/2 ounces each) chicken broth

1 cup half-and-half cream

In a saucepan, heat butter over medium-high heat; sauté mushrooms and onion until tender. Mix flour, salt, pepper and one can broth until smooth; stir into mushroom mixture. Stir in remaining broth. Bring to a boil; cook and stir until thickened, about 2 minutes. Reduce heat; stir in cream. Simmer, uncovered, until flavors are blended, about 15 minutes, stirring occasionally. Yield: 6 servings.  PS

Jan Leitschuh is a local gardener, avid eater of fresh produce and co-founder of the Sandhills Farm to Table Cooperative.
The Gift of Garden

Presents for the kitchen gardener in your life

By Jan Leitschuh

Gardening is like any passion — it comes with snazzy and useful accoutrements.

If you are gifting someone with a kitchen gardening passion, your selections range from stocking stuffer to “oh, honey!” Dial your appropriate dose.

Anyone who grows vegetables loves fresh food, and handling the fruits of one’s labors is more a pleasure than a chore. Chopping, scraping, dicing, peeling, julienning — all render the raw garden product into components for a terrific meal. So, I’d put a great kitchen knife for food prep right up there with the garden hoe.

My go-to tool in a kitchen full of expensive, passed-down Henckels knives is a simple and lightweight ceramic paring knife. It’s sharp as hell, lightweight, handy and nimble, has a great feel in the hand, is tough enough to halve a squash or fine enough to peel an apple. It makes vegetable prep a delight. It’s inexpensive.

Ceramic knives are fashioned from a zirconia powder, and then fired and sharpened. If a diamond is a 10 on the hardness scale, then a ceramic knife is an 8.5. Ceramic knives don’t corrode, and they keep an edge longer than steel. Nor do they react to fruit acids. Beyond that, the indefinable, tactile pleasure of dicing an eggplant or a tough-skinned tomato with a sharp ceramic is the element that keeps me reaching for my light, white-bladed knife over and over again.

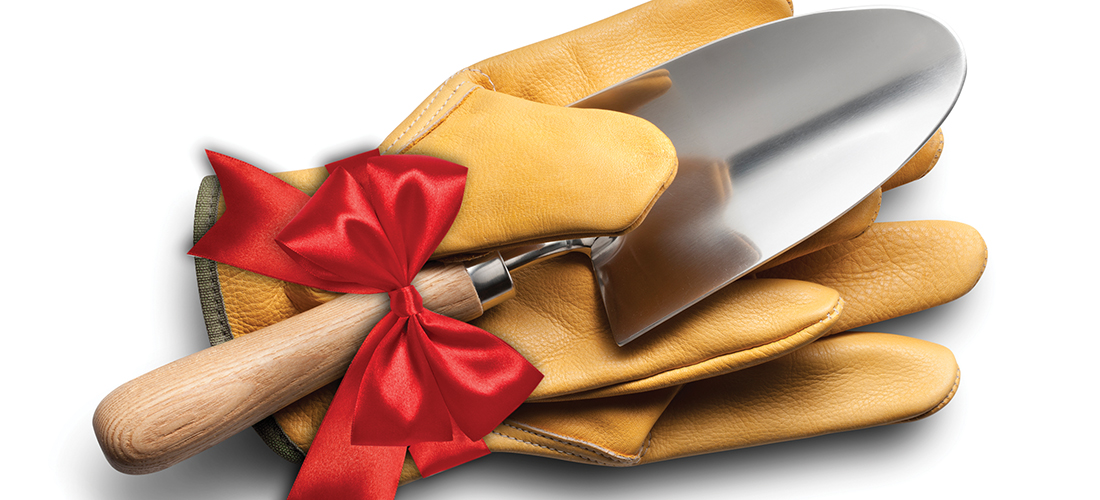
Gardener’s hands are hard-working tools, too. Exposure to mud, cold and sand is rough on hands, cuticles and nails, drying them ragged. Thorns and stickers poke holes in our tender epidermis, forcing us to get a tetanus booster (yes, it’s possible to get tetanus from a thorn stick). So, gloves are always a thoughtful gift, even as we lose the last pair in the junk drawer and wear a mismatched glove on our right hand to pull the spiny okra or cut free a thorny eggplant.

You could have a fight on your hands. A true gardener loves the feel of good soil — cool, fluffy, rich and free of rocks, sifting through the fingers. It’s an aesthetic pleasure. Unfortunately, the practice is rather hard on the hands. Most gardeners compromise, starting out in their gloves and then shucking the right one the moment a delicate task such as tying twine is required. The discarded glove lies hidden under the peppers, getting rained on and baked, until discovered, ruined, in the fall when pulling up the plants. So, the timing is right for a new pair.

A simple cotton pair from the hardware store is the first option. They are, er, dirt cheap and work for general use. They help prevent the worst effects, but can quickly become sodden when transplanting in damp spring soil. If you choose these, be rash, buy a half-dozen for cycling through the wash.

The more useful sort of glove has a waterproof barrier that keeps hands dry. The palms and fingers of a cotton glove are dipped in some sort of rubbery compound, usually nitrile, and function as a pretty good barrier. They look cool, grip quite well, and since the back of the hand is cotton and not smothered in nitrile, breathe fairly well. They also come in candy colors — turquoise, bright yellow, purple, pink, etc. — so you can buy several pairs for a stocking effect.

The most luxurious gloves are goatskin leather. For some reason goatskin is popular as a garden glove material, perhaps because it is both thin enough to be useful, soft enough to be comfortable, and tough enough to allow one to pull weeds or clip thorny things. It breathes better than the rubbery gloves. Extra little luxuries are a cotton lining, which the Brits favor, and a little drawstring adjustment at the wrist for best fit. They are still fairly cheap, $20 to $30.

A padded kneeling bench is a terrific gift, also around $20 to $30. A good one has handholds on the side to assist those trick knees in rising. Once up, you can flip it over as a little padded sitting bench.

A gift certificate to a seed company will ensure a pleasant January, flipping through seed catalogs by the fire compiling the shopping list. Sniff around to discover their favorites.

Moving up the gift scale, every gardener would find a pruner handy for snipping tough stems like eggplant, pruning grape vines or fruit trees and the like, besides general home landscape use. The gold standard here is the Swiss-made Felco 2 bypass pruners. Hardened steel, with the classic red handle, these pruners are endlessly handy. There is a notch for cutting wire. They can be kept super sharp, and clean cuts help wood heal. This is a professional grade tool. Get a hip holster while you are at it, so your gardener can feel like a boss and never be at a loss.

What Sandhills gardener wouldn’t welcome a load of really good compost? We’re not talking the “topsoil” sold in bags at the discount store but real, honest-to-goodness eggshell compost. I’ve used Brooks Contractor of Goldston, and split a dumptruck load with a friend. T. H. Blue may also have something for your giftee. But know what you are getting into. The truck needs access to your garden to dump, and you’ll need some energy to spread it and till it in.

Come to think of it, renting a strong body with a tiller for a day is not a bad idea for a welcome gift.

But back to compost. There are other businesses and barns in the area that may have compost. Call around to locally owned garden centers, ask friends, ask N.C. Cooperative Extension. And if you don’t want to deal with a large pile, it’s perfectly fine to gift a few bags of mushroom compost to dig at leisure.

Finally, we come to the “oh, wow!” gift for any gardener. That would be a small walk-in greenhouse. I’ve seen them as inexpensive as $100 (JCPenney, out of plastic) and you go up from there. My little pleasure was a sturdy plastic house called The Germinator (about $300), and it tucked into a sheltered nook with the garage on the north and the house on the west.

Because it was sheltered, it required only a few nights of supplemental heat from a portable heater with an extension cord to keep things from freezing. Black 50-gallon pickle barrels filled with water were the pillars of my back shelves and offered thermal mass. They released heat at night and absorbed it during the day. My husband gifted me a remote thermometer with a readout I put in the kitchen window so I always knew when things were too hot or too cold.

A greenhouse really needs flat ground to perform well. You also need to monitor temperature and adjust manually on these simple structures. Fancier models offer sturdier walls and more automated temperature controls.

These are the gifts that keep on giving. And, best of all, you may be the recipient next summer of some mighty fine produce. Visions of sugarplums don’t hold a candle to that first homegrown tomato. Win-win!  PS

Jan Leitschuh is a local gardener, avid eater of fresh produce and co-founder of the Sandhills Farm to Table Cooperative.
A Southern Commandment

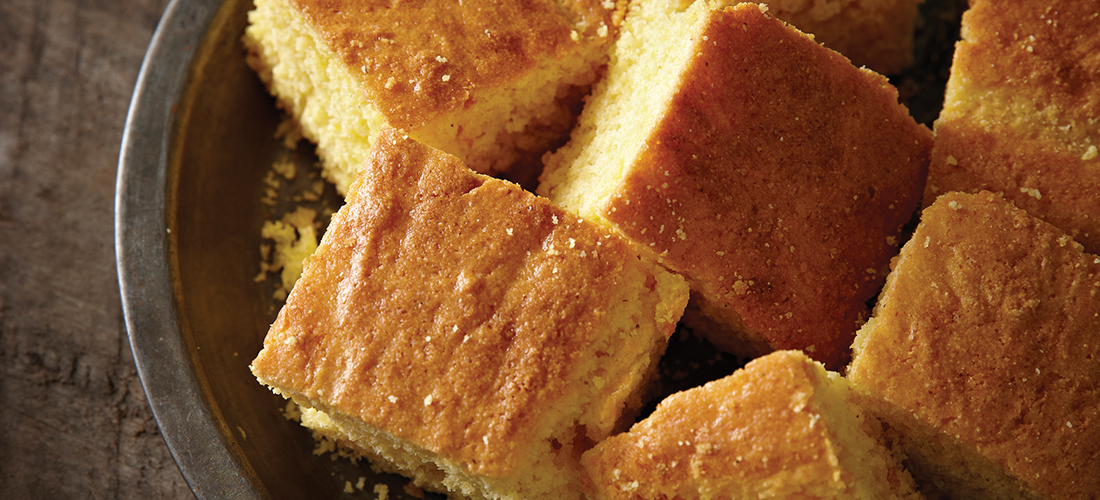
There will be cornbread!

By Jan Leitschuh

Even in these low-carb times, there is cornbread.

It’s not going anywhere.

Moist, lightly golden, aromatic, steam-emitting and firm-yet-crumbly, iconic Southern cornbread is simply a tradition not to be trifled with. This is November, the season of the harvest and Thanksgiving. And there will be cornbread, Paleo diet be damned.

Cornbread has been called the “cornerstone” of Southern cuisine. While we associate cornbread with the tables of the South, the story goes deeper than that. Corn, or maize, is a New World grain, evolved from centuries of careful selection and breeding by indigenous populations of this weedy grass.

Though now it is grown across the world, and bred in laboratories, corn was unknown to Europeans before Columbus. Early settlers naturally tried to grow their familiar wheat in the steamy South. They wanted bread.

But wheat bread did not do as well in Southern fields, while corn did, growing all the way down into Mexico and beyond, where it was domesticated over 10,000 years ago. Several small cobs of several inches developed from a grass that originally produced only one tiny cob an inch long. Now it grows long and prolific, and is the most widely grown grain in the Americas and the most widely grown grain in the world by weight. Over 85 percent of U.S. corn is now genetically modified, under patent, including sweet corn.

Early settlers in the Southeast imitated their native neighbors, learning to process and cook maize from the Cherokee, Creek, Chickasaw and Choctaw. They ground the corn to make a meal, sometimes treating it with alkaline substances to increase nutrition and digestibility. Before long, settlers were adapting recipes to the prolific crop to make the breads and bakery. High in energy, corn became a meal staple. From Colonial days until the present, cornbread has been eaten on Southern tables.

Cornbread rose in popularity during the Civil War. Baking soda became available and was used for leavening. Cornbread was cheap, and it was filling. Meal could be shaped into loaves to bake and rise, or simply fried in some bacon drippings in a cast iron skillet. This latter technique was easy enough for anyone to cook up a mess of fritters, johnnycakes, corn pone and hoecakes that stuck to the ribs and let a body do a hard day’s work.

In fact, with a little water, salt and fat, you could cook a small dense cake right in the field, on a garden hoe blade held over a small fire. As families grew wealthier, the basic recipes expanded to include eggs, buttermilk, flour, yeast and sugar.

Cornbread is considered a quickbread, that is, a bakery leavened with baking powder rather than yeast. Corn lacks the tough gluten proteins that trap gases given off by yeast. Instead, Southern cornbread relies on the protein from eggs to give it structure.

If you grew up in the North, or Midwest as I did, cornbread meant something a little different. Sugar was used, along with a portion of wheat flour, to produce a lighter, more cakey type cornbread. We buttered it lavishly, and drizzled it with honey.

In the South, less sugar is used, and little to no wheat flour. Southern cornbread today can be as simple as corn flour, a little salt, baking powder, milk or buttermilk (clabber) and eggs. Molasses is the traditional drizzle. Leftover cornbread will not go to waste either, sometimes crumbled and served with milk like cold cereal.

The cornbread-like hush puppy is another prized Southern treat, the buttermilk batter being deep-fried, often with the addition of onion powder and seasonings. Served with fish or seafood, you’ll find it on menus up and down the mid-Atlantic coast.

It’s a versatile grain, corn. With different treatments, it’s the basis for cornmeal pudding, masa harina (cornmeal treated with an alkaline lime water) for tamales and tortillas, polenta, posole, hominy, grits, corn muffins, even popcorn, corn flakes and corn dogs. Corn oil and cornstarch, corn syrup and grain alcohol (think moonshine and bourbon whiskey) are further iterations that might show up in our kitchen cabinets.

So now that you’re drooling — you know you are — and have determined to revisit this Southern favorite this November, let us combine the best of the old and the new, the North, the South and the West.

With luck, you are an industrious locavore, and last June and July you bought scads of local, non-GMO sweet corn fresh picked from area markets. You ate sweet corn on the cob, roasted, boiled or steamed, till it came out of your ears, and then sliced the milky, yellow kernels from the remaining cobs and froze batches for chillier times such as these.

That means, clever you, that there is home-frozen sweet corn at your disposal. And if you are going to expend the calories on this starchy, cool weather treat, it’s going to have to be good. That means you are going to add some thawed and drained sweet corn to your cornbread, to help give it tooth and natural sweetness.

If you were unfortunate enough to miss the summer sweet corn train, you could use canned, I guess. Add a small can of drained sweet corn kernels to the mix and fantasize.

There are many variations in cornbread recipes, including those which add cheese, or jalapeños, or pork rinds, onions, even bacon. Native Americans added seeds, or nuts and berries. You do just as your little taste buds dictate.

Mark Twain may be right. This scion of the Midwest may not know how to make a proper Southern cornbread, though we sure do grow a whole heap of corn out there. It’s possible we picked up a tip or two.

The recipe below is a winner, though, and can even be made gluten-free for those holiday visitors who may be avoiding wheat. It has a mild, natural sweetness. If you enjoy an even sweeter cornbread, increase sugar by 1/4 cup.

Stick to the Paleo diet if you must; starchy corn is high in calories. But consider a wee hiatus to whip up a batch of golden-crusted cornbread to have with a winter’s chili, then go for a run. Or permit the odd indulgence at Thanksgiving to celebrate, with gratitude, the season of harvest and abundance.

Buttermilk Cornbread

Ingredients

1/2 cup melted butter

2 eggs

1 cup finely milled yellow cornmeal

1 cup flour (or all-purpose gluten-free baking mix with xanthan gum)

1/4 cup sugar

1/2 teaspoon baking soda

1/2 teaspoon salt

1 cup buttermilk

Kernels from one or two cobs sweet corn, thawed drained.

Instructions

Preheat oven to 375F.

Whisk together melted butter and eggs. Add remaining ingredients except fresh corn. Whisk until just combined and few lumps remain (do not over-mix). Stir in fresh corn kernels.

Pour into a greased 8-inch baking dish. Bake for about 30 minutes, until lightly browned on top and a toothpick inserted into the center comes out clean.  PS

Jan Leitschuh is a local gardener, avid eater of fresh produce and co-founder of the Sandhills Farm to Table Cooperative.
How to Save the World — One Garden at a Time

Choosing plants that promote biodiversity

By Jan Leitschuh

It’s the web of life, local-scale.

Outside our vegetable gardens — where it seems everything is trying to eat our tomatoes, cabbages and squash — it’s a potential desert out there for insect life, says a prominent naturalist. They don’t have enough to eat.

What, you say? Don’t care about bugs and crawlies? Good riddance?

Understandable, but quite shortsighted, says Dr. Douglas Tallamy, University of Delaware professor and chair of entomology and wildlife ecology. Birds, butterflies, amphibians and animals — and humans — all depend on the biodiversity of native plant communities. And without biodiversity, he says, “They are starving. Many bird species, for example, have declined drastically in the past 40 years.”

This bald fact has profound implications for the human race.

Tallamy is speaking at the Fair Barn in Pinehurst Oct. 30 on “Restoring Nature’s Relationships at Home,” sponsored by Save Our Sandhills. He wants you to know this: As we witness natural systems crashing around us, ordinary citizens are a critical piece of the puzzle going forward.

“It’s in our own self interest to care,” he says, and to care deeply. “We are literally supported by the natural systems that surround us. And the plants form the foundation for the web of life that surrounds us. It is biodiversity that runs the ecosystems that support us.” He pauses for emphasis, and then repeats: “We are supported by natural systems.”

In other words, there’s no more “out there” out there. We have to begin with our own residential landscapes.

Native Sandhills and North Carolina plants evolved in specific local weather, soil and terrain conditions; local bugs, animals and birds adapted right along with them.

We all know by now that native plants are naturally better adapted to a given area.

“Natives have proven themselves to be adapted to what Mother Nature provides in a particular area. They do not need the additional care that most imported plants do,” notes Dee Bartlett Johnson, coordinator at Sandhills Community College’s landscape gardening department. “ If we are trying to lessen our impact on the environment, natives are certainly the way to go; less water and less fertilization are needed.”

And there are even deeper reasons: life itself.

“By restoring natives to our landscapes, we are restoring life to our residential properties,” says Tallamy. We add back critical links in a fragmented habitat, habitat that is needed to restore balance to natural systems.

“There really aren’t enough natural areas anymore to support the biodiversity of life,” says Tallamy, “and those that do exist are chopped up and fragmented. By planting native species on our residential properties, we connect those habitat fragments, throw them a lifeline. Most people think nature is happy and healthy ‘somewhere else’ but there is no ‘somewhere else’ anymore.”

Native plants occupy essential spots in the local ecosystem. “They don’t call it an ecoSYSTEM for nothing,” says Tallamy. “It is a system. Nature, by its very nature, creates specialized relationships between plants and animals in a given area.”

It’s the cosmic dance of interaction and interdependence. The premise of Tallamy’s talk is simple: Native plants evolved in concert with local insects, birds and animals, thus native plants provide for their food and habitat needs better than plants from elsewhere.

Native species are necessary for insects and animals to thrive because they provide critical food and habitat for life. “We plant the beautiful ornamental from elsewhere because it is flashy, but the end result is local creatures are starving because they simply didn’t evolve with the new landscaping and can’t draw nourishment from them,” says Tallamy, also the author of Bringing Nature Home: How You Can Sustain Wildlife with Native Plants (Timber Press, $27.95).

“I’m not trying to recreate the ancient ecosystem,” he once said in an interview with The New York Times. “That is gone. I’m trying to create biodiversity.”

In an opinion piece in 2015, Tallamy wrote, “Plants are as close to biological miracles as a scientist could dare admit. After all, they allow us, and nearly every other species, to eat sunlight, by creating the nourishment that drives food webs on this planet. As if that weren’t enough, plants also produce oxygen, build topsoil and hold it in place, prevent floods, sequester carbon dioxide, buffer extreme weather and clean our water. Considering all this, you might think we gardeners would value plants for what they do. Instead, we value them for what they look like.”

According to a supporting website, BringingNatureHome.com, “Chances are, you have never thought of your garden — indeed, all of the space on your property — as a wildlife preserve that represents the last chance we have for sustaining plants and animals that were once common throughout the U.S. But that is exactly the role our suburban landscapes are now playing and will play even more in the near future.

“If this is news to you, it’s not your fault. We were taught from childhood that gardens are for beauty; they are a chance to express our artistic talents, to have fun with and relax in. And, whether we like it or not, the way we landscape our properties is taken by our neighbors as a statement of our wealth and social status.

“But no one has taught us that we have forced the plants and animals that evolved in North America (our nation’s biodiversity) to depend more and more on human-dominated landscapes for their continued existence.”

For example, oak trees are a tree species that support an enormous spectrum of biodiversity. “But there are no more woods, not like before,” Tallamy says. “We now find those productive oak trees in our front yards, lining our neighborhoods. By planting native plants, we connect those habitat fragments.”

In a geological age so dominated by humanity’s impact on the environment that scientists have recently labeled it the Anthropocene Era, we find that almost 50 percent of the land mass has been transformed by human action. “Our actions have impact,” Tallamy says. “And resolution can begin at home.

“What we’ve done is recognize that plants are pretty. So all these human-dominated ecosystems are going to be decorated with pretty plants. That’s fine in itself, but they often come from somewhere else, often Asia/China.

“Our native ecosystems don’t run on these non-native plants. Native plants, on the other hand, take sun and pass that energy on as food. Insects and other life eat them. These non-native plants are inedible to most insect species here, so they’re not passing their energy on.”

Many of these non-native plants have escaped our gardens and become invasive weed species in nature habitats. Tallamy says that 30 percent of the U.S. plant biomass is now from Asia. “Our natural areas are invaded,” he says.

Most birds rear their young on caterpillars. “It takes 6,000 to 9,000 caterpillars to raise a brood of chickadees. Look at the tiny space of habitat for all those birds crammed in there, 70 to 80 percent in human created areas,” Tallamy says.

“I compared a young white oak in my yard with one of the Bradford pears in my neighbor’s yard,” he wrote. “Both trees are the same size, but Bradford pears are ornamentals from Asia, while white oaks are native to eastern North America. I walked around each tree and counted the caterpillars on their leaves at head height. I found 410 caterpillars on the white oak (comprising 19 different species), and only one caterpillar (an inchworm) on the Bradford pear.”

Tallamy and his wife spend their free time clearing their acreage of autumn olive, burning bush, bush honeysuckle, barberry, miscanthus ornamental grass and other non-native invasives. “It’s a very long list,” says Tallamy. “There are a few key genera of plants that produce about 75 percent of the food. Planting native oaks as a street tree, for example. They support 557 types of caterpillars versus the imported zelkova, which supports zero species of caterpillars. So, if you’re a chickadee, we need a few powerful genera. We can have that crape myrtle, it’s noninvasive — but if it’s all crape myrtle, we’re in trouble.”

Native plantings need not be boring, says SCC’s Johnson. “Many of our natives have amazing blooms,” she says, “but beyond that many of them have year-round interest such as interesting foliage, wonderful fall color and interesting branch structure in the winter. Azaleas will not give you those kinds of interest, and they will be a lot more work than the natives.”

Lawn is unhelpful, notes Tallamy. “It doesn’t sequester carbon, doesn’t help support food webs, or support water systems,” he says. His proposal? “ Let’s cut lawn areas in half. If we all did that, we’d have a new, homegrown national park, 20 million acres in size, scattered all over the place.

“Planting natives is fun, it exposes the kids to nature, and most of all it recognizes that everybody on this planet has a stewardship role. Because it’s the only place we’ve got.”

Three of the top six invasive, non-native plants mentioned by the Smithsonian Insider website include:

Japanese honeysuckle (Lonicera japonica) vs. alternative natives such as Trumpet creeper (Campsis radicans) and coral honeysuckle (Lonicera sempervirens).

Japanese barberry (Berberis Thunbergii) vs alternative natives such as Shrubby St. Johnswort (Hypericum prolificum) and winterberry (Ilex verticillata).

English ivy (Hedera helix) vs. alternative natives such as creeping mint (Meehania cordata), Allegheny spurge (Pachysandra procumbens) and creeping phlox (Phlox stolonifera).

In the vegetable and flower garden, says Taylor Williams, Moore County Cooperative Extension, gardeners may wish to include caterpillar-feeding members of the fennel (Apiaceae) family, including dill, fennel, coriander, etc. Also, all members of the mint family, including basil, lavender, oregano, thyme, bee balms and more in addition to many members of the aster family, especially goldenrods and yarrow, sunflowers, rudbeckia, and Indian blanket.  PS

Dr. Douglas Tallamy’s talk is at 2 p.m., Oct. 30, at the Fair Barn, 200 Beulah Hill Road S., Pinehurst, NC 28374. Admission is free but registration is required. Call 910-295-1900 or register online at www.surveymonkey.com/r/Tallamy.

Jan Leitschuh is a local gardener, avid eater of fresh produce and co-founder of the Sandhills Farm to Table Cooperative.