The Kitchen Garden

To Everything
a Season

And spring is for
digging in the dirt

By Jan Leitschuh

These are the best of days, weather-wise.

In the Sandhills, dogwoods and azaleas swell, turning our area into a fairyland. The garden stores and centers see a brisk business in April, as sunny days and pleasant temps lure folks out to tend their yellowed, pine-pollened yards.

And the urge to grow a garden takes hold, to raise a few fresh vegetables for the kitchen.

Now is a beautiful time to turn rich compost and a little lime into our garden beds, preparing the soil to receive seeds and tender transplants. It’s one of the ancient rites of spring, that calls to get our hands in the cold dirt.

Some plants thrive in it, and some languish or rot away. It’s good to have a handle on which do what.

Think of March, April and May as three different planting zones. In late February and early March, sugar snap and snow peas can be sown directly into the garden. They laugh at the cold and provide buckets of sweet snaps for salads, stir-fries and snacks.

Other seeds that thrive in this time period are chard, spinach, turnip, radish, carrots, lettuce, arugula, beets, rutabaga and spicy mustard. Irish potatoes can go in too. Transplants of onions, broccoli, cabbage, kale, kohlrabi and collards can be set out during this time. Pots of parsley, mint and dill seed are herbs that thrive.

If you dislike hot summer gardening and bugs, perhaps you will enjoy just planting an early garden for a fresh harvest. After all, the farmers markets are bursting at the seams come summer.

April allows for further variety. Weather conditions are transitioning, and that is reflected in the soil temperatures. Our last frost date is in early April, meaning the probability is low for a killing frost. The nights are still chilly, but the days grow warmer. The soil, though transitioning, is still quite chilly and can rot certain seeds and even transplants.

Choose seeds and plants suited for this situation. If you’re unwilling to lose a few seeds or plants, early April can be a little tricky, but sound the all-clear after mid-month. Bush snap beans can be pre-sprouted or sown directly. Summer squash and zucchini can go in early, to try to outrun some of the emerging bugs. Plant any sweet corn this month. Set up that cucumber trellis and go for it, especially after the middle of the month.

Southern field peas can start to go in and continue in succession through May. Some peppers can be planted mid-month, though if you are only putting in a few plants, you might wait until the last week of April. Sunflowers can be seeded in if you’d like to attract pollinators to your garden. And fennel is an herb that will thrive.

In April, that itch to plant a tomato hits. Resist.

Who doesn’t love a juicy, homegrown tomato? The garden shops and farmers markets are full of beautiful transplants, and lots of variety — heirloom, grape, slicing/sandwich, plum/paste, and more. Feel free to grab your favorites, but hold off planting them directly in the garden soil. Instead, pot them up in a nutrient-balanced potting soil, and bring your tray of transplants in at night if temps drop low. They will put on healthy root systems and good top growth and be ready to hit the ground running. I find rinsed milk cartons with a few holes punched for drainage to be economical and roomy, growing gorgeous tomato transplants. When the time comes to plant, dig a deep hole, peel back the carton and plant — in May.

By then, the night temperatures are consistently in the 50s. The soil is warming up to receive the last of your garden’s spring input.

Besides tomatoes, you can give heat-loving eggplant the same treatment. It will thank you with strong production. May is the time for direct seeding your okra, and winter squash will thrive. Sweet potato slips planted then will make some fun digging in the fall. Basil, a true heat-thriver, can be safely transplanted or sown — or both.

Enjoy these upcoming spring days, pollen or no. Answer that ancient call to root about in the dirt. I know I will be.  PS

Jan Leitschuh is a local gardener, avid eater of fresh produce and co-founder of Sandhills Farm to Table.

The Kitchen Garden

Pot ’o Green

Light up your early spring

By Jan Leitschuh

What’s prettier than a pot of pansies, satisfies our primal March longing for St. Paddy’s Day green, and is edible too?

’Tis the leafy stuff! Frilly, lacy, colored, savoyed or freckled greens.

It’s the cusp of spring. Sure, and isn’t it time you scratched that grand gardening itch and treated yourself to a salad greens planter?

Granted, “prettier than pansies” is a wee stretch, but pansies won’t shake off their winter doldrums and hit their glory days until later in the month. Don’t we just need some fierce vernal cheerfulness? Cheaper than a bouquet of flowers, a greens tub or planter can light up your springtime front-step pots or window boxes.

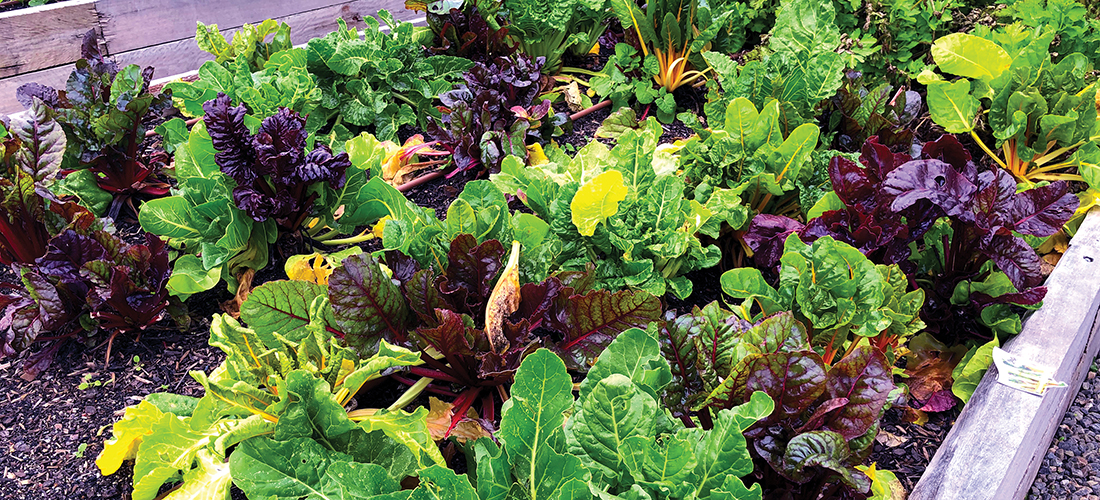
Most spring greens such as spinach, various cheerfully hi-colored lettuces, kale, arugula, candy-stemmed chards, collards and more — herbs such as parsley or mint, even broccoli, onions or cauliflower — are moving onto the shelves of local plant vendors. Available in 4- or 6-packs, the greens are well-started and offer instant gratification and useful design elements.

Those of you with a patch of good ground can skip all the container folderal and save some money by buying a seed packet or two. Till up the spot, add lots of compost (or well-aged manure — most greens are heavy feeders) and sprinkle your seeds. Pat them into the soil with the flat of your hand and keep lightly watered if the rains don’t fall.

You should have greens o’plenty in your cutting garden in April. May the rows rise up to meet ye!

However, not everyone is blessed with that grand patch of good ground, and why should you miss out on one of the oldest rites of spring? Mix lots of mature compost into the soil of your planting vessel. A premixed potting soil with fertilizer included will surely bring the luck of the Irish.

As long as it has good drainage and holds an adequate amount of soil, the container doesn’t much matter, does it?

Humble or classy? You can spark up a fancy glazed ceramic pot for the front step, populate a wooden window box, stuff a whisky barrel half, hide a lined laundry basket among some small shrubs, or just use some larger black plastic planting pots.

Just mind the three aspects of good container design: thriller, filler and spiller.

Your thriller element will offer some height and an upright element to catch the eye, won’t it now? Pick a tall, strong-leaved and substantial plant such as dark green dinosaur kale to anchor your salad pot or planter. A twig framework anchored in the middle might support springtime’s garden candy, edible-podded sugar snap peas.

Another vertical option might be a tall trio of rainbow Swiss chard, with its candy-colored stalks. Romaine or certain young collard plants might work, if you can find them. Onion and garlic greens give a similar upright effect.

The middle layer, or “filler,” is your workhorse. Stuff in plants of nutritious spinach, lettuce and spicy arugula. So many pretty lettuces to choose from! Pinch off a few leaves to fill out your salad or green smoothie.

Another option — add in the different textures of herbs that favor spring temperatures. Dark green parsley is a perfect companion, handsome set against the frilly lime greens and burgundies of lettuces, and useful in cooking. Mints and cilantro also do well in the spring before the days heat up.

The “spiller” layer that softens the pot edges and drapes over the side will be a little harder to find for a springtime pot. Perennial herbs such as thyme droop nicely but are barely leafing out. Edible flowers like nasturtiums might work. You could deploy a small pot of ivy for its draping effect, and let it grow in situ for your summer pot creation.

When the temperatures heat up, greens tend to go gagging about the place and turn bitter, switching from the vegetative to the reproductive stage. Diehard gardeners might permit this and save the seeds (or allow for a less-reliable self-sowing). The small yellow flowers on stalks have their own delicate beauty.

But it’s perfectly fine if you pull out the spent greens and toss them on the compost heap. Then plant yourself a summer tomato, a bell pepper — or go full floral for your summer display. Until then, sláinte!  PS

Jan Leitschuh is a local gardener, avid eater of fresh produce and co-founder of Sandhills Farm to Table.
The Kitchen Garden

Christmas Greens

Cold and collards go together

By Jan Leitschuh

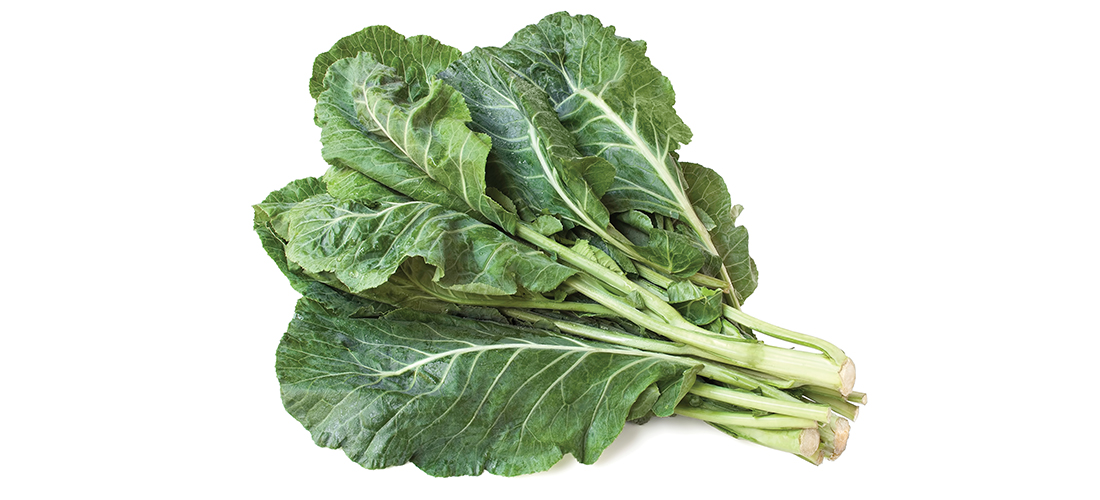
It’s the most wonderful time of the year for many kitchen gardeners. Holidays are an opportune time to harvest, prepare and share the fruits of the late fall veggie patch — especially fresh collards.

About the time frost kisses the November vegetable garden, knocking back the remnant pepper plants and gone-to-seed basil, the collard patch comes into its happy place. That happy place extends into December, indeed, usually all winter. Jack Frost may be nipping at your nose, but he only does very good things for the unique flavor of collards.

When temperatures drop down to about 26 degrees Fahrenheit, frost can burn the foliage of the collard’s cousins such as broccoli and cauliflower. But the tough leaves of collards can take the cold down to 5 degrees F. A deeply cold morning may flatten your collard patch, a sad drooping sight, but after a few hours of sun they look sturdy and brand-new again. More than merely survive cold weather, nutrient-packed collards come through the cold even more flavorful — sweeter.

“Because of their high levels of glucosinolate compounds, collards offer more nutrition than all but just a few other vegetables,” says SFGate. “Freshly harvested collards top the charts in nutritional benefits, but by the time they are shipped long distances, up to 80 percent of their nutrients are lost. In addition, time and distance cause sweetness to fade and bitterness to intensify, so the tastiest option is to grow them yourself.”

That’s what we do — grow ‘em ourselves! No bugs in our winter garden.

A member of the cabbage family, the substantive, leathery leaves of collards grow in a loose head, rather than tight balls like cabbages. Thus, the home gardener can harvest just a few leaves for supper or soup, or you can chop the whole shebang for a holiday cookfest.

There are several ways to prepare collard leaves for cooking. A quick and simple way is to tear the leafy part from the midrib, then discard the ribs. The softer leaves can be rolled and cut into thin strips for even steaming. By julienning, smaller amounts of the tough leaves can be swiftly and easily steamed, dressed with a little Texas Pete or olive oil.

Discarding the sturdy midribs is wasteful, however. A more traditional treatment is to go big, with pounds of collards prepped at one time. Tear the leaf from the midrib, as above. Then, snap the crisp ribs into 3-inch pieces and place on the bottom of a pan with about 4 cups of liquid.

In the South, those 4 cups of flavorful liquid are often the result of boiling two or three smoked ham hocks in several cups of water for 2 hours (you could use — sorry, traditionalists — chicken, or even vegetable stock if ham is off your dietary radar). Other common additions are a teaspoon or so each of salt and red pepper flakes. One-half cup of apple cider vinegar helps the boiled meat break down and adds depth to the flavor but, be certain to use a non-reactive pot.

After a 2-hour simmer, the smoked meat should fall off the bone. Cool the broth, chop the meat, and remove bones. Add about 5 pounds of washed and torn collards, the snapped midribs at the bottom of the liquid. Then pile on the torn leaves, with the thickest leaves near the bottom. The newer, more tender, leaves can go in near the top since they won’t be fully submerged.

Cover the pot and simmer gently for another hour. Repeat, gently. Low heat keeps the healthy sulfur compounds in the collards from stinking up the joint. The bright green leaves will darken to an olive green.

Eat hearty, share with friends, and freeze the rest. Merry Christmas! PS

Jan Leitschuh is a local gardener, avid eater of fresh produce and co-founder of Sandhills Farm to Table.
The Kitchen Garden

Thanksgiving in a Bowl

The everything-but-the-kitchen-sink soup

By Jan Leitschuh

Who wouldn’t love to curl up around a steamy, creamy bowl of soup on a raw November day?

I have a clever friend and avid kitchen gardener, Deb Tucker, who gathers the fall harvest from garden and market, and throws it together in marvelous combinations. She takes this abundance and turns it into a rich bowl of comfort food to ward off late fall’s chill.

The goodies in her cook pot are different every time. The nice thing about this soup is that the ingredients are fluid, and you don’t have to be a gifted chef to make a hearty and delicious potful — just a cook who likes to eat.

The markets reflect the abundance of fresh fall harvest available to us, from apples and squashes, to broccoli, to pecans, to sweet potatoes, to early collards, to fall green beans, to northern cranberries and more. And, of course, roasted turkey.

And my creative friend grabs onto it with both hands, crafting her free-form soup magic.

So, no precise recipes here. Soup is more of a narrative, anyway, a tale of your household’s leftover bits and bobs, with a tasty dash of this and that. To craft your Thanksgiving-in-a-bowl, follow the basic structure, unleash your inner Deb, and fashion a soup that fits your dietary needs and preferences.

Deb described her latest as “cream and cheeses and sherry and cranberries and onions and pecans and nutmeg and coriander and broccoli and cayenne and leftover seasoned turkey tenderloins. Basically . . . comfort food.”

Too rich for you? Back off the cream and cheeses. Avoiding alcohol? Eliminate the sherry. Vegetarian? Use vegetable stock and lose the turkey. Vegan? Vegetarian plus no dairy.

See? This is easy. So, commence:

1. Begin at the bottom of your soup pot. Add a bit of oil and “start as we do with nearly everything, sautéing/caramelizing onion,” Deb said. You might want to add a handful of chopped celery, if available. Thanksgiving spices such as sage are also good additions — a bit of chopped, fried sage is the “pumpkin spice” of our favorite savory Thanksgiving dishes.

2. You’ll need the stock for the soup’s broth. Chicken broth is the standard; vegetable stock could also suffice. A carton of squash soup might be an intriguing side trip into fall flavors. Add liquid to the soup pot and heat. Once your stock is established, start tossing things in.

3. Depending on your diet, you may or may not want to skip the dairy — my friend cooks like a Frenchwoman. On this chilly fall day, Deb’s tastes went right to rich by adding “a little heavy cream. You could also use both cream cheese and/or mascarpone,” she said, “though I wanted the tart bite of cream cheese.” Gilding the lily, as it were, Deb also used a second cheese, an extra-sharp shredded cheddar. “It was a cool, rainy day, and I just wanted some cheesiness,” she said. “I was out of any melty-type cheese, but that would be good, too.” Despite all the dairy, Deb used a light touch and called her concoction more of a “bisque, as it wasn’t as thick as a creamed soup, but not as broth-y as a clear soup.”

4. Add the protein. Deb tossed in leftover turkey, torn in pieces from a simple Butterball-type turkey tenderloin. (On another occasion, she sprinkled the tenderloins with chili powder and cumin, roasting them at 325 degrees for about 45 minutes. She also added mashed sweet potatoes.) Vegetarians could add chunks of grilled portobello mushrooms, or perhaps stir some nut butter into the veggie broth.

5. Season the Thanksgiving bowl with spices and flavors. Deb loves sherry in soups, “many good splashes.” She tried a spot of nutmeg (“just a little . . . freshly grated is best”) and coriander. For a little more heat, she dashed in a little cayenne along with salt and pepper. Though she loves garlic in so many things, Deb steered clear of it this time. “I didn’t think it fit with this milder concoction,” she explained.

6. Add more stuff. Deb kept tossing in seasonal ingredients. A handful of chopped pecans are a soup surprise but very effective, adding “a little bit of the crunch of pecans, which can also be mild and creamy.” Another surprise is a scattering of dried fruits. For this latest creation, she used low-sugar dried cranberries. She adores adding Montmorency sour cherries at other times.

7. After simmering a bit to blend flavors, Deb added frozen broccoli florets near the end. She wants them cooked but still firm and green, “not too soggy. Sometimes I’ll throw some frozen florets into a skillet and brown it quickly, so it resembles roasted.” The result is “easy and quick, if you already have the leftover turkey.”

As a self-described experimental kitchen cook, I could see adding a few sautéed green beans, a cut potato or two, or perhaps some chunks of roasted sweet potato in some iteration. Your larder, tastebuds and imagination shape the outcome.

The result was so good, “I wish I had made enough to have the next day,” Deb said. “Oh, wait, I think I do have one bowl left. Don’t tell my husband. It might disappear when I settle down to watch a movie tonight.”

November leftovers don’t get much better than that. PS

Jan Leitschuh is a local gardener, avid eater of fresh produce and co-founder of Sandhills Farm to Table.

The Kitchen Garden

Bowled Over

Goodies in a gourd

By Jan Leitschuh

And so the seasons change.

The morning freshness in the air and the autumnal shifts in foliage color reinvigorate our heat-saturated souls. Naturally, we yield to the urge to celebrate the transition to coolness, happily sampling the seasonal pumpkin spice lattes and apple hand pies, and the return to outdoor enjoyment.

So, too, we decorate our homes with pumpkins, gourds, squashes — colorful symbols of the harvest abundance of summer, stored for winter feasting. Around Thanksgiving, the fall cucurbit show can be turned into nutritious meals and side dishes.

Eating a squash isn’t the only possibility for festive fall culinary adventures. Get your gourd on. Creativity increases festivity. C’mon, unleash your inner Martha Stewart, in service to the season.

No doubt, squashes and pumpkins are good eating. They are nutrient dense, with lots of vitamins, minerals, and gut-soothing fiber but relatively few calories.

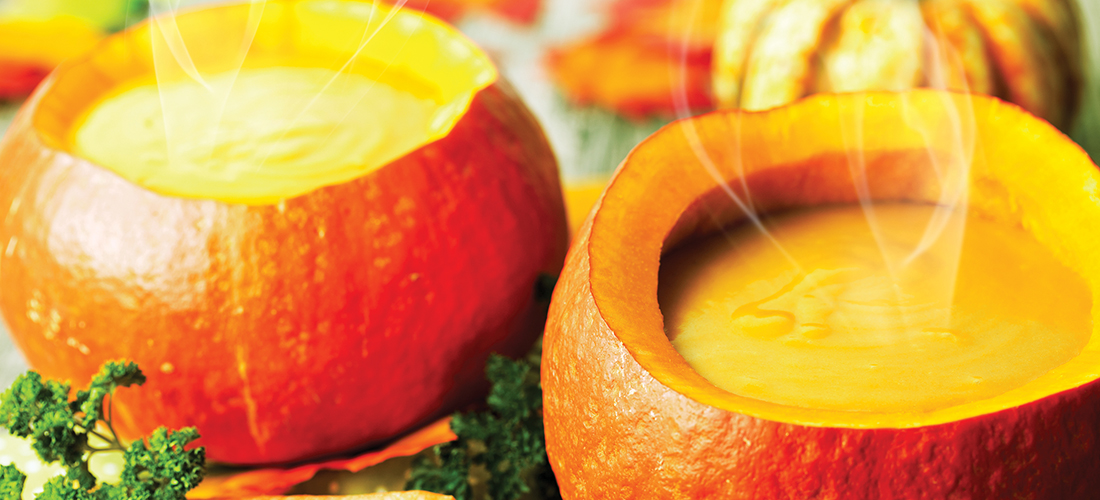
But we are talking fun here. To add a bit of thoughtful eye candy to the dinner table, we can skip the ceramic soup tureens, and the cute serving dishes shaped like autumn produce, and go directly to the real deal. Use your fall pumpkins, green and tan squashes and Jack-B-Little minis as the serving container.

Long ago, I tumbled to this at a fall potluck. I made a pile of buttery sweet potatoes mashed with a little orange juice, maple syrup and bourbon. The concoction was delicious, but in a bowl the brown-orange blob was visually uninspiring. I had a mid-sized pumpkin on hand, and it looked to be perfect for my presentation upgrade.

After cutting off the pumpkin top and scooping out the seeds, I put the hollowed globe in a baking pan and roasted at 350 degrees for 20-30 minutes. I wanted my “bowl” hot enough to keep my mashed sweet potatoes warm, but not so roasted that its walls collapsed and its pretty orange color changed. After I spooned the mash inside, I topped it with pecans and brown sugar, and stuck the top back on partway, serving spoon sticking out. My bourbon mash stayed hot, and the serving vessel brightened the autumn potluck table.

A large pumpkin, hollowed out and lightly seasoned and baked, could also hold soup. The seasonal “tureen” is a conversation-worthy centerpiece in itself. Tuck a few ears of colorful Indian corn at the base, if desired. A meaty tan or green heirloom pumpkin would be extra special.

Now, wouldn’t a ginger-peanut-butternut soup taste extra good in it?

Children love the smaller pumpkins as serving vessels. Pie pumpkins are a good size for soup and, who knows, could a serving of vegetables in one of the “Littles” encourage consumption?

Kids aside, small pie pumpkins could dish up pretty individual servings of, say, a coconut-pumpkin curry. The orange and white mini-pumpkins, so cute and readily available in supermarkets this time of year, could even dress up small quantities of something wildly spicy, say a Thai sauce, hot pepper jelly or Mexican salsa.

Squashes can get in on the action too. A halved acorn, delicata or butternut squash, seeds removed, can be brushed with oil and seasoned before baking. The heat caramelizes the sugars in the squash for a richer flavor. Use your squash as a side dish, as is.

A fancier method is to cool the baked squash, scoop out the roasted flesh, combine with some onions, rice, seasonings and ground beef, and return the mix to the shell. Top with a little shredded cheese for a quick broil. Dinner on the half shell.

Or, combine roasted squash mash with chopped fall apples and a little cinnamon, raisins and brown sugar for a nutritious dessert. The colorful striped “carnival” acorn squash would be spectacular here.

Now that you are planning to put that extra Halloween pumpkin to work doing double duty, you’ll want something warm to put inside it. Why not try this autumnal recipe, packed with cool-weather veggies, from BrokeAss Gourmet:

Peanut-Ginger Soup

Ingredients

2 tablespoons olive oil

1 1/2 cups broccoli florets

2 medium-sized carrots, cut into coins

1 tablespoon grated fresh ginger

4 cloves garlic, chopped

1/2 teaspoon cayenne pepper

1/2 teaspoon dried basil

1/4 teaspoon crushed red pepper

1/2 teaspoon salt

1/2 teaspoon pepper

1 14-ounce can vegetarian vegetable stock

1 28-ounce can diced tomatoes

6 tablespoons peanut butter

Directions

In a large soup pot, heat the olive oil over medium heat and sauté the broccoli, carrots, ginger, garlic and spices until veggies are tender. Add the stock, tomatoes and peanut butter. Reduce the heat and simmer for 20 minutes, stirring occasionally. Serve and top with a few crushed peanuts. Serves 4.  PS

Jan Leitschuh is a local gardener, avid eater of fresh produce and co-founder of Sandhills Farm to Table.
The Kitchen Garden

Of Monarchs and Milkweed

Can you give a butterfly a hand?

By Jan Leitschuh

The iconic, orange and black monarch butterflies are in shocking decline and could use a little help.

Luckily, our kitchen gardens — or any sunny patch of ground — can do more than grow a tomato. Since the life of the monarch butterfly is intimately entwined with that of the milkweed species, what if we were able to lend a little hand on our home turf?

Right now, the monarch butterflies are migrating southward through North Carolina on their awe-inspiring journey to their winter grounds in southern Mexico. But what will they eat? The only food a monarch caterpillar can consume is milkweed. Monarchs have lost an estimated 165 million acres of critical breeding habitat in the United States to herbicide spraying, deforestation and development in recent decades.

Sharp declines in milkweed populations in the agricultural Midwest have been reported. In the early ’90s, the increased spraying of glyphosate, or Roundup, following the introduction of crops genetically modified to withstand the herbicide, wiped out large tracts of perennial milkweed on farmland.

Do you have milkweed in your garden or yard? You could. Right now, and for the next couple of months, milkweed pods will be ripening and releasing their seeds. I gathered some fat pods from a Virginia mountain meadow six years ago and have had milkweed — and monarch caterpillars — ever since.

Throughout the United States, concerned gardeners are creating monarch-safe havens, little habitat “steppingstones” similar in intent to pollinator gardens, to recreate habitat for declining insect populations.

Though the migration is on now, you’ll be hard-pressed to spot the familiar monarch. In fact, seeing one is an Instagram-worthy moment these days. Staggering declines in these showy butterflies were reported in the 2000s. In Mexico, where the bulk of the migratory overwintering population returns to a specific area, the monarchs once occupied 45 acres at their peak in the mid-1990s. Recently, that population plunged to cover a mere 1.65 acres, according to the World Wildlife Fund.

The many troubles of the beautiful monarch butterfly are well documented. Severe and changing weather has damaged eggs and reduced hatch numbers. But most scientists concur that the monarch’s number one threat to survival is the dwindling number of wild milkweed plants available on which to lay their eggs.

This is where gardeners and landowners can fill in some of the gaps.

The story of today’s butterfly began with its great-grandparent leaving the forests of Mexico and heading for the milkweed of Texas. Adult monarchs consume plant nectar, but they lay their eggs exclusively on milkweed. The eggs hatch into the notable green-white-black caterpillars.

After feeding on milkweed leaves for two weeks (if they survive bird and insect predators, that is), they form a chrysalis on the underside of the milkweed leaf, eventually hatching into a bright orange butterfly — their numbers fanning out across the United States as far north as Canada. Given milkweed, another summer hatch ensues.

Finally, on the return trip — happening now — a third generation can hatch. This “super generation” mysteriously returns to the same Mexican forest its great-grandparents left from, though it had never been there. No one knows how this happens. The monarch is the only butterfly known to make this two-way migratory journey as birds do. There are much smaller populations that overwinter in Hawaii, Florida and California, too.

Back to your garden. There are several kinds of milkweed you could add that might suit. The entire milkweed family is catnip to butterflies of all sorts, and other native pollinators. Milkweeds establish large, deep root systems and prefer not to be transplanted. Some species are small and neat, some are large and coarse and are better suited to meadows, back of the border, under power lines and sunny edges of the property.

If you have a very neat, formal urban garden, seek out Asclepias tuberosa, or butterfly weed. Butterfly weed is a small, neat plant that does well in droughts, heat and Sandhills soil. The compact perennial displays flaming orange or cheerful, yellow blossoms. Establish several plants together to ensure sufficient food for hungry young caterpillars. Your local nursery can likely hook you up with a potted plant or three.

A little larger is whorled milkweed, (Asclepias verticillata), about 12-24-inches tall and wide. This white-flowered variety also does well in our dry summer conditions. You may have to order this from a specialty company such as the online retailer American Meadows, which ships potted plants. This unique company also has plenty of informative how-to information on its website.

Buying local? Sorrell’s Nursery in Dunn has a wide selection of native milkweeds that are organically grown — check out their Facebook page. MonarchWatch.Org is another excellent resource with leads on milkweed plants and seed.

Use care with the non-native, pretty, tropical milkweed, (Asclepias curassavica), say experts, as its long season of nectar could cause the monarchs to linger too long up north and get caught out by colder temps in fall. Some feel this is not an issue for Zone 7 and below. If used, experts suggest cutting this variety back in fall and winter.

Swamp milkweed (Asclepias incarnata) prefers moist areas, so if you have a nearby swamp, pond, lake or bog, check it out. Again, unless you have access to wild milkweed seed, you may have to order this.

The best-known milkweed is the common milkweed (Asclepias syriaca). Children enjoy tossing the fluff that carries each seed from this variety’s pod. In World War II, this fluff was used as a kapok substitute in life preservers — two bags of pods would fill one life jacket. This is the one I gathered as ripe seed pods from a sunny, unmown meadow and brought home to the Sandhills.

If you have a little space, or a “back of the border” that you could dedicate to a 36- 48-inch-tall plant, common milkweed produces tremendous lavender-pink blooms in June and is absolutely beloved by many pollinators. During the spring and fall monarch migrations, the abundant milkweed leaves of this plant provide food for a new generation of caterpillars.

One caution, though; your deeply rooted milkweed plot will grow slowly, so be sure to place it in a spot where it can quietly expand. If, after a few years, you want to contain its spread, common milkweed is easy to control by pulling, mowing or cutting.

You can even share with a neighbor who has more monarch caterpillars than available food — just stick a few cut milkweed stalks in a vase or bottle and pass it along. The caterpillars prefer the younger, more tender leaves rather than the leaves of podded stalks.

Besides the host plant milkweed, nectar plants that bloom at different times are needed for the monarch. The caterpillars eat the milkweed, but the parent butterflies need nectar.

Check out the North Carolina Wildlife Federation’s “Butterfly Highway.” Consider putting your butterfly/pollinator garden on the highway at: https://ncwf.org/habitat/butterfly-highway.

There are useful Facebook pages and groups dedicated to assisting monarchs and helping milkweed growers. Monarchs & Milkweed of Wake Forest is a good one, with a friendly community that reports sightings of monarchs, eggs, and caterpillars.

Monarchs, Milkweed and More is another Facebook group. Raleigh Area Monarchs and Milkweed is a third.

If gathering milkweed, select only a few pods, leaving the rest to spread from the mother plants. Look for a pod that has split, showing ripe, brown seeds. Pale seeds are not yet ripe. Or ask around among friends with farms and wilder spaces.

To start milkweed from seed, the easiest way is to emulate Mother Nature and plant them in the fall. I scattered seed across lightly disturbed soil and raked it in. Some separate the milkweed “fluff” from the seed, but I did not. Come spring, I had milkweed.

If you really want to start your seeds in the spring, American Meadows advises that you first break their dormancy with cold stratification. In the wild, says the online wildflower retailer, milkweed plants scatter their seeds quite late in the season. The coming cold would normally kill any seedlings that germinated right away. However, the seeds of milkweed (and other late-season flower plants) “are cleverly programmed to delay germination until after they’ve been exposed to winter’s cold, followed by gradually rising temperatures in springtime.” This adaptation is known as stratification.

So, if you have a little bit of space to offer a safe haven, you may become a critical stop-off for the struggling monarch species.  PS

Jan Leitschuh is a local gardener, avid eater of fresh produce and co-founder of Sandhills Farm to Table.

The Kitchen Garden

All Strung Out

Try a special brand of squash

By Jan Leitschuh

Check any that apply:

— Looking to eat better, fewer carbs and processed foods, and shed those COVID pounds?

— Searching for ways to work more vegetables into your diet?

— Need to avoid gluten due to sensitivities or auto-immune issues?

— Want a simple, low-fuss, low-muss meal?

Spaghetti squash, coming onto markets this month, is the gourd for you.

You’ve probably seen these largish, lemon-colored winter squashes in local markets. This plain, oblong vegetable contains a surprise inside — an extraordinary texture, long strands of squash that, when cooked, make a useful substitute for pasta noodles.

I have grown it in my Sandhills vegetable garden. Local markets will start to feature it toward the end of the month, and it is readily available in supermarkets. Spaghetti squash stores fairly well, about two, even three, months in a cool place.

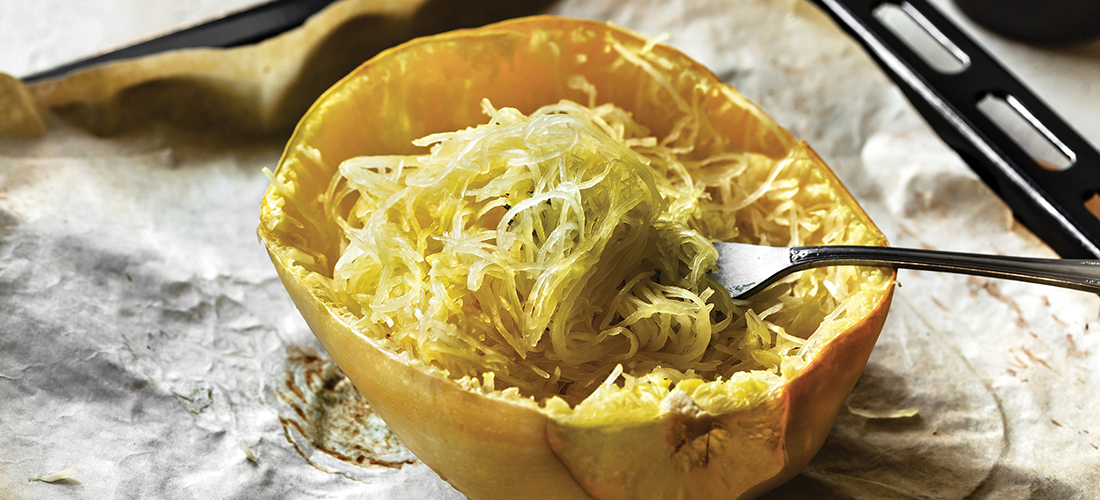
Once cooked, the flesh of spaghetti squash can be forked into fine strands resembling angel hair pasta. Its mild flavor offers a clear stage for a variety of tastes and treatments such as pestos, red sauces and curries.

The simplest dinner treatment is to halve a 2-3 pound squash lengthwise, scoop out the seeds from each half, brush with a little oil, season with salt and pepper, and roast in a baking dish at 375 degrees for 30-45 minutes, or until the flesh is fork-tender. Cool slightly, enough to handle.

If you don’t like wrestling large squashes with sharp objects, you can also bake yours whole. If whole, slice off the stem end, then pierce the rind with a fork before placing in an ovenproof baking dish with a little water. Sealing the dish with foil helps speed things up a bit. The baking may take longer, up to an hour and a half for a larger squash. Remove when skin is softened. An oven mitt is helpful to steady the hot rind. Open carefully — the steam can scald — and scoop out the seeds.

The fastest method for a quick supper is to microwave the whole squash. Pierce the rind several times to avoid a buildup of steam. Place on a plate and microwave until tender, 20 minutes or so, until softened.

The easiest dinner prep? Place each squash half on a plate and fill with your favorite jarred marinara. A sprinkle of Parmesan on top and . . . Voila! A healthy, easy meal for two. The eater does the work of pulling free the squash strands.

For a less-slack treatment, tease out the strands by drawing a fork gently down the flesh lengthwise. Toss the strands with some iteration of garlic, red sauce, Italian spices, grated cheese, mushrooms, peppers, ground sausage, etc., before returning the mix to the baked squash rind.

The scooped flesh can be used in casseroles in place of thin wheat pasta. The “noodles” can be given an Asian, Indian or Southwestern twist with a change in seasonings and flavors. Low-carbers even make a ketogenic pizza crust using the strand, eggs and cheese.

For a fancier plating, some folks have been known to take the scooped strands and form “nests” in muffin tins, to be filled with your favorite stuffing. The nests can also star at breakfast, baked with eggs.

Or cut your squash into horizontal “rings” instead of in half lengthwise. This fun baked presentation shortens the cooking time and can then be stuffed with goodies.

Speaking of goodness, spaghetti squash is nutrient dense but low in calories. It can deliver vitamins A and C, folic acid, niacin, manganese, potassium and other nutrients. A whole cup of the squash is only 10 carbs, much lower than wheat pasta — 28 percent, in fact — and only 42 calories.

If you haven’t explored spaghetti squash yet, give this interesting vegetable a try.  PS

Jan Leitschuh is a local gardener, avid eater of fresh produce and co-founder of Sandhills Farm to Table.
Her favorite book is Jayber Crow, by Wendell Berry.

The Kitchen Garden

The Abundance Time

Get ready, here it comes

By Jan Leitschuh

This is the time for reaping. The farm stands, markets and well-diversified KGs (kitchen gardens) are brimming with vegetables, herbs, fruits and flowers.

Even the non-KG-ers may have a plethora of plump, ripe tomatoes on their pet potted plant. Or perhaps it’s sheaves of fresh basil from that small solo planting back in May.

Maybe the branches of that trio of landscaped rabbiteye blueberries are sagging to the ground with their sweet, nutritious payload. Or the farm stand sweet corn is so good you just want to save a batch for a Thanksgiving corn pudding or cornbread.

And then there’s the zucchini . . .

It’s the abundance time.

We’ve waited for it, tastebuds watering. Those first few pickings of garden-fresh produce were sublime. But the garden goods are coming thick and fast now. Soon, the kitchen counters will threaten to disappear under each day’s harvest.

What to do? What to do?

The focus right now is not on planting, with the possible exception of a later crop of bush beans, zucchini, fall tomatoes, cukes or summer squash. It’s best to pass on new plantings of sweet corn, eggplant, bell pepper or okra.

Instead, the wise kitchen gardener prepares for the overwhelming bounty of late July, when the plants pump out the produce faster than you can say “ratatouille.” So, how do you capture summer’s bounty to use on those chilly winter nights? Do you can, or are you apt to avoid steaming pots in July? Perhaps freezing, dehydration or oven-drying will be your go-to this year. Whatever method you choose, these days there are internet resources galore to help you do it right.

If you’ve never canned, it’s worth a venture into this time-honored method of food preservation. It’s a steamy summer process with its own set of paraphernalia, and one needs to set aside a morning to do it, but it offers a tangible and satisfactory result — and one that connects me, at least, to my mother, aunts and grandmothers. Sentiment and steam go hand-in-hand.

Basically, a heavy-duty canning jar is filled up with food, covered with a fitted lid and boiled for a specific time to kill potential pathogens. There’s nothing like dumping a jar of your homegrown stewed tomatoes into a batch of winter chili or opening up a quart of local July peaches for a holiday peach pie.

Jars and lids are in every supermarket this time of year. Canning kits are inexpensive and readily available and include a large pot, a jar rack, jar lifters, a wide-mouth funnel and a little magnet on a stick for picking up boiled lids and rims. My kit is over 20 years old.

If you plan to can low-acid tomatoes, beans, corn and other lower pH veggies, you need good resources and possibly a pressure cooker. Read up on how to prevent botulism spores and any other harmful organisms. Canning is not hard to do, but the process must be respected.

Jams and jellies are a good entree to canning. Jams make nice gifts, and allow for some creativity with added spices, liqueurs and flavorings. Think fig-habanero jam, blueberry Chambord or peach bourbon preserves.

How-to jam directions are very clear on the supermarket pectins that ensure the jam “sets” up. If making hot jams are not your thing on 90-plus degree days, some people freeze summer fruits to jam during cooler months when a warm kitchen is welcome. There are also easy, no-boil freezer jams. Recipes abound on the internet.

Freezing is perhaps the fastest and easiest way to preserve your harvest — if you have the space. You can also lock in nutrients from fresh produce by freezing at the peak of ripeness. Herbs, fruits and vegetables each have simple processes for preserving taste and texture when thawed.

Most fruits can be frozen raw. Blueberries and blackberries can be spread on a cookie sheet, frozen, then placed in labeled and dated heavy-duty freezer bags for winter snacking. (Spreading them out first for freezing prevents them from clumping.) Peaches can be frozen in a simple syrup, or puréed with some lemon juice to discourage discoloration, then frozen in ice cube trays for drinks or future smoothies. Don’t forget to make a few natural peach popsicles, while you’re at it.

Bell peppers and onions are easy — just chop, bag and freeze. Many vegetables freeze better if you blanch them first. Blanching involves a quick dip in boiling water to set the color and deactivate the natural enzymes that will further break down or discolor the food.

Transfer blanched veggies to an ice bath to stop the cooking. Drain and freeze in a single layer to prevent clumping, then bag, date and label. To prevent freezer burn, press out all the air, or use a straw to suck out extra air.

For sweet corn, you can freeze cobs whole but remove husk and silks first. Blanch cobs for four minutes then cool in an ice bath. Since bulky cobs take up space, you can slice the kernels off the cob when cool, then bag, date and label.

Blanch green and wax beans for three minutes. Zucchini and yellow squash slices are also three minutes. To remove the skins of peaches and tomatoes, blanch for 30 seconds or so, then put them into an ice bath. Tough tomato skins peel easier if you cut a small “x” at the bottom before plopping in hot water.

Cherry or grape tomatoes are easy to freeze. Pick out the green stem end and then freeze on trays like berries. Toss them atop winter casseroles.

Melons? Don’t keep them for long, but try a refreshing frozen granita or slushie of honeydew, lime and mint or one of cantaloupe, orange juice and Grand Marnier.

I’ve also dehydrated watermelon for hikes. Truly. You don’t end up with much but the chewy little slices are as sweet and flavorful as candy. Thin peach slices dehydrate well too. Purée with lemon and make fruit roll-ups for the kids.

Sun-dried plum tomatoes are my favorite. Slice in half, drizzle in olive oil and sprinkle with sea salt. Dry on a baking sheet in the oven at lowest heat until leathery. Freeze, or pack in oil and refrigerate. Use in pizzas, casseroles, salads, or eat as an intense, flavorful snack.

Herbs can be dried or frozen. Summer basil is probably the most popular herb to preserve for the winter. Whip up your favorite batch of pesto. I usually rinse off my basil then process it with a little good olive oil. Poured into ice cube trays, frozen, then bagged, I have a little burst of summer sunshine for any winter Italian dish, pasta or soup.

Drying is easy, just cut herbs before they flower. Strip the leaves from the stem and dry on a paper towel on a sunny table with good air circulation. Dump in a jar when absolutely crisp-dry. I dry catnip for the cat, fresh oregano and lemon thyme for seasoning, and my chocolate mint leaves for winter teas.

If you can’t eat and preserve it all, share your garden love with neighbors, friends or food banks. After all, it is the abundance time.  PS

Jan Leitschuh is a local gardener, avid eater of fresh produce and co-founder of Sandhills Farm to Table.
The Kitchen Garden

Tomato Tips

Prepare for your homegrown bounty

By Jan Leitschuh

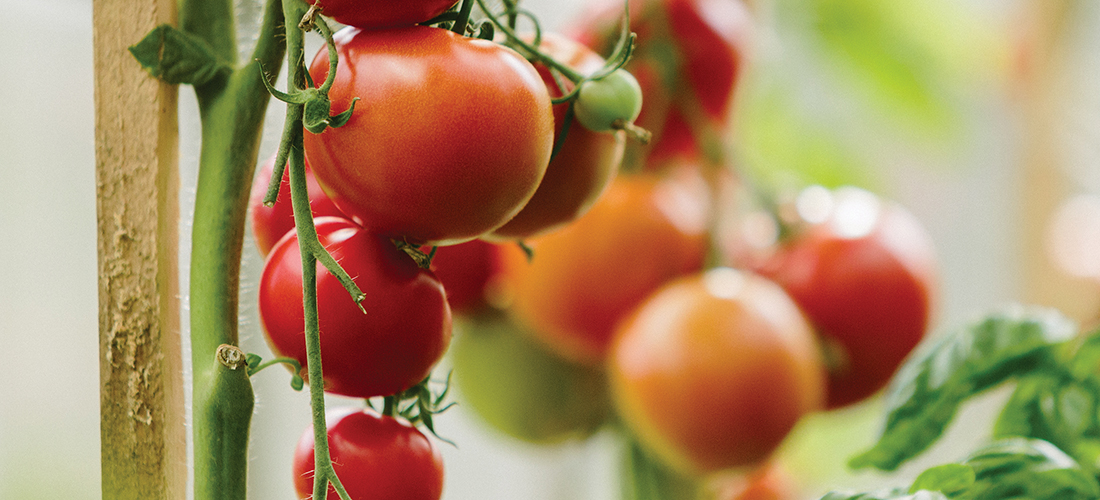
You, or your friendly local farm stand or market, will have ripe, field-grown tomatoes by the end of this month. Even non-kitchen gardeners have been known to plant a tomato or two. It’s the juicy lure of summer meals with that fabulous homegrown tomato taste. With that in mind, here are a few random, but useful, tricks and tips:

— Stake or cage. If you haven’t already, do it now. By the end of the month, your vines will be so heavy with ripening fruits that the plant will sprawl along the ground, tomatoes will rot, and the plant will be exposed to pests and diseases. At this point, tall stakes may be your best bet. If you cage, get one tall enough that the vines don’t spill over the top, then snap under the growing weight of your hard-won harvest. Set cages or stakes deep in the ground so they don’t blow over, and tie vines loosely with soft cloth or twine, supporting the fruiting arms. The thin wire cones sold at supermarkets and some garden stores are really too short for tomatoes and are better suited to peppers and eggplant.

— Hunt for hornworms. Likely, you have a few on your plants right now, so put your glasses on and have a look. Search for chewed leaves. You’re looking for a fat, green, caterpillar-looking creature, especially on the undersides of your branches. Remove and squish (or feed to your neighbor’s chickens). Just a few hornworms can decimate a plant. Luckily, you’ll probably have just a few. Hornworms are tricky because of their exceptional green camouflage. They can hide in plain sight, but once you’ve spotted them, you can’t unsee them. Daily checks for a few weeks — with your cheaters on — will end this problem.

— Improve taste via soil. Generally, the better the soil, the better the flavor. Compost and a mineral-balanced tomato fertilizer are your friends. Unfortunately, by June, isn’t this like shutting the barn door after the mule has fled? Au contraire! It’s not too late to put in another round of tomato plants for late summer and fall harvests. In the early stages of growth, tomato plants need plenty of nitrogen to grow strong stems and plenty of leaves. Once the plant has matured, the major minerals of phosphorus and potassium are needed in greater amounts to allow the plant to switch to successful fruit production. Trace minerals are important as well. Potassium levels in the soil have a significant impact on the taste of the fruits, as do sulfur, boron, sodium and chlorine. Next year, ensure your soil contains the right balance of these nutrients, and you’ll be flooded with flavorful tomatoes come harvest time. I like a mineral product called SulPoMag that’s well-suited for our Sandhills soils.

— Improve taste via variety. Tomato taste is complex, and your original variety choice is important. With thousands of tomato varieties to choose from, each with its own unique flavor profile, the tender heirlooms often top the flavor tests. Store-bought tomatoes are bred with shipping and shelf life, not flavor, in mind. Heirlooms, however, do not have the disease resistance of some of the decent, more modern tomatoes like the popular Better Boy. So, plant some of both.

— Add Epsom salts. Here is a post-planting tweak you can do right now. The timing is “ripe.” Do your tomatoes lack that delicious homegrown taste? Are your plants slow to fruit or ripen, leaves curling or turning yellow between the leaf’s green veining? It may be a magnesium deficiency. This region of the country tends to have low magnesium in the soil. Epsom salts, or hydrated magnesium sulfate, can help boost your tomato yield and keep plants bushy and healthy. The fruits will grow larger and taste better, and the plants will better resist disease and bear longer. Use it as a soil drench or foliar spray. Epsom salts are highly soluble and provide two essential micronutrients: magnesium and sulfur.

Once a month, dissolve two tablespoons Epsom salts in a gallon of water and “drench” the soil around your plant. Thereafter, use plain water regularly until the following month, then repeat the Epsom drench every 30 days. This same mixture — two tablespoons in a gallon of water — can also be sprayed on the leaves as a foliar spray and the magnesium (and sulphur) will be taken up by the plant quickly. Be sparing, again on a monthly schedule.

— Don’t forget pruning. In May, did you prune your tomatoes? Yes, prune. Removing the lower leaves up from the first fruit, or flower cluster, helps fight off common foliar diseases that result from splashing dirt. If you didn’t do it then, do it now. Did you also manage to pinch off the suckers, those feral shoots that arise from the V between the main stem and tomato branches? Cut them off as soon as you see them forming. Pruning them does cut down on the amount of fruit you’ll get, but it also improves the health of the plant, and in the long run, leads to stronger plants that will produce through the whole season. If these suckers are allowed to grow, they will set fruit, but also crowd out the other branches in search of sunlight. That can lead to poor air circulation and fungal diseases. It can also cause fruit to ripen slowly, or not at all. If you don’t prune your plants, you’ll have a smaller and less tasty yield because the extra energy that goes to growing foliage won’t make its way into the fruit. Also, remove any dead or dying leaves to allow the plant to put its energy into fruit production. Wash hands between plants to avoid spreading disease inadvertently.

— Water properly. Keep water off leaves. Tomato leaves are born trying to grab onto a foliar disease, it seems. Proper watering — and mulch — helps prevent splashing dirt onto the leaves. Slight water stress at the time of picking improves flavor, too, since it avoids dilution. Perhaps water in the morning and pick in the afternoon — for that delicious suppertime BLT or Caprese salad. There’s no need to guess when to water your tomato plants. Simply stick your index finger into the soil; if it feels dry, it’s time to water. If it’s moist, you’re good to go. If plants are drooping or wilting, water them deeply immediately and add mulch to protect roots and conserve soil moisture.

— Use the right pots fo container plantings. “Water and feed” is your mantra. Your potted tomato, a heavy feeder, is completely dependent on you. Use determinate (shorter and bushier varieties) or special “bush” tomatoes. Most determinate tomatoes (those that grow to a designated height then stop) are perfect for large, 5-10-gallon pots. Also, roots tend to migrate to the outside of their container. On a blazing day, this can lead to root burn on the sunny side. I’ll set a cheap, large nursery pot within my nicer pot to avoid this, with a little air gap of mulch or sand on the sides. At least use a light colored, reflective pot for your tomatoes if not using the pot-in-a-pot method.

— Companions are helpful. Basil. You’ll pair it with ‘maters in the cook pot, so why not in the garden? Besides culinary considerations, some say basil plants help deter certain pests like whiteflies or thrips. I know for a fact a crushed basil leaf, rubbed on the arms, deters evening mosquitoes. Others swear that tomatoes are tastier with basil planted nearby — you can be the judge of that. Garlic is also said to help repel pests, and that may include deer. Marigolds, cheerful little things, discourage root-knot nematodes. Some gardeners believe marigolds deter tomato hornworms and thrips too.

— Beware non-companions. Avoid planting sworn enemies nearby, such as cabbage or corn. These are such heavy feeders, they will pull nutrients from your tomatoes. Plus, corn earworm, Heliothus zea, known by another name, tomato fruitworm, will attack your tomatoes. Fennel is another unpleasant companion, exuding an unpleasant substance that discourages its neighbors. Also avoid planting other members of the tomato family — eggplant, Irish potatoes and bell peppers. They share diseases.

— Treat black spots. Tomatoes on the vine sometimes get black spots on the bottom, called blossom end rot. This is usually caused by a calcium deficiency. Lime or a good tomato fertilizer will help the issue, or next year you can put crushed egg shells in the soil around the plant. Commercial growers will use a calcium spray at the first sign of it.

— Plan for sbundance. Because it’s almost here. Start Googling recipes, and ways to put up and use your harvest. From canning to salsa to freezing to sun-dried tomatoes, from pizza sauce to tomato chutney to ratatouille, get your tomato game on. By July, you’ll be swimming in delicious, homegrown fruits. Lucky you! Don’t forget to share with friends.  PS

Jan Leitschuh is a local gardener, avid eater of fresh produce and co-founder of Sandhills Farm to Table.
The Kitchen Garden

Bearing Fruit

When Sandhills strawberries rule

By Jan Leitschuh

With apologies to John Lennon, in the Sandhills, strawberry fields are not forever.

So, COVID-sluggish berry lovers will need to shake up their socially-isolated calendars and get a move on to catch this seasonal Sandhills delight. At the beginning of May, the local berries are hitting their stride; by Mother’s Day, they will have hit their peak. Thereafter, the volume will tail off rapidly. Get moving!

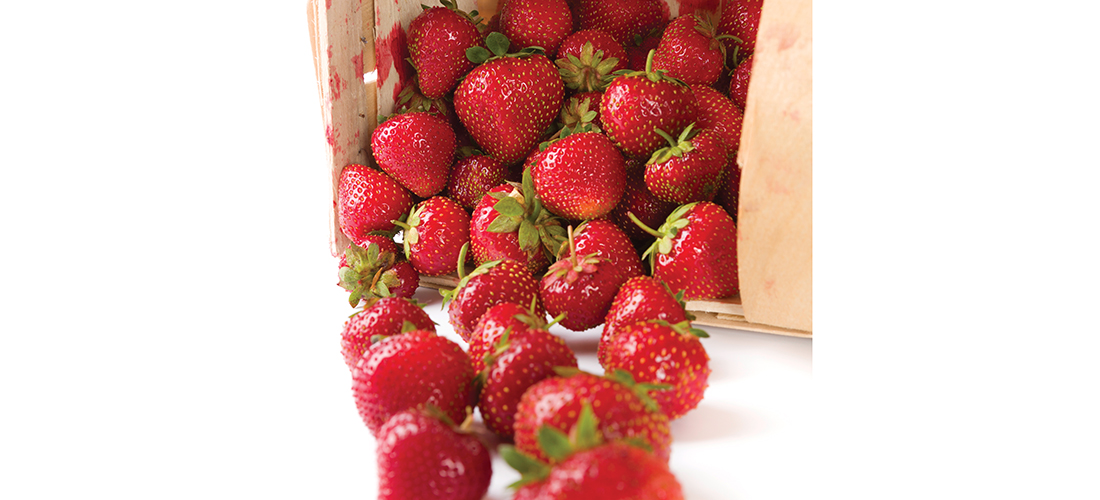
You didn’t plant your own strawberries last October, did you? Luckily, local growers did, and their efforts are now bearing fruit. Literally. Producers usually have enough volume to open sometime in April (usually mid-April). As the weather warms, the berries begin to ripen in large, rapid waves. Lovers of strawberries cherish this brief, abundant window of juicy berry sweetness and load up.

Local strawberries? What’s the big deal? Aren’t there strawberries in the supermarkets nearly year-round?

Indeed there are, and a nice thing that is, too. These ruby-colored fruits brighten up yogurts, cereals, salads and garnish cheese plates all year.

But we’ve all bitten into a large, robust store strawberry, mouth a’watering, and felt . . . bleh. Disappointment. Where was the tender sweetness? Where was the melting, fragrant juice? The taste did not live up to its visual promise.

While a colorful, store-bought strawberry is certainly better than a poke in the eye with a sharp stick, that berry can’t hold its own against the vibrant, local product. Why? Because most store berries are bred to be shipped long distances, rather than for taste, sweetness and tender juiciness.

The Sandhills berry, however, is harvested and distributed locally — a touchy business, given the fragile, sweet tenderness of the locally preferred varieties like Chandler, Camerosa and Sweet Charlie. Sandhills berries are hand-picked at the peak of ripeness, rather than early to be shipped, and its sugars have longer to develop. This ready-ripeness means you have to eat or process them right away. Given their tender juiciness, Sandhills berries are not going to hang around for weeks like a half-ripe, store-bought strawberry.

Few things are more sensual during the lusty month of May than a fresh Sandhills strawberry, eaten at room temperature (preferably with a splash of cream, whipped or otherwise). In Roman times, it was the fruit associated with the goddess Venus. Ancient Romans often made offerings of the fruit at her temples. Food of the goddess. Shouldn’t some grace your springtime table?

Strawberries and cream is a traditional Wimbledon snack. More than 55,000 pounds — over 25 tons — of strawberries are consumed every year during the championships.

Local farmers markets and farm stands should have buckets of ripe strawberries as the month opens. (Again, don’t tarry. The glorious flush comes, peaks and flies past in a flash!) Local You-Pick farms are great fun if a jaunt to the country with the kids appeals — just know that in 2021, the You-Pick status, as they say on Facebook, is “complicated.”

Last year producers did the picking and sold through car windows, lines of autos snaking through the farm roads as eager-but-cautious customers lined up and paid tribute to the Sandhills strawberry during peak times. This year may be a combo of the above, plus some greater openness later in the season. Plans remain fluid.

Popular Highlander Farms on N.C. 22, for example, is currently planning on doing drive-up, said producer John Blue, as well as walk-up. This plan will be re-evaluated as needed. “We are not planning to open the You-Pick right now,” he says, “but we will see as the season progresses.”

Best bet is to contact your favorite fruit stand for info. Many of the local stands and markets have Facebook pages and phone numbers.

Besides the deliciousness and fragrance, strawberries are the exotic superfood you’ve been consuming your entire life. The delicious fruits are chock-full of useful, health-promoting compounds like folic acid, vitamin C, fiber, anthocyanins and quercetin. The medical conclusion is that the well-studied strawberry supports cardiovascular and metabolic health, and the abundant flavonoids may help reduce hypertension and general inflammatory markers.

Strawberries actually have half the sugar as the same volume of blueberries. Part of their sweet sleight of hand magic has to do with that heady, nose-filling fragrance. Strawberries are fairly acidic, however, so brush your teeth after to avoid gum irritation and tooth sensitivity.

Don’t wash your Sandhills strawberries until you are ready to eat or process them. Any wetness will rapidly promote mold. Best to store them in the fridge crisper for a day or two at most. In other words, plan ahead before bringing them home.

Once you have your plan in mind, rinse and hull berries. Hulling means nipping out the green stem bit at the top.

Now what? My weakness is a strawberry pavlova, an elegant confection on a light meringue base. Whipped cream is piped into a “nest,” then sweetened berries are spooned into the middle. A dollop of cream and a berry on top crowns this fabulous, fattening dessert. It has it all — sweet creaminess, crispy-chewy meringue and, of course, glorious, fresh berries at their peak.

Classic strawberry shortcake is a close second, however. Biscuits, cream and berries — how can you go wrong? Unless, of course, you prefer strawberries and lemon pound cake.

Strawberry preserves are easy enough to do. There are many YouTube videos that can walk you through the process. Freezer jam is even simpler. No canning knowledge needed. (Recipe below or use the recipe on the Sure-Jell pack.)

Easiest is probably maceration. Combine hulled, sliced strawberries with sugar in a large glass or ceramic bowl and toss to combine. Set aside to “macerate” — basically stew in their own sweet, red juices. Cover bowl with plastic wrap and place in fridge. Eat with a spoon, ladle over yogurt and desserts or combine with cooked rhubarb. 

Roasting strawberries is an unusual way to use up large quantities, and yields a rich, jammy, deeply flavored sauce. The heat of the oven concentrates the fruit’s natural sugars, so no additional sugar is needed. Rinse, hull and halve or quarter your berries. Arrange in a single layer on a parchment-lined baking sheet and roast at 350 degrees Fahrenheit for about 20 minutes. Spoon into a container while still warm, or the thickened, roasted juices can set up on the pan.

Bruised berries? Rinse them and toss them in daiquiris or smoothies, or puree and freeze. Ice cube trays make a nice unit of “berry” when a cube or two might be needed for a spring salad dressing, or to smarten up a fruit drink. Strawberry ices and “popsicles” are a healthy dessert alternative.

To symbolize perfection and righteousness, medieval stone masons carved strawberry designs on altars and around the tops of pillars in churches and cathedrals. The least we can do is place a righteous bowl of local perfection on our tables this month.

Easy Strawberry Freezer Jam “Springtime in a Jar”

4 cups granulated white sugar

1 quart fresh strawberries (see exact measurement below)

3 ounces (one pouch) liquid fruit pectin (Certo is readily available at most larger supermarkets)

2 tablespoons fresh lemon juice

(Yes, this is a lot of sugar, but necessary for the jam to “set” — use less if you don’t mind a more syrup-like creation or search out sugar-free type pectins at your store.)

Stem and crush strawberries with a potato masher. Don’t try to use a blender or food processor for this step as you want some small pieces of strawberry to remain. Measure exactly 2 cups prepared fruit into a large microwave-safe bowl. Add the 4 cups of sugar and stir well for 1 minute. Microwave bowl on high power for 3 minutes. (Mixture will not cook but will become warm enough for sugar to dissolve.) Remove and stir well for another minute, to avoid graininess.

Allow strawberry mixture to sit for 2 hours, giving it a good stir about every 30 minutes. Take a taste to make sure the sugar is dissolved. If it still has a bit of a grainy texture, stir for another minute or two until sugar is well-dissolved. (When the sugar is well-dissolved, the mixture will actually deepen in color and lose its “cloudiness.”)

Combine the liquid pectin and lemon juice in a small bowl. Add to strawberry mixture and stir 3 minutes. Fill containers to within 1/2 inch of top — mixture will expand a bit in the freezer. Let stand at room temperature 24 hours. Refrigerate up to 3 weeks or freeze up to 1 year. Thaw in refrigerator.

— From The Café Sucre Farine.  PS

Jan Leitschuh is a local gardener, avid eater of fresh produce and co-founder of Sandhills Farm to Table.