Food for Thought

Strawberry Fields Forever

Classic shortcake is nice. But it’s hard to beat this spirited twist on summer’s most luscious berry

By Jane Lear

Although it may sound strange, soaking, or macerating, strawberries in a mix of sugar, orange juice, and Madeira or sherry is far from a new idea. Macerated fresh fruit was a Victorian fad borrowed from the French, and in Miss Leslie’s New Cookery Book of 1857, by the popular American cookbook author Eliza Leslie, you will find “Strawberries in Wine.” There’s no citrus, but Miss Leslie does specify Madeira or sherry. The berries are “served at parties in small glass saucers,” she noted, “heaped on the top with whipped cream, or with white ice cream.”

My grandmother used glass saucers for serving as well — they hold the winey juices nicely — but her rationale behind macerated strawberries wasn’t a special occasion but a too-hot-to-bake day. By June, her house would be dim and shadowy, the tall windows shuttered to keep out the heat and bright shafts of sunlight.

Preparations for the evening meal — a pot of snap beans set to simmer, for instance — usually began in the cool of the morning, after the breakfast things were cleared away. A “strawberry bowl,” however, was left until the drowsy afternoon. I’d be pulled away from Nancy Drew to help wash a colander full of the ripe fruit (“always leave the caps on, dear, so they don’t get waterlogged”) and pat them dry with well-worn tea towels reserved for just that purpose. Trying to copy my grandmother’s neat flick of the wrist made quick work (or so I thought) of hulling.

You may wonder if a fortified wine such as Madeira or sherry — or port, if that’s your preference — will overpower strawberries, one of the softest, most perishable fruits, but I’m reminded of the “Nobody puts Baby in a corner” line from the movie Dirty Dancing. Although each wine adds its singular, supple balance of sweetness and acidity to the berries, the fruit not only holds its own but gains extra resonance. (The same is true of strawberries with balsamic vinegar, traditional in Modena, Italy, the home of aceto balsamico. For this, you need the best, oldest balsamic vinegar you can find; the kind that’s been reduced over time to a syrupy liquid.)

Strawberries need warm sunny days and cooler nights for peak flavor and fragrance. When shopping, look for even coloring (those with white shoulders haven’t had enough time to fully ripen) and a captivating aroma. Those that travel the least generally taste the best, so seek out local growers.

Whipped cream or vanilla ice cream à la Miss Leslie are perfectly fine accompaniments to macerated strawberries, but my grandmother’s favorite embellishment was actually an exercise in household economy: leftover (i.e., slightly stale) sponge cake or pound cake, cut into fingers or cubes and toasted. The end result was modest and restrained, yet completely refreshing, and afterward, everyone at the table stood up, ready for a game of cards or Parcheesi.

What I realize I’m ready for, though, is a set of Victorian cut-glass saucers. And maybe some Nancy Drew.

Strawberries with Madeira
and Orange

1 quart ripe strawberries

Sugar to taste

About 1/4 cup freshly squeezed
orange juice

About 1/4 cup medium-dry Madeira
or sherry

1. Quickly rinse the strawberries and pat them dry. Hull them with a paring knife and put the whole berries (halve them if large) in a serving bowl.

2. Generously sprinkle them with the sugar and gently stir in the orange juice and Madeira. Refrigerate, covered, until the berries release their juices and the flavors have a chance to play well together, about 2 hours. PS

Jane Lear, formerly of Gourmet magazine and Martha Stewart Living, is the editor of Feed Me, a quarterly magazine for Long Island food lovers.

Food for Thought

Christmas, Sweet and Savory

The spirit of the holidays begins in the kitchen. Cheese biscuits, gingerbread and garnet-hued poached pears are three simple yet festive ways to celebrate

By  Jane Lear

The harried modern person looks to the winter holidays like someone slumped across a railroad track contemplating an oncoming train,” mused food writer Laurie Colwin more than 25 years ago. Her words resonate today amid the ever-increasing hype, and I, for one, refuse to get caught up in the fray. When it comes to feeding people, for instance, I tend to rely on a small repertoire of things I can pull together without too much fuss and which will make folks feel cherished.

Cheese biscuits are at the top of my list. I’m using the word biscuits here in the British sense to mean crisp wafers, and it’s still fairly common parlance in Colonial cities. In fact, you’ll see a recipe for these cayenne-spiced nibblies (often in the form of cheese straws) in every community and Junior League cookbook published south of the Mason-Dixon Line. They’re standard fare at drinks parties, wedding receptions, and almost every other social occasion you can think of.

I’m very fond of how my mother served them, with soups and stews. Perhaps this was because the store-bought bread available at the time wasn’t particularly flavorful (a basic baguette or sourdough loaf was unattainable), or perhaps she wanted a change from baking powder biscuits or cornbread; I don’t know. But cheese biscuits are a great way to add a little savory richness, some finesse, to an everyday meal. One — just one, mind you — is also a civilized way to end an evening, along with a nightcap, or what some of us call a baby-doll.

And cheese biscuits make a fabulous present. Even though it’s possible to buy every imaginable delicacy online these days, I think people are especially thrilled to open a gift that is homemade and almost profound in its plainness. And that is not something sweet.

Southerners appreciate cheese biscuits because they know one can never have too big a stash. For expat Northerners, there is an element of surprise, and, once tasted, delight. “Where have these been all my life?” the recipients exclaim, reaching into the tin for another. And cheese biscuits have legs — that is, real staying power. Not only are they good keepers, but you don’t get sick to death of looking at them, the way you do Christmas cookies. Face it: By early January, those cookies are so last year.

Cheese biscuits are so simple to make that anyone, even a person who suffers from an extreme case of F.O.F. (Fear of Flour), can throw them together without thinking about it. The secret is to buy the sharpest cheddar you can find, and add a little Parmigiano, “for sass,” as the cookbook author Damon Lee Fowler likes to say.

Gingerbread is another standby in my holiday kitchen because it is easy to make and a hit with young and old alike. It can be enjoyed absolutely plain or dressed up with a glaze made from lemon juice and confectioners sugar, or with billows of whipped cream flavored with a little bourbon. It’s the sort of thing you can serve guests at a fancy dinner party, and they will immediately feel like they’re part of the family.

Whenever I make gingerbread, I am reminded of my Aunt Eloise — actually, a longtime friend of my mother’s — who often visited us during the holidays. She would arrive in an immaculately maintained Buick and insist on carrying her own suitcase into our hall, setting it down with a little sigh. (“Always travel light, dear,” she counseled, years before I ever went anywhere. “You may have to move fast.”)

My brother and I couldn’t wait to present ourselves before Aunt Eloise because we knew exactly what would happen. She would shake her head in amazement at how much we had grown, and hug us thoroughly before rummaging through a capacious handbag for two chocolate bars, wrapped in thin gold foil and glossy paper.

We had to open them very carefully, because Aunt Eloise wanted the foil back. Like my parents, she had grown up during the Great Depression, and never wasted a thing. She would smooth the sheets and tuck them away with a smile.

The days before Christmas were filled with tree-cutting and decoration, setting up the crèche, which had an expanded cast (my father trolled thrift shops and pawn shops looking, in particular, for the Baby Jesus — he couldn’t bear the thought of one being adrift), and frantic gift wrapping.

And then, of course, there was the gingerbread. Dark, moist, and spicy, it was Aunt E.’s specialty. One year, she turned to face my brother and me in the kitchen. “I have always made gingerbread for you,” she said, removing her apron and hitching it up, neat and workmanlike, around me. “Now, it’s your turn.” She switched on the oven and then got comfortable at the kitchen table. Mom made cups of tea for them both and buttered the pan.

My brother stirred the flour, baking soda and spices together. I plugged in the Sunbeam and managed to cream the butter and dark brown sugar, then beat in the eggs and cane syrup — preferred by all in our house to molasses. I stopped, startled, when the mixture looked curdled, but Aunt Eloise peered into the bowl and said, “Oh, it’s fine! Just keep going and see what happens.”

After beating in the flour mixture and a little hot water, everything miraculously came together. After my mother helped me pour the batter into the pan, she put it into the hot oven.

By the time the dishes were done, so was the gingerbread. Aunt Eloise patted several pockets — she had a magician’s knack for misdirection — before unerringly settling on the right one, then fished out an envelope full of small gold stars, cut out of foil. They smelled very faintly of chocolate as we pressed them into the warm cake.

Now, when it comes to holiday food that is both easy and spectacular, things get a bit trickier. It pays to keep a file of these recipes, and if they happen to be gluten and/or dairy free, or not terribly bad for you, then so much the better. My go-to favorite is a recipe for scarlet poached pears developed by my former Gourmet colleague Paul Grimes, a brilliant food stylist with a painter’s eye.

Because poached pears rarely look as good as they taste, Paul took a cue from a dessert at Le Chateaubriand, in Paris, which uses a beet to intensify the pears’ hue. If you or yours don’t happen to like beets, no worries: You can’t taste the beet in the least, and the fresher and juicier it is, the deeper in color the fruit will become.

Beets have long been used as a dye for textiles and food, by the way. Before the advent of artificial colorants, they put the “red” in red velvet cake, for instance, and they turn Easter eggs a delicate mauve. The vegetable’s saturated color, like that of bougainvillea, amaranth and the flowers of some cacti, comes from pigments called betalains (from Beta vulgaris, the Latin name of the common beet).

Poaching is among the gentlest of cooking techniques. Although it isn’t complicated, you do want to be mindful of the heat. You don’t want the liquid to vigorously boil — otherwise, whatever it is you’re cooking will either break apart or toughen. A lower flame allows you greater control and precision. The end result — whether you are poaching chicken, say, or eggs or fruit — should possess the quality of moelleux (mwall-YEW) — a soft, velvety mouthfeel that is completely, captivatingly French.

If you are at all resistant to the idea of poached pears, you’ve likely been traumatized by one that threatened to skid across the table when pierced with a fork. This usually happens during a first date or dinner with the boss. But understanding moelleux — the pears should be so tender they practically melt in your mouth — is a gamechanger. The key to success is very basic: You must cook the pears until they are done. Since the pears may be of slightly different sizes or at different stages of ripeness, be sure to test them all. When you insert a small skewer or paring knife, it should glide in but the flesh should still feel solid, not mushy.

Cheese biscuits, gingerbread and gorgeous poached pears have become three of my favorite traditions of the season, and here’s hoping they find a place at your table as well. Happy holidays!
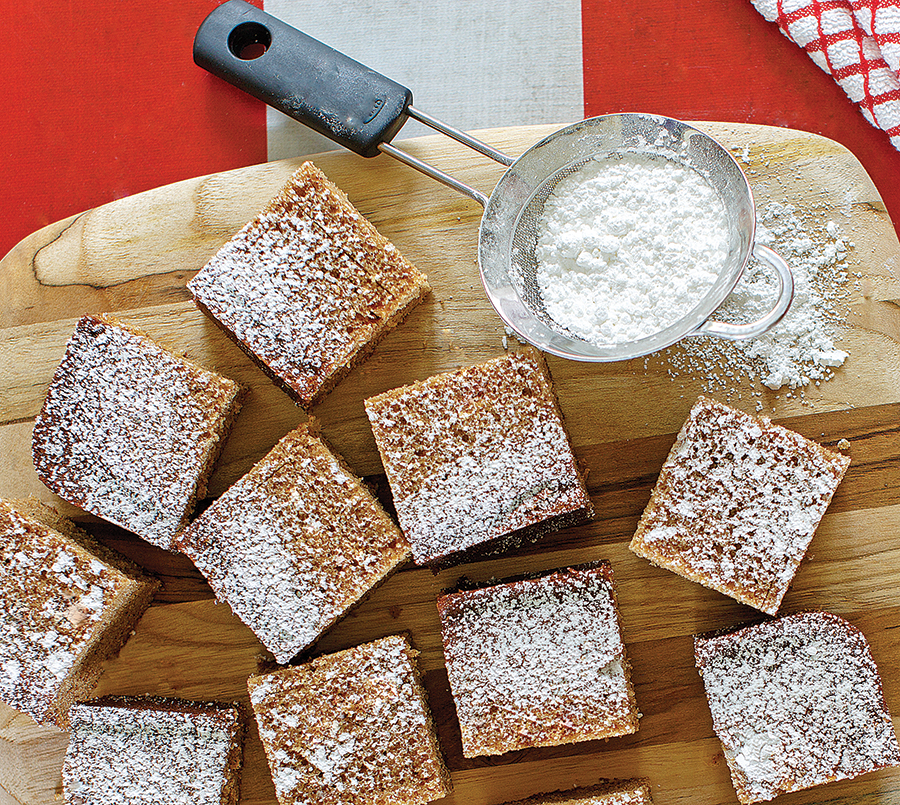
Gingerbread

I don’t have Aunt Eloise’s recipe, but this is a close approximation. It’s based on the Tropical Gingerbread (minus the canned coconut) in Charleston Receipts — a standard reference for both Aunt E. and my mother — and the Old-Fashioned Gingerbread in the big yellow Gourmet Cookbook. When it comes to the cane syrup, you should know that this syrup made from ribbon cane is lighter and sweeter than molasses. Not only is it a versatile baking ingredient, it makes the ultimate condiment for pancakes, waffles, and hot biscuits. Cane syrup is available at supermarkets in the South; one of my favorite mail-order brands is Steen’s (steenssyrup.com), from Louisiana.

1 stick unsalted butter, room temperature, plus extra to butter pan

2 cups all-purpose flour

1 teaspoon baking soda

1 1/2 teaspoons ground ginger

1 teaspoon ground cinnamon

1/4 teaspoon ground allspice or cloves

1/2 teaspoon salt

3/4 cup firmly packed dark brown sugar

2 large eggs

1/2 cup pure ribbon cane syrup

2/3 cup hot water

1. Preheat the oven to 350° and butter an 8- or 9-inch square baking pan. In one bowl stir together the flour, baking soda, spices and salt. In another bowl with an electric mixer beat together the butter and brown sugar at medium-high speed until nice and fluffy.

2. Beat in the eggs, one at a time, then beat in the cane syrup. At this point, the batter might look curdled, but, as Aunt Eloise would tell you, don’t worry about it. Reduce the mixer speed to low and beat in the flour mixture, then the hot water. Continue to beat until the batter is smooth, a minute or so.

3. Pour the batter into the pan and bake in the middle of the oven until a wooden skewer inserted in the center of the gingerbread comes out perfectly clean, around 35 to 40 minutes. Put the pan on a wire rack to cool for a bit, then serve warm. The gingerbread is also a great keeper: the flavor deepens after a day or so, and if tightly wrapped, the cake stays moist.

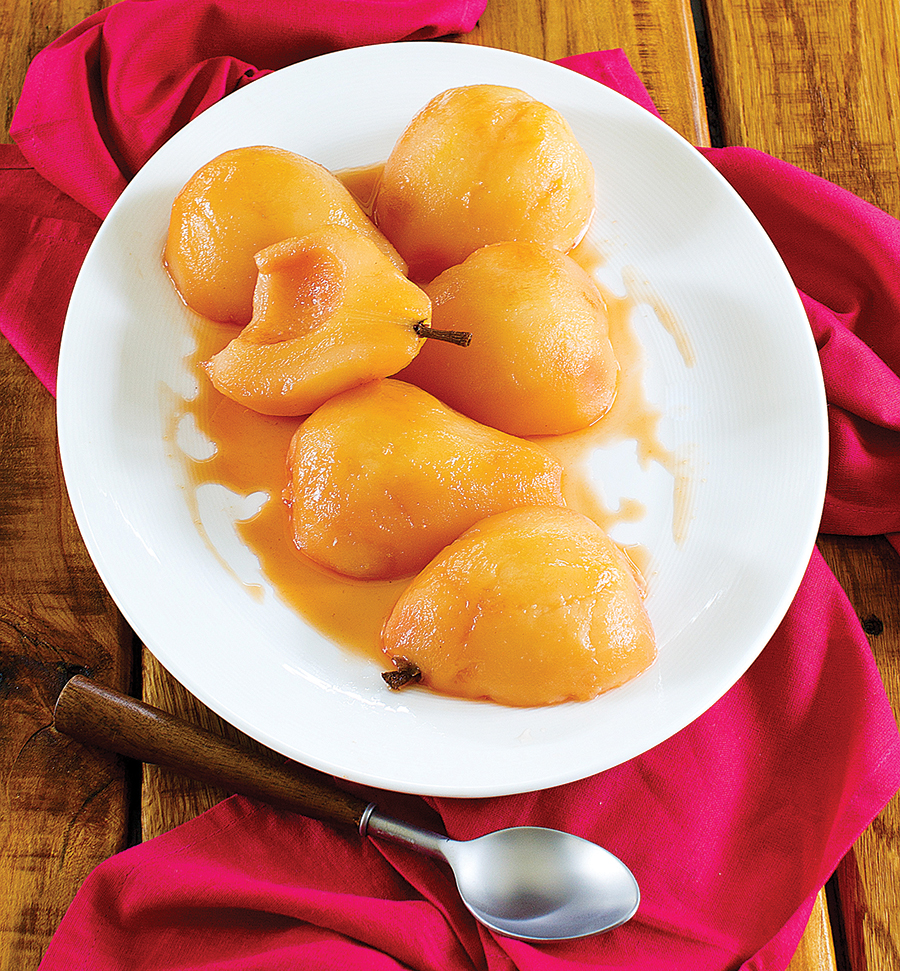
Scarlet Poached Pears à la Gourmet

Serves 6

If your pears are very small or ripe (instead of firm-ripe), then set the kitchen timer for 20 minutes, say, instead of the 35 to 40 minutes specified below. And if the pears are indeed done more quickly, then transfer them to a bowl to cool, remove the bay leaf and cinnamon, and continue to simmer the poaching liquid until thickened and syrupy.

About the poaching wine: Orange Muscat is not the easiest dessert wine to find, but don’t fret. Another muscat won’t have the same alluring orange-apricot aroma, but it will still be delicious. Serve these beauties with a fork, for stabilizing the pear, and a dessert spoon, for scooping flesh and juice.

2 cups Orange Muscat such as Quady Winery’s Essensia (from a 750-ml bottle)

1 medium red beet (1/4 pound), peeled and sliced

1 tablespoon sugar

2 teaspoons fresh lemon juice

1 cinnamon stick (about 2 inches in length)

1 bay leaf

3 small firm-ripe pears (about 1 pound total), such as Forelle or Bosc, peeled, halved lengthwise, and cored

1. Bring wine, beet, sugar, lemon juice, cinnamon stick, and bay leaf to a boil in a 1 1/2 – to 2-quart saucepan, stirring until sugar is dissolved.

2. Add pears and cover with a round of parchment paper to help them cook and color evenly. (So that they stay covered with liquid, place a small saucer on top of the parchment as they cook.) Reduce the heat and simmer, turning occasionally, until pears are tender and liquid is syrupy, 35 to 40 minutes. Transfer pears to a bowl. Discard cinnamon stick and bay leaf and pour syrup over pears. Cool completely in syrup, about 30 minutes. Poached pears can be made 1 day ahead and chilled in the syrup; the color will deepen the longer they stay in the syrup.
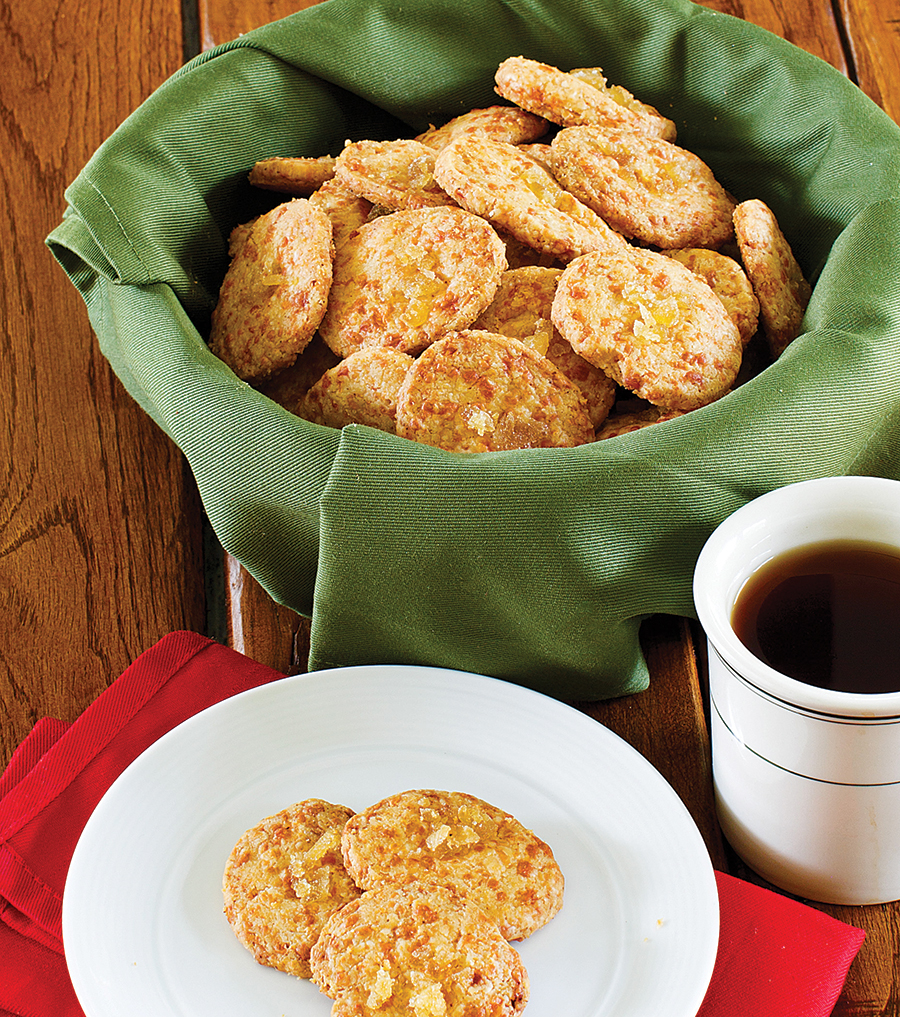
Cheese Biscuits

1 1/2 cups all-purpose flour

1 teaspoon coarse salt

A generous pinch cayenne

1 stick unsalted butter, cut into pieces and softened to room temperature

6 ounces extra-sharp orange cheddar plus 2 ounces Parmigiano-Reggiano, coarsely grated (about 2 cups total) and at room temperature

Finely chopped crystallized ginger, for garnish

1. Whisk together the flour, salt and cayenne in a bowl until combined well. In another bowl, with a stand mixer, beat together butter and cheese until smooth. Beat dry ingredients into cheese mixture until smooth. The dough should be very malleable, like Play-Doh.

2. Roll the dough into a couple of logs for slicing. Wrap in waxed paper and chill until firm but not hard, about 30 minutes. (Dough keeps in the refrigerator 1 week. You can also freeze it, wrapped well; let it thaw at room temperature until pliable enough to work with.)

3. Preheat oven to 350 degrees and cut each log into 1/8-inch rounds, giving the log a quarter turn after each slice so it stays round. Put a dab of the crystallized ginger on top of each biscuit, pressing gently so it adheres.

4. You can either bake the biscuits, one baking sheet at a time, in the middle of the oven, or set the racks in the upper and lower thirds, and switch the baking sheets halfway through. Depending on the size and thickness of your biscuits, they’ll take anywhere from 16 to 18 minutes to bake. They are done when the bottoms are golden but the tops and sides are still pale. Let cool on a wire rack. Biscuits will stay fresh in an airtight tin for days and even improve in flavor.  PS

Jane Lear, formerly of Gourmet magazine and Martha Stewart Living, is the editor of Feed Me, a quarterly magazine for Long Island food lovers.

Food for Thought

The Tomato’s Last Hurrah

Summer’s carefree days have drawn to a close, but much of the bounty is still with us. Now’s the time to use up every bit of the tomato’s goodness

By Jane Lear

When I was a child, no one I knew cooked pasta (what we called noodles) with tomato sauce at home. In our part of the South, that sort of food was considered not just ethnic, but positively exotic, enjoyed as a special treat at the lone Italian restaurant in town. So although a college roommate introduced me to Ragú — we both thought it was pretty good — I didn’t have what you might call a relationship with tomato sauce until I moved to New York City in the late 1970s.

By sheer good fortune, I landed a job at Alfred A. Knopf, the legendary publishing house, and among the luminaries who graced the halls was Marcella Hazan, author of the instant classics The Classic Italian Cook Book and More Classic Italian Cooking. (Both books are combined in Essentials of Classic Italian Cooking, published by Knopf almost 20 years later.)

Mrs. Hazan’s recipe for Tomato Sauce with Onion and Butter, from the first book, is at once devastatingly simple and life-changing. Aside from pasta and cheese, it lists just four ingredients: tomatoes (fresh or canned), one onion, five tablespoons of butter, and salt. That recipe, which is easily available online, has long been famous for being a gift to home cooks everywhere; periodically, it is rediscovered and wins a whole new fan base.

I made tomato sauce the Marcella way for years. Eventually, though, I branched out, impelled by curiosity and the fact that during the end of tomato season, God will strike me dead if I let a single soft-ripe heirloom go to waste. That’s how I found out that a sauce gets complexity and a good balance of acidity and fruity sweetness from a mixture of varieties, and those juicy heirlooms were more interesting to play with than the pulpier plum (Roma) types.

The basic sauce below is extremely versatile — it’s what my husband and I reach for when making pasta and pizza. It’s wonderful drizzled over flat fresh romano beans, a slab of meatloaf, or polenta. And it seems to taste even better when made with the last of the year’s tomatoes. I freeze as much of it as I can because the jar in the fridge will be gone in no time flat.

By the way, the key to a great tomato sauce is the right pot. You want something heavy-bottomed, to discourage scorching, and with a wide surface area, to aid evaporation. The less time the tomatoes spend reducing, the fresher and more immediate the flavor will be.

A few personal asides on tomato prep: Some people like to peel and seed tomatoes before making sauce; others feel it’s more efficient to toss everything into the pot, then pass the cooked sauce through a food mill to get rid of the gnarly bits.

I generally prefer doing the work on the front end, but unlike many folks, I don’t blanch the tomatoes in boiling water first. Instead, I plunk them in a bowl, pour a kettle of boiling water over them and make myself a cup of tea while I’m at it. By the time I’ve gotten a sieve organized over another bowl, the tomatoes can be eased out of the hot water one by one; with a little help from a paring knife, the skins slip right off.

When seeding tomatoes, first cut them in half crosswise — around the equator — exposing the seed pockets. Use a finger to loosen the seeds in each pocket, then empty the tomato halves over the sieve.

To save every drop of the juices, I don’t chop the tomatoes on a cutting board, but instead in my hand, over the sieve. My tool of choice is a Dexter Russell oyster knife; the straight-edged blade is dull yet can still get the job done, the rubber handle is grippy in a wet hand, and the curved, rounded tip is ideal for flicking errant seeds out of the way. The chopped tomatoes go in the bowl underneath, and once you’ve pressed hard on the solids in the sieve, you can toss them into the compost pail knowing they’ve given their all.

Late-Season Tomato Sauce

Makes about 1 1/2 quarts

I’ve never found my finished sauce to be overly acidic, so it never occurs to me to add any sugar, but I’m no purist: It all depends on the tomatoes. If your sauce tastes harsh, add a little brown sugar to taste. Lastly, inspiration here comes from Marcella Hazan, but also the late Giuliano Bugialli, who taught me that basil isn’t used in a tomato sauce for its own flavor, but to bring out the flavor of the tomatoes themselves.

1/4 cup extra virgin olive oil

1 large yellow onion, chopped

3 fat cloves of garlic, minced

Several sprigs of fresh thyme, marjoram
or winter savory, tied together with kitchen string

5 to 6 pounds soft-ripe tomatoes, peeled, seeded and roughly chopped, plus
their juices

Coarse salt

1 or 2 fresh basil sprigs

A little unsalted butter, if desired

1. Heat the oil in a large, wide, heavy-bottomed pot over moderately high heat until it’s hot. Add the onion and cook until it begins to soften, then add the garlic. Cook, stirring occasionally, until the onion and garlic are thoroughly softened (don’t let them brown).

2. Add the tied herb sprigs, the tomatoes and their juices, and a generous pinch or two of salt. Simmer the sauce, uncovered, stirring occasionally, until it thickens nicely, about 1 hour. Taste the sauce and adjust the seasoning. Remove the herb sprigs.

3. After the sauce is done, add the basil sprigs, simmer the sauce an additional 2 minutes, then remove the basil.

4. Stirring in a little butter at this point will round out the flavors in the sauce and give it finesse, but it’s by no means necessary. I like a fairly chunky sauce, but if you prefer something smoother, purée it in a blender. Let the sauce cool completely, uncovered, before refrigerating or freezing.  PS

Jane Lear, formerly of Gourmet magazine and Martha Stewart Living, is the editor of Feed Me, a quarterly magazine for Long Island food lovers.

Food for Thought

Plum Crazy

America’s sudden passion for heirloom fruits and vegetables means glorious varieties like Santa Rosa and Mirabelle plums are widely available

By Jane Lear

One of my earliest food memories is of a high-walled garden somewhere along the Cape Fear. It belonged to friends of my parents, and while they sipped long cool drinks in the shade of a venerable live oak, I was allowed to explore and eat pretty much anything I could find. Blueberries, raspberries, the pears reached by shinnying up a knotted rope to a convenient branch. Figs, plump and sweet with ultra-delicate skins.

And there were wonderful plums. I found their thin, taut red skins and gold flesh mesmerizing. Their rich aroma and full-on sweet-tart flavor were a revelation, and their texture — well, after my mother tried one, it was the first time I heard the word “lush.”

Those beauts were worlds apart from the characterless supermarket plums that are so common today. For ages, I thought those plums I enjoyed as an 8-year-old couldn’t possibly have been as magical as I remembered.

Until, that is, about 15 years ago on a visit to northern California, when I first bit into a plum from Frog Hollow Farm. The cultivar was ‘Santa Rosa,’ I discovered, and I felt as though I’d found a long-lost friend.

Santa Rosa has a grand American history. It was bred in 1906 by the celebrated horticulturalist Luther Burbank (1849–1926) at his plant research center. Named for its birthplace, the plum is arguably his crowning achievement. It’s no surprise that our family friends, both enthusiastic home orchardists, would have gotten their hands on some trees. 

The tight skin of a perfectly ripe Santa Rosa pops when you bite into it, and when devouring the flesh (“lush” is exactly what it is), it’s best if you’re leaning over the kitchen sink. I have this image of the modernist poet William Carlos Williams doing so, whisking his tie out of the way at the last second, before turning guilt into art in “This is Just To Say”:

“I have eaten / the plums / that were in / the icebox / and which / you were probably / saving / for breakfast. / Forgive me / they were delicious / so sweet / and so cold.”

Any high school English teacher will tell you that this much-anthologized poem, written in 1934, can have a number of different meanings, including temptation and the triumph of the physical over the spiritual. But it’s also a great example of how to offer a non-apologizing apology after inconveniencing a loved one. The subsequent parodies (the first, by Williams himself) continued for decades and indeed have been given new life as a meme on Twitter:

“I have closed / the tabs / that were in / the browser / and which / you were probably / saving / to read / Forgive me / they hogged memory / and were / so old,” wrote stvnrlly@stvnrlly.

Happily, America’s increasing passion for heirloom varieties of fruits and vegetables means a wider array of interesting plum varieties is available, including Santa Rosa and the small ‘Mirabelle,’ which is yellow blushed with crimson and intensely sweet. (In France, it’s used to make plum eau-de-vie.) Keep your eyes open, and if you see juicy looking tree-ripened plums for sale anywhere, snap them up.

The Williamses and their icebox aside, plums won’t continue to ripen if chilled. Keep them at room temperature and out of direct sunlight instead. If you must refrigerate them (they’re a magnet for fruit flies), don’t wash the ripe fruit beforehand, and bring to room temperature before eating. Another tip? Never cluster or stack plums or any stone fruit — that leads to uneven ripening or bruising. So spread out your bounty onto a platter instead of piling it into a bowl.

Whenever I see promising plums, I always buy too many, because I can’t decide what to do with them. A galette is always appealing, as is an upside-down cake. But I often take the path of least resistance and roast them, a technique I picked up from cookbook author and all-around culinary goddess Georgeanne Brennan. She roasts her stone fruit in a wood-fired outdoor oven, but a regular old oven works fine too, even though it isn’t nearly as romantic. And her trick of serving the roasted fruit with crème fraîche worked into fresh ricotta is a keeper: The thickened cream gives the fluffy, uncomplicated ricotta a nutty sweetness, a little tang, and voluptuous body.

I love the rich, faintly spicy flavor of roasted plums all by themselves, but you could easily use peaches or a combination of stone fruits — plums and nectarines, say. And you could substitute a dollop of mascarpone or softly whipped heavy cream for the creamy ricotta.

Roasted plums are versatile. They swing homey or haute, and are ideal if you aren’t a baker or need a gluten-free dessert, because there is no crust or crumble topping involved. They cook quietly all by themselves and make the kitchen smell heavenly. And, if you are fortunate, there will be a spoonful or two left for tomorrow morning.

Then again, you could just eat your plums out of hand, leaning over the kitchen sink.

Roasted Plums with Creamy Ricotta and Honey

1 cup fresh ricotta

About 1/4 cup crème fraîche

A dash of pure vanilla extract

Sugar

6 to 8 plums, depending on size, or a mixture of plums and nectarines and/or peaches

Extra-virgin olive oil

Honey, for drizzling

1. Preheat the oven to 475º. Stir together the ricotta, crème fraîche, vanilla and about 2 tablespoons sugar, or to taste, in a bowl. Pop that into the fridge until ready to use.

2. Cut the plums from stem end to bottom, first down one side, then the other. Gently twist the halves together; if they separate from the pit easily, that means they are freestone. Otherwise, they’re clingstone, so cut the flesh away from the pit in largish wedges. Put the plums in a shallow baking dish just large enough to fit them in 1 layer. Drizzle with about 1 tablespoon oil and turn them a few times to coat. Generously sprinkle with sugar and turn once or twice more. Roast until the plums have just collapsed and are tender and just caramelized enough, about 20 minutes.

3. Serve the plums in small bowls with the creamy ricotta and honey, for drizzling, on the side.  PS

Jane Lear, formerly of Gourmet magazine and Martha Stewart Living, is the editor of Feed Me, a quarterly magazine for Long Island food lovers.

Food for Thought

(Chicken) Salad Days

There is nothing like chicken salad. Whether homey or haute, it can be the centerpiece of any summer meal

By Jane Lear

Aside from the “fiesta” or “Oriental” versions found at some chain restaurants, chicken salad has pretty much been relegated to the Nostalgia Department: suitable fare for tearooms, drugstore lunch counters and Southern porch suppers, circa 1955.

I don’t know why. I suppose people are afraid of the fat in mayonnaise — common to most recipes — or perhaps the technique of poaching chicken — ditto — sounds difficult. This should change. Chicken salad should become a trend.

I mean, if I had a restaurant — a little roadside café, say — I’d feature a chicken salad sandwich of the week. Or perhaps I’d serve nothing but chicken salad; if one of the whiz kids behind the grilled-cheese-shop fad wants to diversify, we should talk.

No matter what, though, I always keep chicken salad in my regular rotation at home, because it’s a great make-ahead family supper or, fancied up with tarragon and toasted walnuts, for instance, or with a curry dressing, a fabulous company meal.

In a perfect world, obviously, I’d always take the time to gently poach chicken breast halves, complete with bones and skin: Not only is that one key to flavorful yet clean-tasting meat (along with using a wholesome pastured bird), but the light broth is handy for moistening the salad (instead of more mayo) if it starts to dry out — a trick I learned back in my years at Gourmet.

Life has a tendency to get in the way, however, and I’m here to remind you that you can make delicious chicken salad from leftover sautéed or roasted chicken, or even a store-bought rotisserie bird.

For sheer speed and efficiency, it’s hard to beat that last option, so I’m always a little shocked when I meet people who are snooty about rotisserie, or spit-roasted, chickens, one of the greatest convenience foods on the planet. Have they ever been to an outdoor market in France? I wonder. The queue for poulet rôti should be a tip-off that it’s an honest, worthy substitute for a home-roasted chicken in many a French kitchen.

And in mine, too. I’ll often buy two on the way home in the evening — one for eating that night, with some harissa-slicked couscous and quick-cooked greens, for example — and the other for salad, later in the week. While it’s still warm, I’ll strip it of bones and skin, shred both white and dark meat, and combine it with the dressing. Honestly, anyone can do this.

As far as chicken salad recipes go, I like having a repertoire. Several old-school renditions are embellished with toasted slivered almonds and grapes, cut in half lengthwise. A famous one, which is rich and light all at the same time (aside from red grapes, almonds, celery and parsley, the recipe includes unsweetened whipped cream), was created by renowned Texas cook Helen Corbitt for the café menu at the Neiman Marcus department store in the ’50s. We also have Corbitt to thank for Texas caviar (i.e., pickled black-eyed peas) and poppy-seed dressing.

Other chicken salads in this genre rely on a one-to-one ratio of mayonnaise and sour cream, and green grapes instead of red. In general, this sort of chicken salad is utterly predictable and absolutely delicious. You’ll want to serve it on a bed of soft-leaf lettuces, and on your mother’s china. A side of steamed asparagus and maybe some Parker House rolls and good butter would make everyone very happy.

Lately, though, I’ve been relying on supermarket staples — in particular, Major Grey’s mango chutney and dry-roasted nuts — as well as a picked-up-on-the-run rotisserie bird to put a chicken salad supper on the table fast. What takes this combination out of the Coronation Chicken Salad realm (first made for Queen Elizabeth II’s coronation lunch in 1953, it’s been popular in Britain ever since) are the additions of cilantro, basil, mint, and lime juice for freshness and verve, as well as large, voluptuous leaves of butterhead lettuce, for making Southeast Asian-style roll-ups.

Fast-Track Chicken Salad with Mango Chutney
and Cashews

1 medium red onion, chopped

1 jar Major Grey’s-style mango chutney (8 to 9 ounces), mango cut into smaller, bite-size pieces if too chunky

½1/2 cup mayonnaise (I’m a lifelong fan of Duke’s)

Fresh lime juice, to taste

Coarse salt and freshly ground pepper

1 rotisserie chicken (about 3 pounds), skin and bones discarded and meat shredded

2 to 3 celery stalks, chopped

Dry-roasted whole cashews or peanuts, coarsely chopped, to taste

For the roll-ups

1 or 2 butterhead lettuces such as Bibb, leaves separated, left whole, washed, and spun dry

Handfuls of fresh cilantro, basil and mint sprigs, rinsed and dried

Sliced radishes and/or seedless cucumber, optional

1. Stir together the onion, chutney, mayo and lime juice in a large bowl and season with salt and pepper. (Go easy on the salt if you’re going to be adding salted nuts.) Gently stir in the chicken until thoroughly combined. Give the flavors a chance to mingle for 20 or 30 minutes.

2. Just before serving, gently stir in the celery and nuts. Spoon the chicken salad onto a platter and arrange the roll-up fixings (lettuce leaves, herbs, and vegetables) around it so everyone can serve themselves. Your mother’s china, optional.  PS

Jane Lear, formerly of Gourmet magazine and Martha Stewart Living, is the editor of Feed Me, a quarterly magazine for Long Island food lovers.

Food for Thought

Greens, Eggs and Ham

The devil in the details

By Jane Lear

Something about April makes me nostalgic for — well, I’m not sure what, exactly. The first young vegetables are juicy, tender and exquisite; they are what spring tastes like. Farmers and home gardeners alike have earth-caked hands and knees. They are working hard, being patient. Waiting for the world to wake up and warm up.

As a child, my Aprils were often spent chasing after my mother, who was intent on foraging wild watercress before it flowered and then disappeared until the following year. She’d picked up the knowledge that the plant had been used both culinarily and medicinally during ancient times, and as we waded in frigid creeks and teetered on rocks midstream, she’d treat me to a homily on how brilliant the Greeks were and how exceptional watercress was. (Watercress is indeed rich in vitamins K, A, C, E and B6, as well as phosphorus, magnesium and calcium. Ounce for ounce it contains more antioxidants than broccoli.)

For Easter and other spring occasions, we might be treated to watercress soup served in my grandmother’s thinnest porcelain cups. For the most part, though, we enjoyed the peppery, pungent sprigs fresh in a salad, dressed with nothing more than salt, lemon juice and olive oil — back then, not all that easy to find down South, and thus one of my mother’s most valued condiments.

These days, I avoid wild cress unless I know for sure that the stream it comes from is pristine; instead, I go for the cultivated stuff at the supermarket. It wilts beautifully under a steak, roast chicken or seared piece of fish.

And it makes a wonderful bed for deviled, or stuffed, eggs — the quintessential springtime hors d’oeuvre. I’m crazy about them, especially those made by my longtime friend Rick Ellis. He’s a noted food stylist and culinary historian who is never afraid to serve stuffed eggs at the fanciest dinner party. “They’re always the first thing to disappear,” he said, and he’s right.

What gives Rick’s eggs their rich, round flavor is butter, and he credits Julia Child with the idea. One of the things you learn from someone like Rick (or Julia) is that simplicity doesn’t necessarily mean ease of preparation, but instead perfection and balance in a dish. That’s why it’s important, for instance, to push the cooked egg yolks through a fine-mesh sieve rather than mash them with a fork. It’s what gives the filling such great body.

Another great spring favorite is deviled ham — reason alone for serving a tender, juicy baked ham at Easter. The use of the culinary term “deviled” to mean highly seasoned with spices or condiments dates from at least the early 19th century, but the kind of deviling most Southerners come across isn’t fiery at all, but instead gets a sharp nip from Dijon mustard, often with an assist from a pinch of cayenne.

And if you spoon it onto toast points, you have lovely little canapés, which were, Rick told me, one of the first types of hors d’oeuvre served with drinks. My mind leapt immediately to Jack Benny, who once defined an hors d’oeuvre as a ham sandwich cut into 40 pieces.

Rick, however, was thinking about another icon, Fannie Farmer, and after a quick search in his library, read aloud from his 1918 edition of Fannie Farmer’s Boston Cooking School Cook Book, which laid out the newfangled concept of canapés. “Canapés are made by cutting bread in slices one fourth inch thick, and cutting the slices in strips . . . or circular pieces. The bread is toasted, fried in deep fat, or buttered and browned in the oven, and covered with a seasoned mixture of eggs, cheese, fish, or meat.”

As for the deviled ham, Rick found a recipe for ham sandwich spread seasoned with mustard, salt, pepper and vinegar in the original (1931) edition of The Joy of Cooking. It rightly belongs to the far older category of potted meats, of course. Two centuries ago, I would have had to pound the cooked ham (or partridge, ox tongue, hare, etc.) to a smooth paste with butter in a stone mortar, then season it with salt, pepper and perhaps mace or cayenne. Pressed into small crocks and sealed with clarified butter, my potted ham would have kept about two weeks in a cool, dry place.

No recipe re-enactments for me: I’ll take my food processor and refrigerator and be grateful, thank you. The recipe for deviled ham, which is based on Marion Cunningham’s reborn classic, The Fannie Farmer Cookbook (published in 1979), is simple and delicious. No way it’ll last two weeks.

Rick Ellis’ Stuffed Eggs

Makes 24

1 dozen large eggs

1/4 cup mayonnaise

1/4 cup Dijon mustard

4 tablespoons unsalted butter, softened to room temperature

1 teaspoon fresh lemon juice

1/4 teaspoon cayenne

Coarse salt and ground white pepper

Finely snipped fresh chives for garnish

1. Place the eggs in a pan large enough to hold them in 1 layer and cover with cold water. Bring to a boil, cover the pot, and let sit 15 minutes. Drain and run under cold water until eggs are completely cool.

2. Peel the eggs and cut in half lengthwise. Remove the yolks and rub through a fine-mesh sieve into a bowl. Add the mayo, mustard and butter, and mix until smooth. Stir in the lemon juice, cayenne, and a generous amount of salt and white pepper. Transfer the filling to a pastry bag fitted with a 1/2-inch tip (or jury-rig out of a plastic zip-top bag with a corner snipped off).

3. Pipe the filling into the egg white halves and sprinkle with chives.

Deviled Ham with Toast Points

Makes 2 cups

About 8 slices best-quality white sandwich bread

2 cups (about 1/2 pound) chopped cooked city-cured (baked) ham

1 tablespoon minced onion

2 to 3 teaspoons Dijon mustard

A small pinch cayenne

An even smaller pinch ground mace (optional)

1 tablespoon minced sweet pickle

2 tablespoons mayonnaise or unsalted butter, softened to room temperature

Coarse salt and freshly ground pepper to taste

1. Heat oven to broil and set rack about 6 inches from heat. Put the bread slices on a baking sheet and broil until pale golden and crisp on top, about 1 minute or so. Flip the slices and broil until pale golden on other side, about 1 minute. While bread is still hot, trim crusts and cut into triangles or strips. Once cool, the toast points will keep in an airtight container up to 1 day.

2. Purée the ham until smooth in a food processor. Scrape it into a bowl, then stir in the rest of the ingredients. Pack the deviled ham into a small crock and refrigerate, covered.  PS

Jane Lear was the senior articles editor at Gourmet and features director at Martha Stewart Living.

Food for Thought

Winter Salads

Eat well — and wild

By Jane Lear

Salad in the cold months can be tricky. The mild, tender lettuces available at any supermarket are all well and good, but most other salad staples — tomatoes are an obvious example — are disappointing out of season.

More important, though, a typical garden-variety salad doesn’t suit the heartier, richer food we crave at this time of year. Serving a plate of nicely dressed hothouse lettuces after braised short ribs or cassoulet, for instance, can seem tacked on and curiously unsatisfying. Dinner guests tend to pick at it and wonder what’s for dessert rather than appreciate the punctuation in the meal, so to speak, and feel revitalized. 

For the sort of bracing counterpoint I’m talking about, look to bolder greens such as endive, watercress, arugula, the pale inner leaves of escarole, or springy, spiky frisée. Slivers of sweet, earthy celery root, tangy green apple or aromatic fennel will help matters along. 

One of my favorite winter salads always puts me in mind of the Mediterranean — in particular, Provence and Sicily. The recipe stars fresh fennel and any members of the mandarin citrus family, which includes satsumas, tangerines and clementines. The large, relatively new hybrid marketed as “Sumo” (easily recognized by its prominent topknot) has a superb balance of sweetness and acidity, and the fruit segments, which can be neatly slipped out of their ultra-thin membranes, keep their shape on the plate.

Dandelion greens — which have become more readily available — have a clean, sharp flavor that also reminds me of the Mediterranean. That’s where their use in the kitchen was developed, and you can trace the word “dandelion” from the Latin down through the French dent-de-lion, or “lion’s tooth.” This is no big surprise, given the jagged shape of the leaves, but personally I have a fondness for the common French name, pissenlit, which reflects their purported diuretic properties. 

Wild dandelion greens have intense flavor, but these days, I prefer them cultivated unless I know that the grass they’ve been plucked from is pesticide-free. Wild or cultivated, they have a great affinity for a hot skillet dressing. It won’t necessarily wilt the greens, but it mellows them and softens their rawness. Toasted nuts give the vinaigrette a suave sweetness.

The evolution of salad from a side dish or separate course into the main focus of a meal has come into its own, and this makes scratching together a nourishing, delicious weeknight supper — one of life’s greatest challenges — just a bit simpler. Two staples that I swear by are lentils and sausage, especially the smoked Polish variety called kielbasa.

Lentils are a great gateway legume. Unlike most dried beans, there’s no need to soak them beforehand, they cook quickly, and slide from homey to haute with aplomb. I suppose you could say they’ve been around the block and know a thing or two: After all, they were there in the beginning — er, Beginning — as the pottage for which Esau gave up his birthright in Genesis 25:34.

Although I’ve never met a lentil I didn’t like, I’m a sucker for the pretty green French ones called lentilles du Puy. Yep, I know they’re more expensive than other lentils varieties, but they’re worth it. Their characteristic flavor — peppery and minerally yet delicate — comes from the good volcanic soil and dry, sunny climate in which they’re grown. And because they contain less starch than other varieties, they exhibit a lovely firm-tender texture when cooked. In fact, if your opinion of lentils was formed by one too many mushy stews at indifferent vegetarian restaurants, then these will be a revelation.

French green lentils are delicious in soup, of course, or scooped into the hollow of a baked winter squash, or tossed with small pasta shells and crumbles of fresh goat cheese. What I do most often, though, is serve them in a bistro-style warm salad with kielbasa. Add some crusty bread, good butter, and a glass or two of red, and life will feel very civilized.

All three of the salads described above are incredibly versatile. As you’ll see in the recipes — think of them more as guidelines — one ingredient can often be switched for another, and as you go along, don’t be afraid to improvise, based on the contents of your refrigerator. Odds are, it will taste wonderful.

Mandarin-Fennel Salad

Serves 4

Add some cress or arugula sprigs if you like; substitute green olives for the black. Ruby-red pomegranate seeds would add sparkle and texture, and parsley leaves, an herbal punch.

1 large fennel bulb, trimmed of its feathery stalk and some fronds reserved

3 mandarins, peeled

1/4 cup brine-cured black olives

Your favorite best-quality extra-virgin
olive oil

Fresh lemon juice

Coarse flaky salt (Maldon adds a wonderful crunch) and freshly ground black pepper

Cut the fennel bulb in half lengthwise and discard the tough outer layer or two to expose the cream-colored heart. Then cut the bulb into very thin slices with a handheld slicer or a very sharp knife. Put them in a salad bowl.

Remove the weblike pith from the peeled mandarins (children love doing this and are very good at it). Separate the segments and, depending on the thickness and tightness of the membranes that enclose each one, remove those or not; it’s entirely up to you. Cut the fruit in half crosswise and add it, along with the olives, to the fennel.

Drizzle the salad with olive oil and lemon juice to taste and gently combine. Scatter with salt and a few chopped fennel fronds. Season with a few grinds of pepper.

Dandelion Salad with Toasted Pine
Nut Vinaigrette

Serves 6

I’ve called for sherry vinegar below, but balsamic or red wine vinegar would be fine. If you don’t have pine nuts, use pecans, hazelnuts or homemade croutons. Dried cranberries or cherries would be a nice embellishment, too.

6 handfuls tender dandelion greens, washed, spun dry, and tough stems removed

3 tablespoons extra-virgin olive oil

2 garlic cloves, finely chopped

3 tablespoons pine nuts 

1 tablespoon sherry vinegar, or to taste

Coarse salt and freshly ground pepper

Shaved or very coarsely grated Parmigiano-Reggiano

Tear the greens into generous bite-size pieces and mound them in a large heatproof bowl.

Heat the oil in a small skillet over moderate heat until hot. Add the garlic and pine nuts, cook, stirring them often, until the garlic is golden. Stir in the vinegar, then pour over the greens. Season with salt and pepper and toss to coat. Add the Parm and toss once more. Serve right away.

Warm Lentil Salad with Kielbasa 

Serves 4

This salad, a staff favorite at Gourmet, varies according to my time and inclination. It’s perfectly delicious with nothing more than onion and garlic, or carrot and garlic. As for the kielbasa, feel free to substitute another smoked sausage, country ham, pancetta or lardons — thick-cut strips of bacon sliced into matchsticks and cooked until crisp. Serve it on a bed of watercress or tender leaves of a Boston or Bibb lettuce. If desired, gild the lily by topping each serving with a fried egg.

2 cups French green lentils (lentilles du Puy), picked over and rinsed

6 cups water

1 bay leaf

A couple of sprigs of fresh thyme or, if you can find it, winter savory

Coarse salt and freshly ground pepper

1/2 cup plus 2 tablespoons extra-virgin olive oil, divided

1 cup finely chopped onion

1 cup diced carrot

1 cup diced celery, plus chopped celery leaves for garnish

1 tablespoon finely chopped garlic

1/4 cup redwine or sherry vinegar

1 tablespoon Dijon mustard

1 smoked kielbasa sausage, cut crosswise into 1/4-inch slices

Bring the lentils, water, bay leaf and thyme sprigs to a boil in a 3-quart pot. Reduce the heat and simmer the lentils, covered, until they are almost tender, about 15 minutes. Add 1/2 teaspoon salt and keep simmering until tender but still firm, about another 5 minutes.

Meanwhile, heat 2 tablespoons oil in a large skillet over medium-low heat. Add the onion, carrot, celery and garlic and cook, stirring every so often, until the vegetables are just softened and smell delicious, 8 to 10 minutes.

While the lentils and aromatics are both working, make the vinaigrette: Whisk together the vinegar and mustard in a small bowl and then whisk in the remaining 1/2 cup oil. Season to taste with salt and pepper.

Drain the lentils in a colander, discarding the herbs. Return the lentils to the pot and stir in the vegetables and vinaigrette. Cook over low heat a few minutes until hot, remove from the heat and cover to keep warm. Wipe out the skillet and brown the kielbasa on both sides. Stir into the lentils and garnish with celery leaves.  PS

Jane Lear was the senior articles editor at Gourmet and features director at Martha Stewart Living.

Here Today, Gone Tomato

Nothing says Southern cooking more than a plate of fried green tomatoes

By Jane Lear

The tomato is a tropical berry — it originated in South America — and so it requires plenty of long, hot sunny days to reach its best: the deep, rich-tasting, almost meaty sweetness many of us live for each summer. When September rolls around, though, it’s a different story. It’s not that I’ve gotten bored with all that lush ripeness, but I develop a very definite craving for fried green tomatoes.

If you grow your own backyard beefsteaks, unripe tomatoes are available pretty much all summer long, but this is the time of year they start getting really good. In the early autumn, the days are undeniably getting shorter, and thus there are fewer hours of sun. That and cooler temperatures result in green tomatoes with a greater ratio of acid to sugars.

And my cast-iron skillet, which tends to live on top of the stove anyway, gets a workout. Fried green tomatoes, after all, are terrific any time of day. In the morning, they are wonderful sprinkled with a little brown sugar while still hot in the skillet, right before you gently lift them onto warmed breakfast plates. If you’re a brunch person, serve them that way, and you’ll bring down the house. At lunchtime, embellishing BLTs with fried green tomatoes may seem like a time-consuming complication, but those sandwiches will be transcendent, and you and yours are worth it.

When it comes to the evening meal, fried green tomatoes are typically considered a side dish, and there is nothing wrong with that. But in my experience, they always steal the show, so I tend to build supper around them. I rely on leftover cold roasted chicken or ham to fill in the cracks, for instance. Or I make them the center of a vegetable-based supper in which no one will miss the meat. They play well with corn on the cob or succotash, snap beans or butter beans, ratatouille, grilled zucchini and summer squash with pesto, or grits, rice, or potatoes. Pickled black-eyed peas (aka Texas caviar) are nice in the mix, as are sliced ripe red tomatoes, which, when served alongside crunchy golden fried green tomatoes, add a great contrast in texture and flavor.

If you are fortunate enough to have a jar of watermelon rind pickles in the pantry, my Aunt Roxy would suggest that you hop up and get it. I ate many a meal in her cottage on Harbor Island, and early on I learned watermelon and tomatoes have a curious yet genuine affinity for one another. I imagine Aunt Roxy would greet today’s popular fresh tomato and watermelon salads with a satisfied nod of recognition.

We always had a difference of opinion, however, over cream gravy, a popular accompaniment for fried green tomatoes. It’s not that I am morally opposed to lily gilding, but I have never seen the point in putting something wet on something you have worked to make crisp and golden. A butter sauce on pan-fried soft-shelled crabs, chili or melted cheese on french fries, a big scoop of vanilla on a flaky double-crusted fruit pie: I don’t care what it is, the result is soggy food, and I don’t like it.

When it comes to the actual coating for fried green tomatoes, the most traditional choice is dried bread crumbs. I sometimes use the crisp, flaky Japanese bread crumbs called panko, but like Fannie Flagg, I am happiest with cornmeal. It can be white or yellow, fine-ground or coarse. It doesn’t matter as long as it is sweet-smelling — a sign of freshness. And if you happen to have some okra handy, you may as well fry that up at the same time. Trim the pods, cut them into bite-size nuggets, and coat them like the tomato slices. Although rule one when frying anything is not to crowd the pan (otherwise, the food will steam, not fry), there is always room to work a few pieces of okra into each batch of tomatoes. And whoever you are feeding will think you hung the moon and stars.

Fried Green Tomatoes  (Serves 4)

When cutting tomatoes for frying, aim for slices between 1/4 and 1/2 inch thick. If too thin, you won’t get the custardy interior you want. And if the slices are too thick, then the coating will burn before the interior is softened.

About 1 cup of cornmeal

Coarse salt and freshly ground pepper

1 large egg, lightly beaten with a fork

4 extremely firm (but not rock-hard) large green tomatoes

Vegetable oil or bacon drippings (you can also use a combination of the two)

Preheat the oven to low. Season the cornmeal with salt and pepper and spread in a shallow bowl. Have ready the beaten egg in another shallow bowl. Cut the tomatoes into 1/2-inch slices (see above note).

Pour enough oil or drippings into a large heavy skillet to measure about 1/8 inch and heat over moderate heat until shimmering. Meanwhile, working in batches, dip one tomato slice at a time into the egg, turning to coat, then dredge it well in the cornmeal. As you coat each slice, put it on a sheet of waxed paper and let it rest for a minute or two. (This is something I remember watching Aunt Roxy do. It must give the cornmeal a chance to absorb some moisture and decide to adhere.) By the time you coat enough slices to fit in the skillet, the fat in the pan should be good and hot.

Carefully, so as not to dislodge the coating, slip a batch of tomato slices into the hot fat (do not crowd pan) and fry, turning as necessary, until golden on both sides. Drain the slices on paper towels and transfer them to a baking sheet; tuck them in the oven to stay warm and crisp.

Coat and fry the remaining tomato slices in batches, wiping out the skillet with a paper towel and adding more oil or drippings as needed. Be patient and give the fat time to heat up in between batches. You may find yourself eating the first slice or two while alone in the kitchen, but be sweet and share the rest.  PS

Jane Lear was the senior articles editor at Gourmet and features director at Martha Stewart Living.

Food for Thought

Pamlico Perfection

There is no need for fancy cooking at the beach, especially when local shrimp are running

By Jane Lear

There is something freewheeling about beach house cookery. All the familiar props, from tools to staple foods, are gone, and most folks happily make do with whatever they can find in a stranger’s kitchen cabinets and at the grocery store, seafood market and farm stand. Everything will taste delicious, after all, because most people who love the beach spend the entire day outdoors. Even if you do nothing more strenuous than laze under an umbrella with the latest page-turner, you somehow manage to work up an appetite.

That’s why I am only fussy about a couple of things. The first is tomatoes. More often than not, I’ve been disappointed by the selection at coastal Carolina farm stands; typically, the tomatoes are commercial hybrids and not very interesting or flavorful. I always hedge my bets, then, by bringing plenty of good ’uns with me — both backyard beefsteaks and heirlooms in varying shapes, sizes and degrees of ripeness. I bring lots of them, enough for a week’s worth of salads and the best sandwiches in the world. I pack them in low cardboard boxes and nestled in beach towels, stem-side up so their rounded shoulders won’t get bruised.

I’m also uncompromising about finding local wild-caught shrimp, one of my favorite beach eats. The brown shrimp (Farfantepenaeus aztecus) that are running now are sweet and fat. And whether you buy them from a seafood purveyor or roadside cooler, don’t be afraid to ask questions about their source. “Anyone selling shrimp should know who they purchased it from (if they didn’t catch it themselves) and should be able to provide some details (e.g., the name of the boat, the fish house, area of the coast, etc.) if it’s from North Carolina,” writes Scott Baker, fisheries specialist for the NC Sea Grant Extension Program. “The NC Catch organization has a directory for seafood retailers that provide local products.” NC Catch can be found online at nccatch.org.

The last North Carolina shrimp I had were real beauts — just hours out of the hold of a boat working Pamlico Sound. This shallow lagoon separating much of the Outer Banks from the mainland is a remarkable body of water; it’s so broad and long that when explorer Giovanni da Verrazzano reached the coast in 1523, he thought he had reached the Pacific Ocean.

My extended family that gathers at the beach expands or contracts depending on circumstances. What never changes, though, is a love of the surf and a great reluctance to leave the beach in order to go make dinner. That means we all share kitchen duty — and no one ever complains about the fact that peel-your-own boiled shrimp is the default meal. Add corn on the cob and a platter of those tomatoes, and you have easily attainable perfection in no time flat.

When it comes to cooking shrimp, I’m a big believer in protecting the physical integrity — thus the flavor and tender texture — of seafood. Unless I’m stuck with very large shrimp, I never fool with deveining. Why open up that thin, resilient armor and risk coarsening such delicate meat? To my mind, there’s no beating the succulence of heads-on shrimp, but lots of people prefer the convenience that comes with buying them heads-off.

I also cook shrimp in the smallest amount of water I can get away with, covering them by just 2 inches or so. As far as the seasoning is concerned, I add a quartered lemon and enough sea salt to make cold tap water taste like the ocean. If you are a fan of a seafood boil blend such as Old Bay or Zatarain’s, toss some in as well, but use a light hand — you don’t want to overwhelm the clean, briny-sweet flavor of the shellfish.

James Beard famously declared that “the unpardonable fault in preparing shrimp is overcooking,” therefore attention must be paid. After bringing the seasoned water to a boil, add the unpeeled shrimp and start timing from that moment. Depending on the size of the shrimp and how many pounds of them are in the pot, begin checking for doneness at about two minutes. Once the shrimp are a beautiful rosy-pink on the outside, opaque inside, and firm yet tender in texture (cut one open to check), immediately drain them in a colander.

Spread newspapers over the table and eat the shrimp hot out of the shell, with melted butter (add garlic or a spritz of lemon if the spirit moves), or cooled, with a horseradishy cocktail sauce. A New Orleans-style rémoulade would be wonderful too, but I don’t know — all that mincing and measuring sounds like too much work at the beach.

The adults in my crowd can easily put away at least three-quarters of a pound of shrimp per person. Any leftovers are tucked into the fridge for lunchtime shrimp rolls the next day. Peel the shrimp and cut them into chunks. Add some Duke’s mayo, a little Dijon mustard, shredded carrot, chopped scallion, and perhaps some chopped red bell pepper or celery for crunch. Serve in lightly toasted hot dog buns. Then slather on more sunscreen and go outside. The surf is waiting.  PS

Jane Lear was the senior articles editor at Gourmet and features director at Martha Stewart Living.

Braking for Local Asparagus

Spring is the most ephemeral time of the year, so it pays to cook completely in the moment

By Jane Lear

Asparagus season is in full swing, and a good thing, too, for the vegetable is one of the home cook’s greatest allies. It can be steamed, boiled, sautéed, stir-fried, roasted or grilled. It comes elegantly thin or fat and juicy. It’s impressive drizzled with vinaigrette, and served as a first course; as a side to chicken, fish, ham, pork, or beef; or worked into pasta primavera, risotto, or an omelet or frittata. It is delicious hot, chilled or room temperature. It swings from simple, even austere, presentations (salt, pepper, olive oil, lemon zest) to more complex ones (in a stir-fry with other spring vegetables, for instance, or tucked into a creamy lasagne) without losing its presence.

And even though it is now found in the supermarket produce aisle pretty much year-round, most of us greet our local crop as something special, eating it with joyous, unabashed greed for the four to six weeks it is available. That is why it’s a good idea to buy plenty; I usually allot at least a half pound or more per person. On the off chance there are any leftovers, they’re delicious the next morning, warmed through and dipped into a runny soft-boiled egg.

Some people prefer pencil-thin spears, and others like them thick. The difference in circumference is due not to the relative maturity of the spears, but a combination of factors, including the age of the plants from which they were harvested (the thinner the spear, the younger the plant), cultivar and sex. Female plants produce fewer, larger spears; males give a much higher yield of thin to medium spears.

I tend to seek out asparagus that’s on the plump side because of its succulent, almost meaty, texture. I also find it easier to deal with. Skinny asparagus may look sophisticated on the plate, but during cooking, it can turn from tender to mushy in about a millisecond, and attention must be paid.

All that aside, go for whatever asparagus, whether thick or thin, is the freshest, because it doesn’t keep well. Look for firm, tightly closed tips with a beguiling lavender blush, scales (or leaves, botanically speaking) that lie flat against glossy stalks, and woody ends that are freshly cut and moist. The asparagus in our markets is typically green, but purple cultivars are becoming increasingly available; those are especially nice raw in salads, because when cooked they lose their color, which can range from pale mauve to deep purple. The white asparagus that is more common in Europe is simply prevented from turning green: The growing spears are continually banked with soil to keep them in the dark; that way, they don’t produce chlorophyll.

Cooking asparagus is staggeringly simple, and my basic method is as follows. First, rinse the asparagus well to remove any sand or grit (trust me, it’s there) and pat dry. Snap off the tough ends (or cut them if the spears are very thick), and peel the stalks if the skin is fibrous.

In a large skillet, lay the asparagus lengthwise, tips facing in the same direction, in an inch or so of salted water. Bring the water to a gentle boil and cook the asparagus until it is barely tender; the tip of a knife inserted in a spear should meet a very slight resistance, and if you pick it up in the middle with tongs, it should bend slightly. Thin spears take just a few minutes and more robust spears a bit longer. Once you’ve prepared asparagus this way, you can go in any number of directions. Below are two favorites.

A Homey Asparagus Supper for Two

I cobbled together this dish one rainy spring evening a few years ago, and was really proud of myself — until I realized the revered English food writer Nigel Slater had beat me to the punch. “A rubble of cooked, chopped pancetta, and especially its melted fat, makes a gorgeous seasoning for a fat bunch of spears,” he wrote in Tender: A cook and his vegetable patch. And how.

Preheat the oven to 400°F. Using the basic method outlined above, cook a bundle of medium to large asparagus until just barely tender. Meanwhile, melt a generous tablespoon of unsalted butter in an ovenproof skillet or sauté pan over moderately high heat. Add an enjoyable amount of chopped pancetta or bacon and cook until golden. Remove from the heat.

Scrape the pancetta and the fat in the pan to one side and add the asparagus. Spoon the pancetta and fat over the asparagus, then sprinkle with freshly grated Parmigiano-Reggiano. Put the pan in the oven and bake until the cheese is melted, 5 minutes or so.

Asparagus Mimosa for Four

This recipe, which can easily be doubled, is a wonderful way to kick-start a dinner party. The asparagus is delicious warm or at room temperature, and the sieved hard-boiled egg is more than a pretty topping: As it absorbs the vinaigrette, it fluffs up like the yellow mimosa blossoms that punctuate winter in Provence. The richness of the egg yolk also gentles the vinaigrette and gives it body.

Cook about 1 1/2 pounds asparagus as above. Cut 2 hard-boiled eggs in half, then press them through a sieve into a small bowl. Whisk together about 2 tablespoons white wine vinegar, 1 tablespoon minced shallot, and a dab of smooth Dijon mustard. (A little minced fresh tarragon would be nice, too.) Add coarse salt and freshly ground black pepper to taste. Whisk in 1/3 cup extra-virgin olive oil (use a mild oil, not a peppery Tuscan one). Toss the asparagus in a small amount of the vinaigrette, and reserve the rest. Parcel out the asparagus among four plates, spoon the rest of the vinaigrette over it, and sprinkle with the sieved egg. Et voilà!

Asparagus on the Grill

By the time May rolls around, we all want to spend as much time as possible outdoors, not standing over a stove. Luckily for us, the technique of grilling really concentrates the singular sweetness of asparagus and overlays its vegetal purity with a little smokiness. Grilled asparagus is delicious as is or with a garlicky mayonnaise.

“When you put just-picked asparagus on a hot grill, they are so juicy they actually jump as they start to cook,” Andrea Reusing once told me. The acclaimed chef-owner of Lantern, in Chapel Hill, and the restaurant at The Durham hotel, in downtown Durham, is extremely deft with seasonal ingredients, and the below recipe is from her book, Cooking in the Moment.

Andrea Reusing’s Charcoal-Grilled Asparagus

Prepare a hot fire in a charcoal grill. Count on 8 to 10 asparagus per person as a side dish or as the focal point of a salad. Keeping all the tips pointing the same direction, toss the asparagus with olive oil, a generous amount of salt, and some freshly ground black pepper. When the flame has died down, the coals are completely covered with ash, and the grill is very hot, grill the asparagus (in batches if necessary). Cook 2 to 3 minutes per side until fragrant, lightly marked, and vibrant green on the outside, and juicy and tender on the inside.  PS

Jane Lear was the senior articles editor at Gourmet and features director at Martha Stewart Living.