Focus on Food

Focus on Food

Celebrating the Pear

Delicate, temperamental and extraordinary

Story and Photograph by Rose Shewey

Pears are a recurring, bittersweet theme in my family. My mom grew up in the Yugoslavia of the 1940s as the youngest of five siblings. When her eldest brother secretly packed his bags one night to attempt to cross the border into Italy, my mom, then 7 years of age, sensed that big changes were ahead. Too young to comprehend the gravity of the situation, her brother simply told her that he was about to visit their aunt and would bring back a basket full of pears from her tree — my mom’s favorite fruit. It wasn’t until weeks after he had left that my mom understood that she’d never see the pears she was promised, nor would she see her brother again, who had been granted a visa to immigrate to the United States.

The pear saga continues. The first solid food I ate as a baby — I have photo proof — was a pear and, in middle school, the first poem I learned to recite by heart, wholeheartedly, was a ballad written by Theodor Fontane, Herr von Ribbeck auf Ribbeck im Havelland. It tells the story of an old man, a gentle soul, who graciously hands out pears from his stately tree to the children of the village. Knowing that he would die soon and that his son was utterly ungenerous, he asks to be buried with a pear. In time, a pear tree grows on his grave, and the children of the village joyfully pick pears every fall — the old man’s legacy.

Aside from the sentimental appreciation I have for pears, I always considered them to be in a class of their own. Pears, as opposed to their close relatives, apples — the workhorse of the rosaceous crop — are much more delicate in nature. More temperamental, too, but also capable of creating moments worth celebrating when eaten at just the right time. Pears can do extraordinary things, too. Slide a bottle over a young pear on a tree, as they do in the French Alsace region, and allow it to grow directly inside the bottle. You’ll end up with eau de vie de poire (“pear water of life”) after the pear reaches full maturity and is turned into delicious brandy.

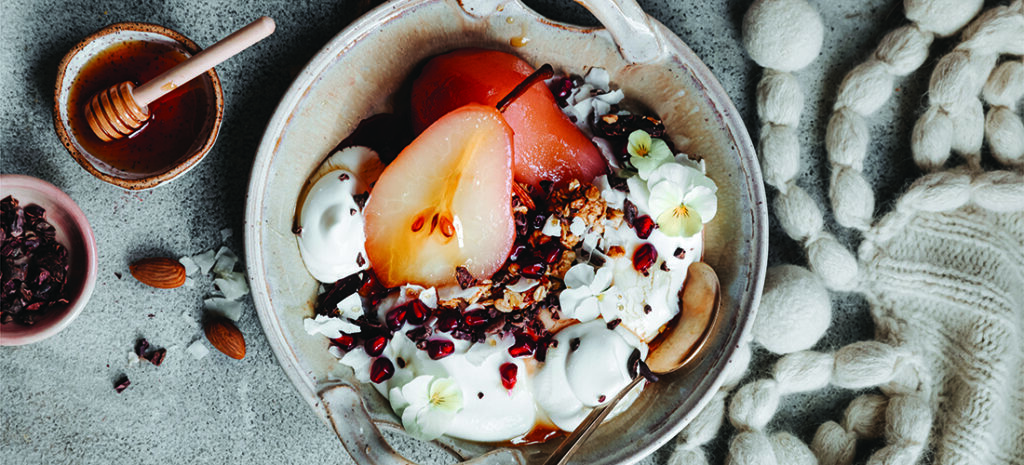
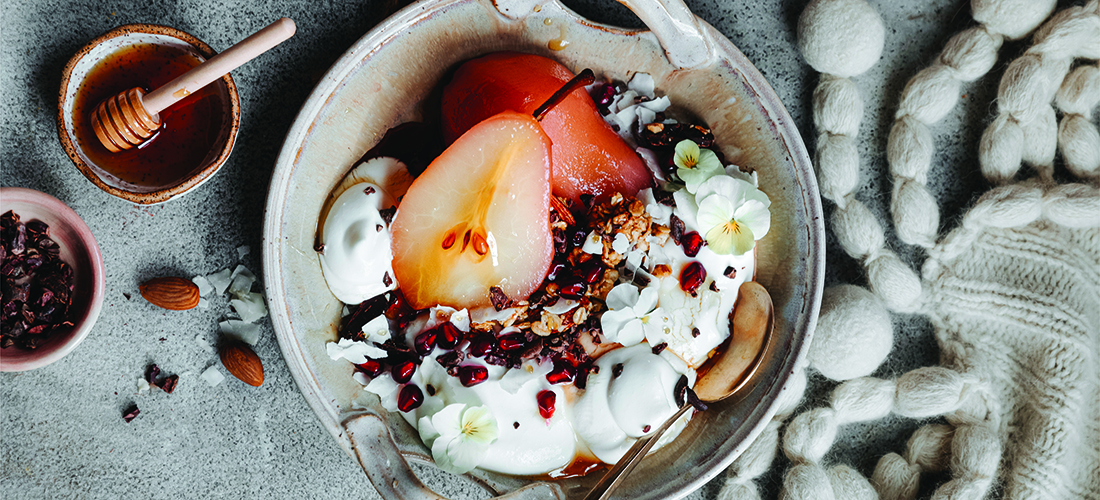
A simple but snazzy way to enjoy pears is to poach them. Ah, the possibilities are endless. From using wine or cider or any type of fruit juice and spices you choose, poaching pears is most satisfying and requires no special skill. My latest discovery in enjoying poached pears? Marry them with whipped cottage cheese. As lumpy and, to some, unappealing as cottage cheese appears in its natural state, once whipped, it turns into a silky, marshmallow-y cream firm enough to make picture-perfect dollops when plated.  PS


Pomegranate Poached Pears with Whipped Cottage Cheese

(Serves 2)

16 ounces cottage cheese (4 percent milk fat)

1 quart pomegranate juice

1 cup sugar

Juice of 1/2 lemon

1 cinnamon stick

2-3 whole cloves

1-2 star anise

1 vanilla bean, cut lengthwise (optional)

2 large pears (Bosc, Bartlett or Anjou)

Toppings of your choice


Place cottage cheese in a food processor and blend until you have a smooth, silky texture that resembles soft whipped cream. Store in the refrigerator.

In a medium pot, heat pomegranate juice. Add sugar and stir to dissolve. Add lemon juice and remaining spices. Peel pears (halve and core, if desired), slide into the liquid and simmer until done — pierce pears with a paring knife, if it meets no resistance, the pears are done. This may take between 10 and 25 minutes, depending on the pears.
Be sure to keep pears submerged or turn them over every once in a while so they cook evenly.

Serve with whipped cottage cheese, pomegranate seeds, muesli, chopped nuts and cacao nibs, or any other toppings of your choice. Add a few spoonfuls of poaching liquid if desired.  PS

German native Rose Shewey is a food stylist and food photographer. To see more of her work visit her website, suessholz.com.

Focus on Food

Focus on Food

Roll, Roll, Roll Your Oats

The renaissance of porridge

Story and Photograph by Rose Shewey

Many moons ago, around the time when candy cigarettes and slap-on bracelets were the cat’s pajamas, a serving of oatmeal seemed more like a punishment to me than a meal worth savoring. My mom cooking oats for us usually meant one of two things: The 7-year-old me had not eaten “right” for a while and needed proper sustenance; or we had simply run out of other breakfast foods (namely bread) before grocery day.

While my brother and I despised cooked oats and feigned tummy aches at the sight of it, we were completely sold on an oatmeal rendition we had been introduced to in our neighbor’s kitchen: raw oats soaked in cold milk for just a minute or two, served with a dash of cacao and a sprinkling of brown sugar. Love, instantly. To us, it was the perfect composition of a refreshing, lightly sweetened, satisfying oat snack, minus the mush. While cooked oats weren’t our jam, this chilled adaptation became a staple in our meal rotation through much of my childhood. My brother, now in his 40s, still eats his oats chilled. Meanwhile, I have made room in my life for traditionally cooked, warm and comforting, creamy oatmeal.

Though porridge, which can be made from any whole grain, is making a comeback as a whole, oatmeal in particular seems to take center stage. Denmark has an established chain of restaurants that serves nothing but porridge for breakfast, lunch and dinner. Savory oatmeal has gone viral on social media this year with masala oats, a traditional Indian breakfast dish, on the rise. Many speculate that the gluten-free craze has contributed to the revival of oatmeal; some believe that studies showing oatmeal aids weight loss are to be credited for it — which is a bit of mystery to me, seeing that the vast majority of people jazz up their oats with fat and sugar. I, however, have a different take on the renaissance of oatmeal.

While oatmeal hardly falls in the category of “acquired taste,” I have numerous friends who, much like myself, went from total rejection to complete adoration of this humble dish. Aside from the fact that I actually enjoy the taste and texture of oatmeal nowadays, I’m drawn to it for another, fairly significant reason. Oatmeal has a unique way of grounding me. However complicated life gets, a bowl of oatmeal is the epitome of simplicity and instantly connects me with the quiet, unrushed aspects of my life. It’s like a warm hug on a chilly day — oatmeal nourishes body and soul. I believe that this sentiment is quietly shared among many of us who embrace this scrumptious, gratifying dish, and may be much more relevant in explaining the recent popularity of oatmeal. But if I happen to lose a few pounds down the road, eating buttery, sugar-sprinkled oatmeal, I’ll happily stand corrected.


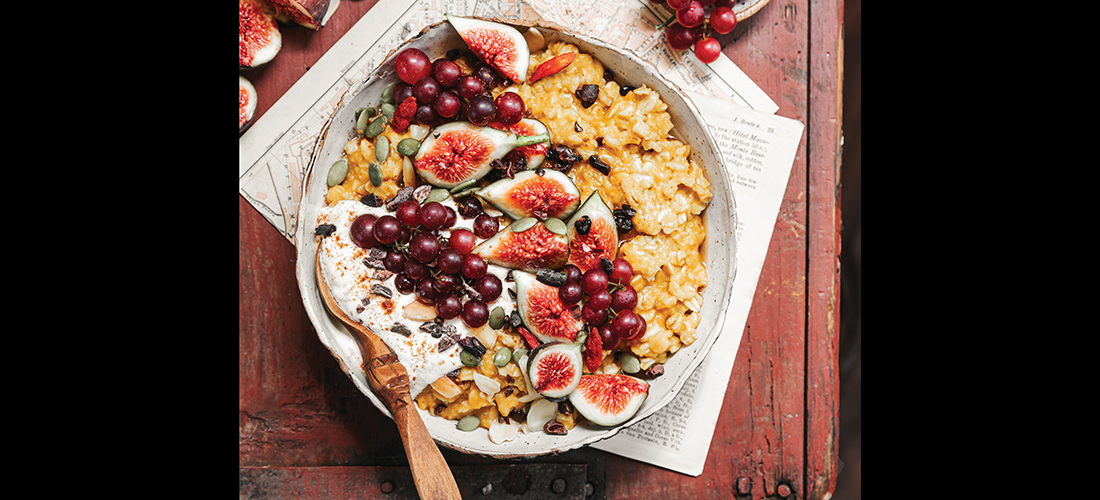
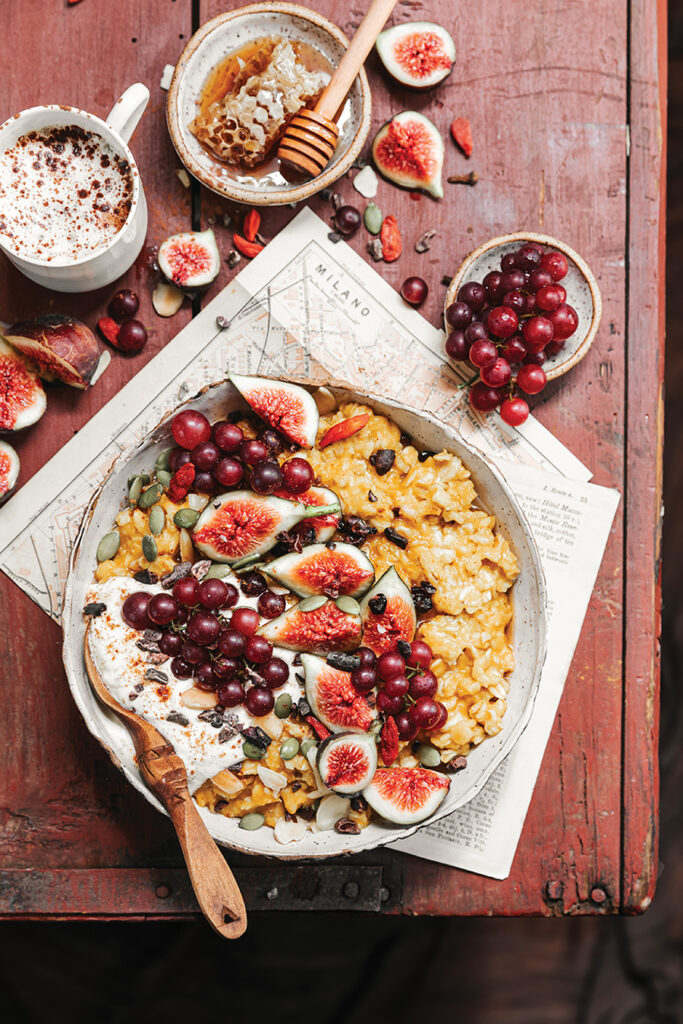
Creamy Pumpkin Oatmeal

(Makes 2 Servings)

Ingredients

1 1/2 cups water

Pinch of salt

1 cup rolled oats

1/2 cup pumpkin puree

3/4 teaspoon ground cinnamon

1-2 tablespoons sweetener, to taste (honey, maple syrup or granulated sugar)

1/2 teaspoon pumpkin spice, optional (see note)

Directions

Bring water and salt to a boil, then add oats. Stir to combine, then add remaining ingredients. Simmer for 5-10 minutes until you reach your desired consistency; remove from heat and allow to rest for 1-2 minutes before serving. Top with seasonal fruit, such as figs, grapes or pears; add pumpkin seeds, cacao nibs, sliced almonds or other chopped nuts, to taste.

Note: Add pumpkin spice for more flavor. To make your own pumpkin spice, combine 1 heaping teaspoon ground cinnamon, 1/4 teaspoon ground nutmeg, 1/4 teaspoon ground ginger and 1/8 teaspoon ground cloves.   PS

German native Rose Shewey is a food stylist and food photographer. To see more of her work visit her website, suessholz.com.
Focus on Food

Focus on Food

A Cottage for the Holidays

New ways to celebrate old traditions

Story and Photograph by Rose Shewey

In the cultural heart of Moore county — yes, I mean Aberdeen — lives a family of three who celebrate Christmas a tad differently. That family is mine. Whether you have a religious or folksy perspective on Yuletide, holiday traditions have evolved over time. But with roots in the Old World and a heartfelt sense of nostalgia, my family preserves its own slice of “Old Christmas” in our home, similar in many ways to an Appalachian Christmas, and closely resembling the festivities of my childhood.

In the old tradition, Christmas actually doesn’t start until, well, Christmas Day, and is celebrated several weeks into the new year. A live tree or branches won’t be brought into the house until Christmas Eve, or winter solstice day at the earliest, and will be kept inside until the first or second week of January. Ornaments are mainly handmade. The Christ Child or St. Nicholas bring presents. Or, if you’re drawn to Nordic folklore as we are, little “tomten” takes care of the gifts.

And the time leading up to Christmas? December always has been, in many cultures, a time of introspection and slowing down, as opposed to hustling from one event to the next. Embracing the darkest time of the year to find clarity, to reflect on the old and anticipate the new, may not be everyone’s cup of eggnog, but to us seems intuitive and in tune with the rhythm of the year.

Though I was raised in the ’80s, what I am about to say might make you think I grew up in a Dickens novel. In my childhood, there was hardly any candy before Christmas Day, and we’re keeping it that way in our house. We mainly had nuts and fruit to nibble on, with the odd chocolate-covered gingerbread doled out by my grandmother. We didn’t make gingerbread houses every single year, but on those Christmases when we did, the hand-crafted gingerbread houses are among the sweetest, most magical memories of my childhood. In contrast to today’s custom of covering nearly every inch of your gingerbread house with candy, we mainly decorated ours with almonds and icing.

While gingerbread houses — the first ones date back to the 16th century — are everything when you have kids, there are other ways to enjoy this whimsical Christmas tradition. This year, we are making cracker cottages for a savory version of the original. These salty, herb-infused holiday homes remind me of the plain and simple, yet timelessly beautiful, gingerbread houses of the past. Cracker cottages are no less enjoyable to build, and add a sense of calm and rustic charm to your tablescape and, of course, make an excellent appetizer and perfect addition to your charcuterie board. 


Almond Poppy Seed Crackers

(Basic recipe yields about 30 crackers)

1 cup blanched almond flour

1 tablespoon golden flax meal

1/2 tablespoon poppy seeds

1/2 teaspoon fine sea salt

3 tablespoons water

Seed, dried herbs, powdered onion or garlic, to taste (optional)


Preheat oven to 350°F. In a small bowl, combine all ingredients and mix with a fork until it resembles a dough. Roll out mixture between two sheets of parchment paper to about 3-4 millimeters thickness. Remove the top parchment paper and section dough with a knife or pizza wheel into desired cracker shapes. Transfer parchment paper with cutouts to a baking sheet and bake for 20-25 minutes, or until crackers turn golden brown (the outer edge will always turn darker then the center).


Cracker Cottage

Create your own template for a cracker cottage or print out a gingerbread house template from any of the free sources online. For a small cracker cottage, you will likely need to triple the basic cracker recipe; it’s best to work in batches and make more as needed. Prepare the dough as per the recipe above, but use your template instead of sectioning dough into crackers. Assemble the house right before use. To assemble, use cream cheese as “glue.” For intricate details, such as icicles, mix 8 ounces of cream cheese (room temperature) with one egg white and refrigerate until it has a firm enough consistency to pipe icicles and other decorative elements.  PS

German native Rose Shewey is a food stylist and food photographer. To see more of her work visit her website, suessholz.com.
Focus on Food

Focus on Food

Pancakes à la Einkorn

Welcome to the world of ancient grains

Story and Photograph by Rose Shewey

Crêpes, the slender, graceful cousin of the pudgy, all-American pancake, used to be the unrivaled god in my Olympus of all things batter-fried. With a culinary frame of reference of an expat and, well, a tad bit of ignorance, I had a lingering prejudice against pancakes for a long time. Put yourself in my shoes. Aside from the fact that a pancake seems to be just ordinary cake posing as a breakfast food, to the untrained eye, they appear a bit clumsy (if not to say uninspired). If you haven’t had the satisfaction of tasting properly prepared, made-from-scratch pancakes (I had the misfortune to be introduced to pancakes from a box mix), it’s not totally unreasonable to be skeptical of the legitimacy of this cake-like meal. Unjustly so, as lovingly home-crafted pancakes, artfully stacked and creatively topped, are a revelation in all their pillowy, puffed-up goodness. Though I have only recently begun to incorporate pancakes into our brunch routine — I still find them a bit heavy for breakfast — what absolutely sold me is making them with einkorn flour.

Einkorn wheat is an ancient grain believed to be the oldest and purest food around. Unlike modern grains, einkorn was never hybridized and contains fewer anti-nutrients, such as gluten. Folks who have a mild gluten sensitivity are often able to consume einkorn because of its gluten profile, which differs in quality from modern gluten.

While you can substitute einkorn for all-purpose flour, I found it best to start out following dedicated recipes to get a feel for this unique flour. Einkorn pancakes are an easy, fail-proof introduction to the world of ancient grains. It adds a nutty flavor and aids in keeping pancakes as fluffy as they need to be. Watch out crêpes, pancakes are on the rise! Pun intended.


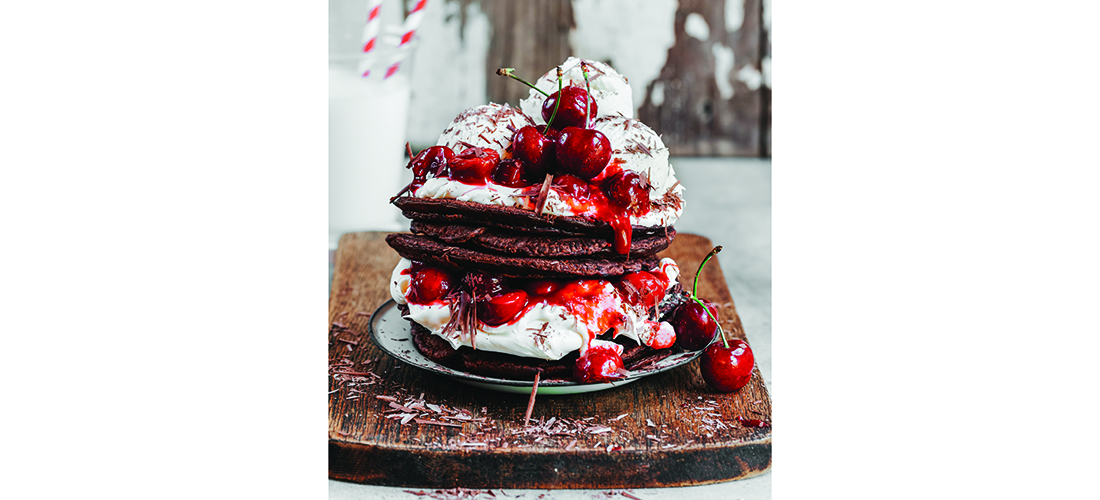
Chocolate Einkorn Pancakes with Cherry Sauce

(Makes 4-6 pancakes)

Cherry Sauce

1 tablespoon arrowroot powder

1/4 cup water

1 pound fresh or frozen pitted cherries

4 – 6 tablespoons sweetener, such as honey, maple syrup or granulated sugar, to taste

1 tablespoon freshly squeezed lemon juice

In a small bowl, whisk together the arrowroot powder and the water to create a slurry. Set aside. Add cherries, sugar (start with less sweetener and add more later, if desired) and lemon juice to a large pot and bring to a boil. Add the slurry while stirring continuously and simmer until the sauce thickens; for a bright red sauce, take off the heat now or keep simmering for 5-7 minutes for a more homogenous, cooked-through cherry sauce.


Einkorn Pancakes

1 1/2 cups all-purpose einkorn flour

3 tablespoons cacao powder

1 teaspoon baking powder

1/4 teaspoon salt

1 cup buttermilk or full-fat milk

1 teaspoon vanilla extract

2 eggs

1 tablespoon melted butter

2 tablespoons honey

Combine all dry ingredients in a large bowl and mix well. Add the remaining ingredients to a separate bowl and mix with a hand mixer until frothy. Add the dry mixture to the liquid mixture and stir until the batter is smooth. Allow batter to rest for a few minutes, as einkorn is slow to absorb liquid. Heat a skillet over medium heat, add desired amount of batter (about 1/4 cup) and cook on one side until the edges look done and the center bubbles up, then flip for a brief moment to finish cooking. Serve right away with toppings of your choice.   PS

German native Rose Shewey is a food stylist and food photographer. To see more of her work visit her website, suessholz.com.
Focus on Food

Focus on Food

Hearts of Stone

A sweet and savory summer flatbread

Story and Photograph by Rose Shewey

We no longer want to be just rich. We want to be eco-rich. It may be a generational thing or perhaps it is the zeitgeist, but either way, forget the townhouse with the smart fridge in your up-and-coming neighborhood. Give us an apple orchard with flower meadows on a spring-fed creek and we’ll consider ourselves wealthy. With peach vendors popping up like beach umbrellas and hot tub-sized crates of watermelon lining the produce aisles of every store this time of year, even if you’re not lucky enough to have the acreage (or the time) for a garden of your own, it’s impossible not to see the beauty and richness Mother Nature is affording us, particularly in the stone fruit department.

Cherries were my first love; I grew up with a cherry tree in my parents’ courtyard, and year after year it grew heaps of the most aromatic, crimson-colored cherries. Apricots and plums would grow lavishly in our cool temperate fields, but the climate in my home pastures didn’t allow for peaches. What once was an exotic fruit to me, lumped in with kiwis and mangoes on the market shelves, is now a cherished local harvest, thanks to the sandy soil of this region.

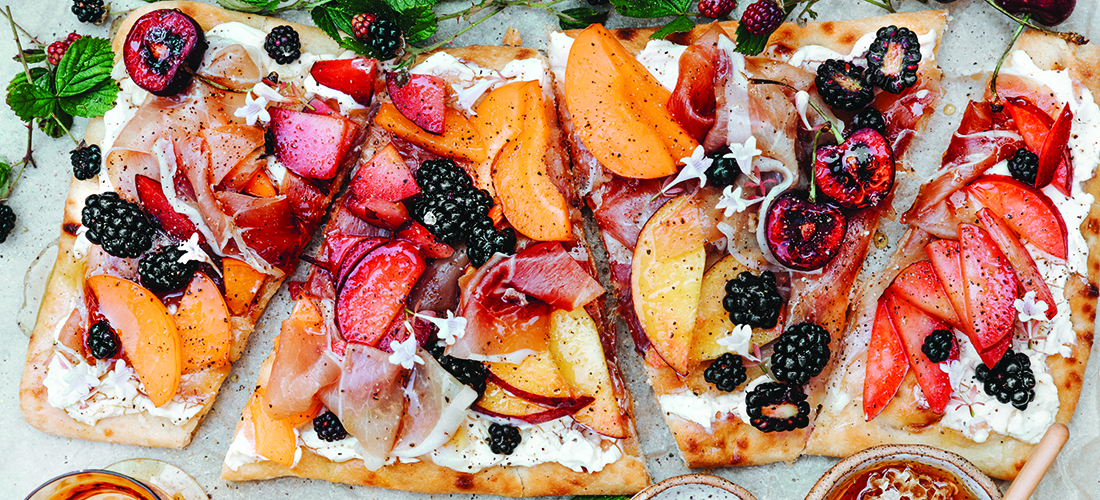
Let’s put the traditional grilled stone fruit and cobbler business on the back burner and try out a more hearty, wholesome meal idea. This sweet and savory flatbread comes together in no time, and cooking is completely optional — that is, if you use a store bought (or pre-made) base, otherwise it will just take minutes to make your own delicious flatbread. You can make this ahead of time or when you need it; topping options and combinations are limitless, and the end result has always been, without fail, a beautiful reflection of summer’s bounty.


Easy Skillet Flatbread

(Makes 4 medium size flatbreads)

2 cups all-purpose flour

1 1/2 teaspoons baking powder

1 teaspoon fine sea salt

1 1/2 tablespoons olive oil

1 teaspoon sweetener, such as honey or granulated sugar

3/4 cup cold water

Combine all ingredients in a bowl and knead for 3-5 minutes, until smooth. If the dough is too sticky, add extra flour; if the dough is too dry, add water, one teaspoon at a time. Divide into four equal parts and roll out to desired shape (about 1/4-inch thick). Heat a large skillet over medium/high heat. Add heat-stable oil (e.g., avocado oil) to the pan and, once heated, add rolled-out dough and cook for about 2 minutes on each side. Reduce heat slightly once you flip the bread, repeat with all remaining portions.


Whipped Goat Cheese

8 ounces goat cheese

3 ounces cream cheese

2 cloves garlic

1 tablespoon olive oil

3/4 teaspoon salt

1 teaspoon lemon zest

2-3 teaspoon fresh herbs, chopped, such as chives or thyme (optional)

Remove goat cheese and cream cheese from the refrigerator about 30 minutes before preparing this dish. Add all ingredients, except for the fresh herbs, if using, to a food processor and blend until creamy. If the texture is still crumbly after blending for 1-2 minutes, add more olive oil, one teaspoon at a time. Fold in fresh herbs and refrigerate up to 3 days.


Toppings

2-3 pieces of sliced stone fruit per person (such as peaches, apricots or plums)

Prosciutto slices

Blackberries

Honey

To assemble, spread whipped goat cheese generously on your flatbread, arrange sliced stone fruit, prosciutto and berries to your liking, drizzle with honey and serve.  PS

German native Rose Shewey is a food stylist and food photographer. To see more of her work visit her website, suessholz.com.

Focus on Food

Focus on Food

Red, White and Scoop

Homemade ice cream with natural dyes

Story and Photograph by Rose Shewey

America, my sweet home away from home. Thirteen years ago in August, you literally took my breath away when I immigrated via Orlando International Airport and, exiting through the sliding doors of Terminal A, was swallowed up by a thick cloud of heat and humidity that momentarily stopped me in my tracks.

While I have yet to adapt to the climate in the Southeast — a mild day in April resembles an average Central European midsummer day — I have reached expert level in managing sweltering summer heat and refining cool-down techniques. If migrating north between the months of June and October is not an option, the least one can do to survive these long, hot summers is get a season pass for the pool and eat lots, and I mean lots and lots, of ice cream.

In honor and celebration of The Star-Spangled Banner, I am shining the spotlight on food dyes and I’ll let that cat right out of the bag — you do not have to use artificial dyes to achieve stunningly vibrant, saturated colors, in ice cream or any other foods. There are a couple of all-natural brands on the market that produce gorgeous vegetable dyes that will knock your socks off. But do not fret, I have also had great success with some fantastic home-dye options.

Red

Powdered raspberries or strawberries will not just give your creation a beautiful blush color (or light red if you use large quantities), but also add an attractive flavor to your food. Red beet powder (not juice) is a decent colorant, and surprisingly, does not impart the quintessential earthy root vegetable flavor. It does, however, turn slightly more magenta than red, in my experience.

Blue

My favorite blue coloring agent is blue butterfly pea flower. This powder turns into a pastel blue with lavender undertones, but it depends on what you color and how much you use. Blue spirulina is another reliable and potent dyeing agent for a vivid blue color.

Advising on the exact measures is tricky when it comes to natural food dyes. The outcome depends on so many factors, such as the pH level of the food you are dyeing and the freshness of your colorant, to name just two. It takes some experimenting but it is so rewarding to draw from Mother Nature to refine home-crafted treats.

All romantic notions and sweet childhood memories aside, making ice cream is cold, hard science. With commercial ice cream as the gold standard in terms of texture and viscosity, homemade ice cream tends to disappoint (think large, grainy ice crystals), but by understanding the ideal ratio of the basic components of ice cream, as well as inviting all-natural texture boosters into your kitchen, the perfect hand-crafted scoop is well within reach.


Blank Canvas ’n’ Ice Cream

(Makes 1 quart ice cream)

(A basic dairy and egg-free ice cream recipe that can be adapted to any flavor)

4 cups dairy-free milk (see notes)

1/4 cup sweetener (e.g., granulated sugar or honey)

1 teaspoon agar flakes

2 teaspoons tapioca starch

1/2 cup smooth nut butter (e.g., almond butter or coconut manna)

Pinch of salt

1 teaspoon vanilla extract (optional)

In a medium skillet, bring the milk to a boil, whisk in sugar and agar flakes, and simmer for 8-10 minutes. Stir frequently to completely dissolve agar flakes. Meanwhile, prepare a tapioca starch slurry: In a small cup, combine tapioca starch with about 1 tablespoon of cold water and mix well. Turn off heat and whisk tapioca starch slurry into the milk, allowing the residual heat to cook the starch. For best results, add your ice cream base to a blender together with your nut butter, salt and vanilla extract and, if desired, food dye, and process until smooth. However, you can also mix in the remaining ingredients by hand. Allow the mixture to completely cool off in the fridge, pour into your ice cream maker and churn according to the manufacturer’s directions.

Notes

This recipe was tested with both homemade nut milk (almond milk and cashew milk) and store-bought nut milk with zero additives (no added gums or emulsifiers).

For a bright white ice cream base, use white granulated sugar or a light-colored honey and coconut manna (coconut butter).  PS

German native Rose Shewey is a food stylist and food photographer. To see more of her work visit her website, suessholz.com.

Focus on Food

Focus on Food

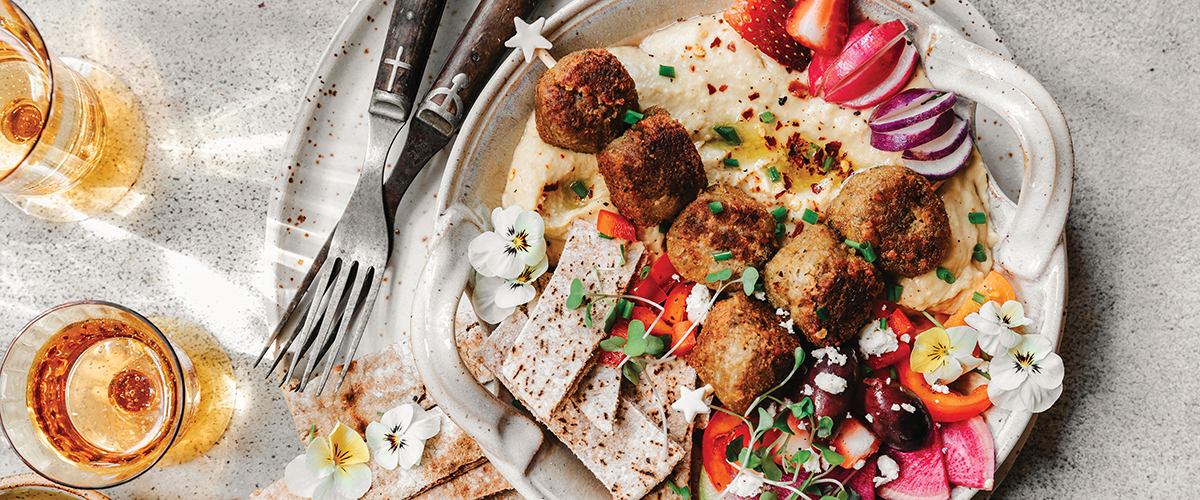
I Dream of Falafel

Iconic street food from the Levant

Story and Photograph by Rose Shewey

Do you know what North Carolina and North Africa have in common? We’re on the same latitude. Consider that for a moment! If you’re looking out onto the Atlantic Ocean in North Carolina you’re on par with Morocco. When inquisitive friends and family from overseas ask about the climate in our part of the world, I typically tell them that we may as well be in Casablanca. You know, if Casablanca was muggy.

I was so fortunate to visit North Africa and parts of the Levant in my younger years. I had just turned 18 and set up shop at the Costa del Sol in Spain for the summer. I vividly remember the day I was lounging at the beach in sunny Marbella; it was a particularly clear day, not a cloud in sight and the morning haze had just dissipated. As I gazed across the azure tinted Mediterranean sea, I saw her. I saw Africa and she was calling my name. Within less than 24 hours, I was on a ferry crossing over from Gibraltar, Spain to Tangier, Morocco. I was unaccompanied with little more than a small backpack, clutching on to my passport, ready to set foot on African soil.

North Africa is hands-down one of the most exotic and colorful places I have visited. While I have many rich memories of this trip, traversing the northern tip of Africa all the way from Morocco to transcontinental Egypt, what stands out the most is the allure of the Arab and Mediterranean cuisine, particularly the many different renditions of falafel I tried. No, I didn’t make it to Israel, the alleged home of the falafel where, rumor has it, you cannot turn around without ending up in the queue of a falafel shop. However, despite its popularity in Israel, most agree that falafel probably originated in Egypt. In fact, if you happen to go to a McDonald’s in Cairo, you’ll find McFalafel on the menu, bizarre as it may seem.

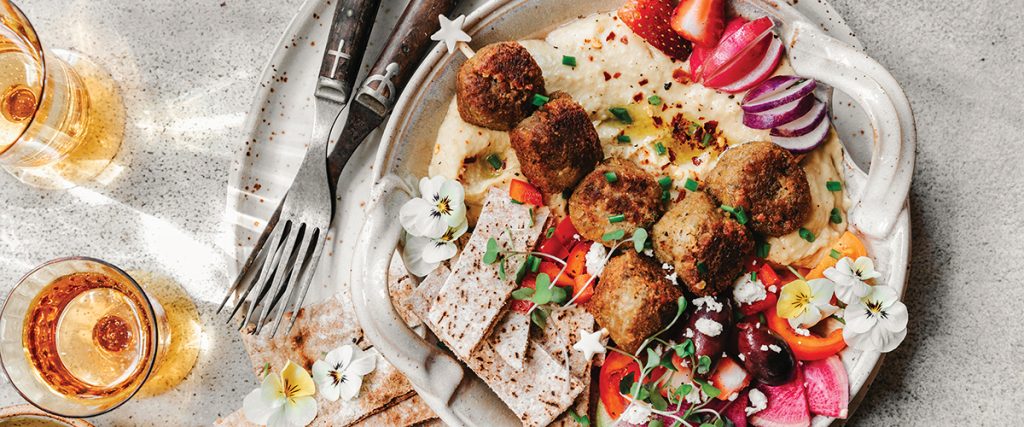
There are many reasons to love falafel. The most obvious is that these golden-baked, crispy balls drizzled with tahini sauce and stuffed into a fluffy pita or served as part of a meze are bursting with flavor. Falafel are also a fabulous gateway to a more plant-based life-style; with their meatball-esque texture, they leave little to be desired. June 12 marks the annual international falafel day, but why wait; there is no wrong time to enjoy the world’s oldest (and perhaps healthiest) fast food. 

Falafel

(Makes about 20 balls)

Ingredients:

1 1/4 cups dried chickpeas, soaked overnight

1/2 cup onion, finely chopped

4 garlic cloves, crushed

1/2 cup flat-leaf parsley, finely chopped

1/2 cup cilantro, finely chopped

1/4 teaspoon cayenne pepper

1 teaspoon ground cumin

1 teaspoon salt

1/2 teaspoon cardamom

1/4 teaspoon black pepper

2 tablespoons chickpea flour

1/2 teaspoon baking soda

Avocado oil for frying (optional)

Drain the chickpeas and add them to a food processor along with the onions, garlic, parsley and cilantro. If you have a small food processor, mix in batches; pulse each batch for about 30 seconds until the ingredients are finely chopped and hold together well. Once processed, add the spices, chickpea flour and baking soda and mix by hand; if the mixture feels too dry, add 1-2 tablespoons of water. Cover and refrigerate the mixture for at least 1 hour before processing.

Using your hands or an ice cream scoop, form balls or patties (about 1 tablespoon of mixture per ball).

You can now deep-fry or bake your falafels. To deep-fry, add about 4 inches of oil to a heavy-bottomed pot and heat the oil to 350°F. Cook falafels in batches, for about 3-4 minutes until they are golden brown. Transfer to a paper-towel lined plate and serve immediately.

To bake the falafel, pre-heat the oven to 425°F. Place the falafel on a baking sheet lined with parchment paper, brush the top of your falafel with oil and bake for 25 minutes. Flip falafel halfway through baking. Serve right away.  PS

German native Rose Shewey is a food stylist and food photographer. To see more of her work visit her website, suessholz.com.
Focus on Food

Focus on Food

Mama Don’t Bake

A simple cheese-less cheesecake

Story and Photograph by Rose Shewey

I talk about diet and nutrition as much as I talk about politics and the weather. Practically never.

To be honest, diet-talk is a regular snoozefest, in my book. But aside from lacking entertainment value, arguing diet- and nutrition-related issues is a no-win undertaking. Having self-studied nutrition for over a decade, I have come to understand that opinions, as well as science, vary tremendously on the subject and — as anybody who survived the great margarine craze knows — change fundamentally from time to time. Throw in body image and weight loss issues, and you’re in for some potentially awkward discussions. No thanks.

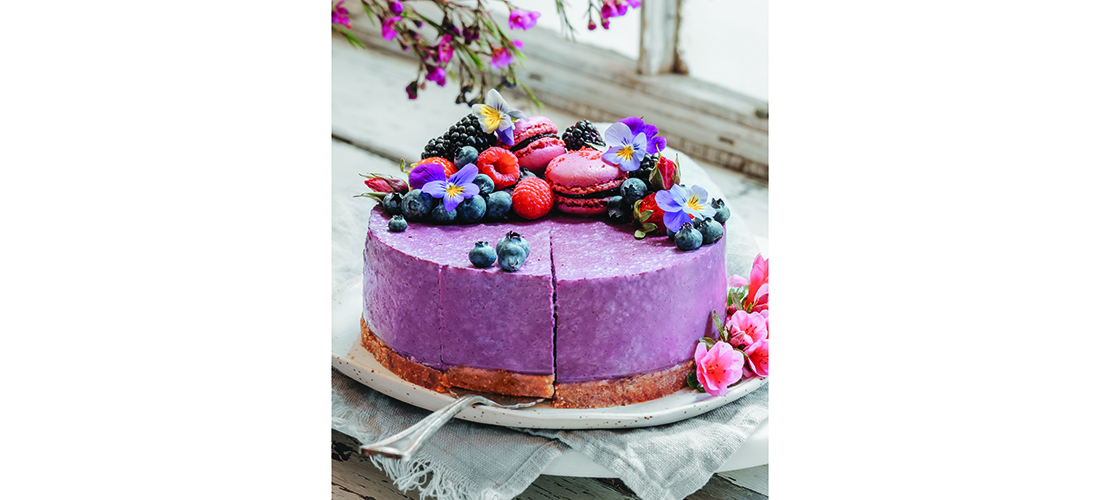
Still, despite all the controversies, can we agree that nutrient-dense foods are an excellent choice? I wouldn’t do this cheesecake any justice if I didn’t touch on the fabulously valuable ingredients this recipe calls for. I am talking about chia seeds, dates, almonds and cashew yogurt, as well as blackberries and even agar. For most health-minded chefs, particularly in the plant-based kitchen, there is something incredibly satisfying about adapting and healthifying conventional recipes. Substituting less nutritious ingredients with nutrient-rich, minimally processed foods to create a dish that looks, tastes and feels like the original is uniquely rewarding.

Take cheesecake, for example. To be clear, there is nothing wrong with regular cheesecake. I’ll be the first to grab a slice off the dessert buffet, but if I can have something of equal quality made with more wholesome ingredients, I will choose the more nourishing version every time.

So, does this cheese-less cheesecake taste like, well, cheesecake? It does. The yogurt gives it that tangy flavor, the texture is creamy and lush but firm enough to maintain its shape beautifully. On a scale of New York-style cheesecake to thick custard, this falls somewhere in the middle. And the proverbial cherry on top? This is a no-bake cake.


No-Bake Blackberry Chia Cheesecake

Crust

90 grams (8-10) dates, pitted

100 grams  (1 cup) ground almonds, blanched

1 teaspoon vanilla extract

Pinch of salt

Cake

340 grams (12 ounces) yogurt — I used store-bought cashew yogurt

55 grams (5 tablespoons) chia seeds

70 grams (about 1/4 cup) maple syrup, or more, to taste

1 can (400 milliliters) unsweetened, full fat coconut milk

3 tablespoons agar flakes (not powder)

300 grams (2 cups) blackberries, fresh or defrosted

Soak dates in boiling water for 10-15 minutes. Line the bottom of a 6-inch springform pan with parchment paper. Drain dates and squeeze out any excess water. Place all ingredients for the crust into a food processor and blend. Scrape down sides frequently while blending until you have a sticky, slightly coarse paste. Press the crust evenly into the bottom of the springform and set aside.

Mix yogurt with chia seeds and maple syrup and refrigerate. Stir the mixture occasionally to maintain an even texture. Pour coconut milk into a small saucepan, add agar flakes and bring to a boil. Reduce heat and simmer for about 6-8 minutes (or according to package instructions), stirring frequently. Meanwhile, add berries to a high speed blender and puree. Transfer berries to a large bowl and add coconut agar mixture, whisk to combine, then quickly incorporate the chia yogurt. Taste for sweetness; you may want to add more maple syrup if you like sweeter cakes, and promptly pour cheesecake mixture into the springform. Transfer cheesecake to the refrigerator and allow to set and chill for at least 3 hours, ideally overnight. Serve with fresh fruit or coconut cream.  PS

German native Rose Shewey is a food stylist and food photographer. To see more of her work visit her website, suessholz.com.
Focus on Food

Focus on Food

Mademoiselle Brioche

A sweet bread for Easter

Story and Photograph by Rose Shewey

If “brioche” conjures up images of burger buns, and little else, have you even lived yet?

Sure, brioche can be a party girl. She makes fabulous burger and sandwich bread, no doubt, but that’s just scratching the surface of what brioche is capable of. Yes, she can be your flip-flop-wearing, tank top-sporting drinking buddy, but if you ever had chocolate-glazed diplomats, you know she can also be your sophisticated wedding date in a lacy dress with kitten heels.

Or, as I am about to show you, brioche can effortlessly turn into your folksy, linen-trousered best friend with dangling earrings, one that is always full of surprises. Brioche is truly multifaceted but rarely ordinary.

For those of you who don’t geek out over baked goods, allow me to explain: Brioche is a delicate, buttery yeast bread (technically, it is a Viennoiserie), similar to everyday yeast breads, but picture a downy cloud made of fine-spun cotton and you have yourself some epic brioche. It also happens to be one of the easier bread recipes to make — if you own some sort of kneading gadget, which I do not.

I stubbornly hand-knead my dough. Nothing is quite as meditative and grounding as using your bare hands to make bread; feeling the texture transform between your fingers from powdery, gooey and slippery to a satisfyingly malleable shape. Making dough is the grown-up equivalent of a toddler’s sensory bin, if ever I have seen one. Bonus points if your dough later doubles in size, which it hopefully will, and you have passed the halfway mark to a feathery brioche, whichever shape or form you decide to process it into.

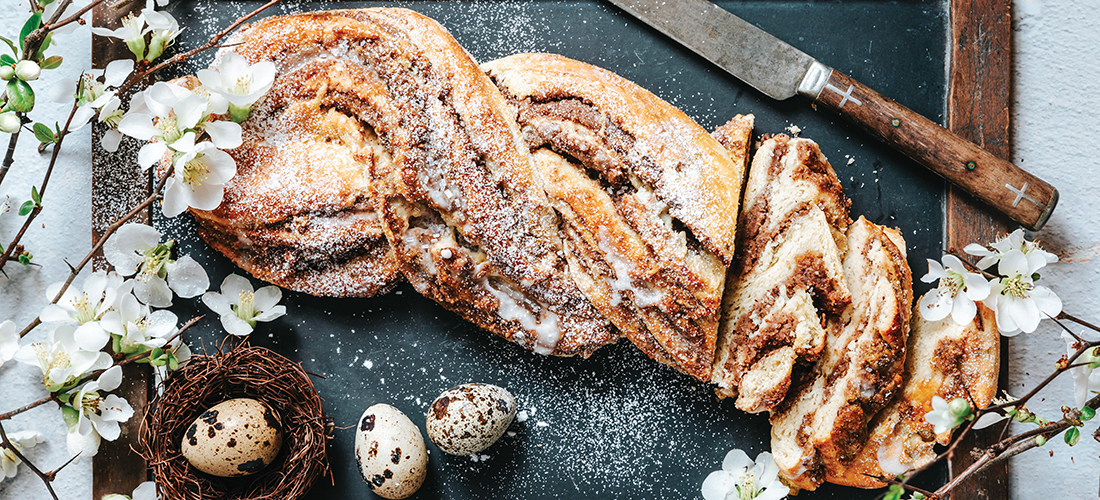
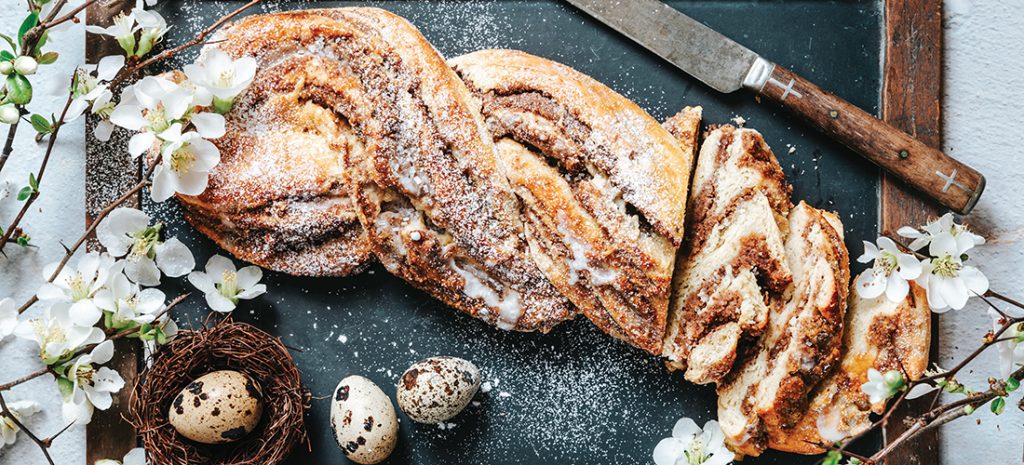
With Easter, or Ostara, on the horizon — you know, that time of the year that marks the awakening of the earth and colors the land in lovely shades of pastel — many cultures celebrate with the tradition of braided yeast bread. The interpretation of its symbolism is wide-ranging and differs significantly, depending on the Kulturkreis. For me, it’s simply a family tradition that brings back memories of my grandma’s kitchen; the sweet perfume of freshly scraped vanilla beans, the earthy scent of fermenting yeast and us kids sticking our fingers into the sugar-lemon glaze bowl, which ultimately got us banished from the room. We didn’t call it brioche then; I didn’t connect the dots until later on, when I went on my own baking journey, and of all the things brioche can be, the Easter braid will forever be my favorite.


Mocha Hazelnut Brioche Braid

(Makes 1 braided loaf)

(Basic dough recipe adapted from
Bouchon Bakery)

For the dough:

270 grams all-purpose flour

6 grams instant yeast

30 grams granulated sugar

7 grams salt

130 grams eggs (roughly 3 medium sized eggs)

45 grams milk

120 grams unsalted butter, cut into 1/2 inch cubes

For the filling:

150 grams finely ground hazelnuts

30 grams sugar

30 grams chocolate spread

5 grams cinnamon

50 grams grated apple

60 grams brewed coffee

8 grams freshly squeezed lemon juice

Place flour and yeast in a large mixing bowl and whisk to combine. Add remaining ingredients except for the butter and mix for 5 minutes by hand, or with the help of a stand mixer with dough hook. Continue kneading for 30 minutes while slowly adding in small chunks of butter. Fully incorporate each chunk of butter before you add the next. The dough will be slightly sticky at this point; remove it from the bowl (use a scraper if needed) and place it on a lightly floured surface. Pat, stretch and fold the dough, then place it back in the bowl, cover and allow to rest for 1 hour at room temperature. Repeat the pat, stretch and fold before moving the dough to the refrigerator and chilling overnight.

Combine all ingredients for the mocha hazelnut filling and set aside. Take the dough out of the fridge and set on a lightly floured surface. Roll out the dough to form a rectangle (about 30×45 centimeters) and cover evenly with the mocha hazelnut filling. Roll up the dough tightly lengthwise, then cut it in half lengthwise and entwine both strings to form a braid. Move your braid to a baking sheet and allow to rest at room temperature for 30-45 minutes. Preheat oven to 325F, apply egg wash, if desired, and bake for 30-35 minutes or until braid turns a light golden color. .  PS

German native Rose Shewey is a food stylist and food photographer. To see more of her work visit her website, suessholz.com.
Focus on Food

Focus on Food

The Best of Both Worlds

Poke takes the mainland

Story and Photograph by Rose Shewey

If you are on the periphery of pop culture, you will likely miss a number of trends, hypes and hashtags. I am fine with the general concept of it. In fact, I am quite comfortable in my state of pop-apathy, unruffled by much of the noise and excitement of mainstream culture. However, it also means I occasionally miss out on something of value. In terms of food, I wish I had paid attention about five years ago when poke bowls rose to fame and conquered the mainland.

Not only was I snoozing on this tasty development but, without giving it much thought, I assumed that poke bowls were of Japanese origin. In my defense, as a native to Central Europe, far removed from any island living, what was I to think of a dish served with sushi rice, raw fish, chopsticks and pickled ginger? (Unsurprisingly, the mainland rendition of poke differs significantly from authentic island poke, but I’ll get to that in a minute). If you, like myself, were off by about 4,000 miles and didn’t know poke is a traditional Hawaiian dish, you’re in good company. I have since learned that, unless you are greeted at the door by aloha signs and grass skirt-wearing waiters, not many people seem to know (or care) where poke comes from as long as it tastes good. And I can get on board with this.

A purist at heart, I’m torn when it comes to straying from tradition; talk about (con)fusion cooking. If the heart of the matter is preserved — which is highly subjective, of course — I’m generally in favor of mixing things up, but please make it an homage to the original, or call it something else. Original Hawaiian poke’s roots go back to when the first Polynesians came to the island. Supposedly, Captain James Cook was served poke during a visit to Hawaii in the late 18th century. Poke literally means “to slice, cut crosswise into pieces.” What is typically served as a simple snack on the island morphed into a wholesome meal on the continent.

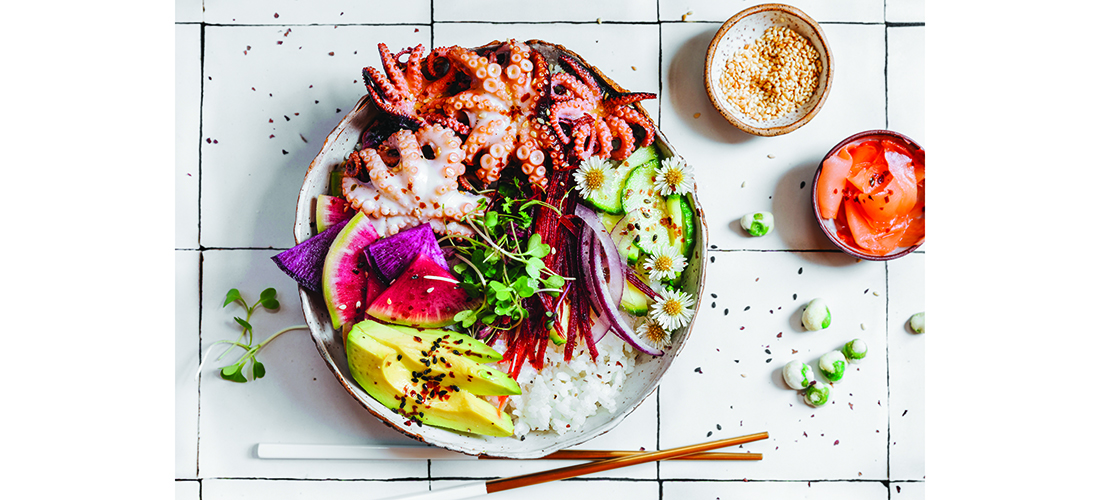
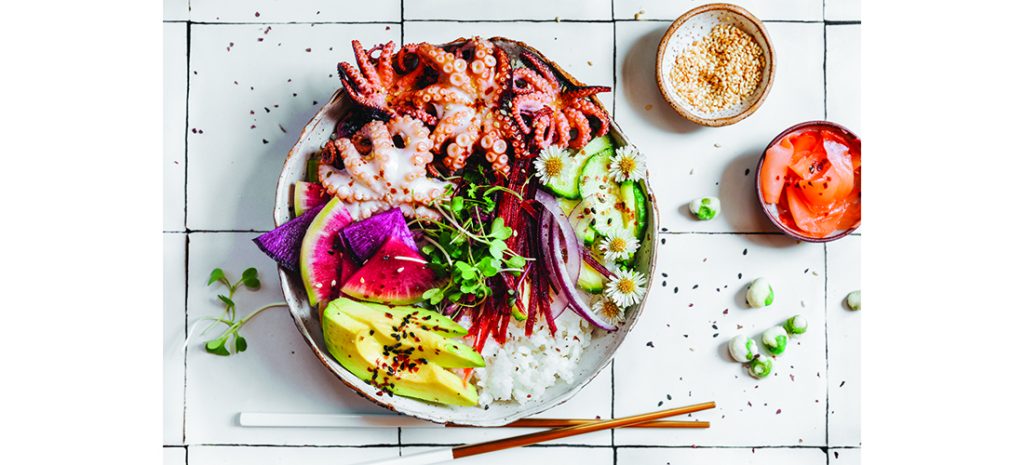
To honor tradition as well as to indulge in the playful bowl-culture of our time, making octopus “tako” poke gets you the best of both worlds, without too much of a compromise. Unless you drown your poke in spicy mayo, then you cannot be helped. Octopus, alongside tuna, is one of the classically used poke ingredients; you can do as the islanders do and eat it raw, without sides, or serve it hipsterville-style on a bed of rice with seaweed and avocado. Either way is scrumptious and definitely picture-worthy.


Tako Poke Bowl  (Serves 2)

For the bowl

12-16 ounces baby octopus, cooked

3 cups sushi rice, cooked

For the relish

1 medium-size tomato, diced

3 tablespoons shoyu (can substitute soy sauce or tamari)

1 tablespoon sesame oil

1 teaspoon grated ginger

1/2 teaspoon crushed red pepper flakes

1/4 cup chopped green onions

1 tablespoon rice vinegar

1 teaspoon honey

Additional optional toppings: sliced avocado, cucumbers and radishes, sprouts, toasted sesame seeds, julienned carrots, roe, pickled ginger, seaweed flakes or salad.

Cut octopus into bite-sized pieces. In a small bowl, combine ingredients for the relish and mix well. Add octopus, stir once more to combine, cover and chill before serving. To serve, add sushi rice to a bowl, top with tako (octopus) poke and add additional ingredients of your choice.  PS

German native Rose Shewey is a food stylist and food photographer. To see more of her work visit her website, suessholz.com.