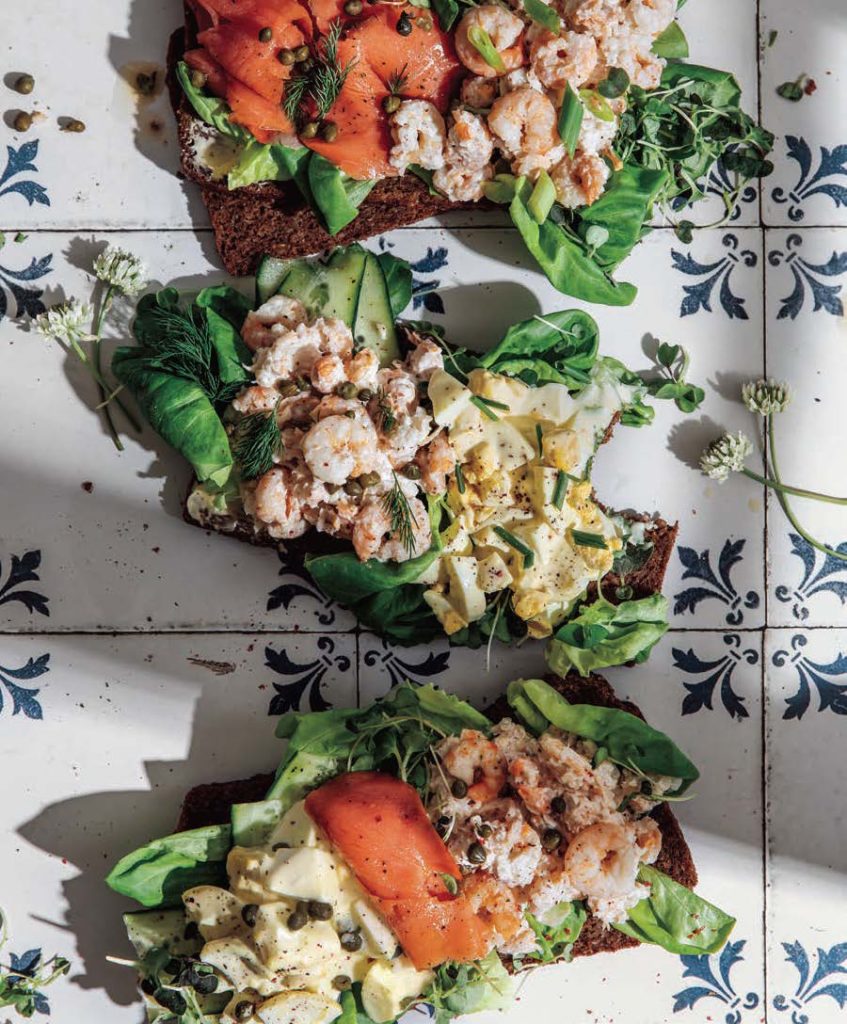
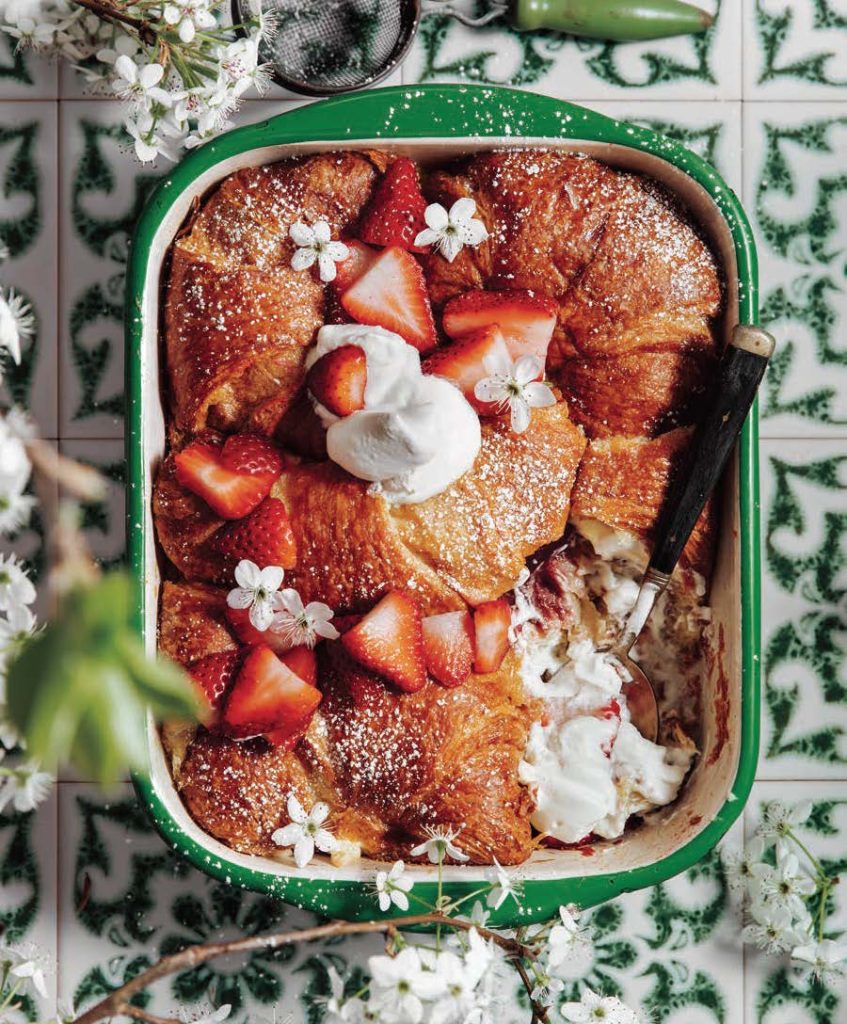
Focus on Food

FOCUS ON FOOD

Spectacular Speculaas

Cookies for St. Nicholas

Story and Photograph by Rose Shewey

Speculaas cookies are works of art with a wonderfully charming backstory. Not quite as popular as gingerbread — unjustly so, I might add — speculaas were originally made with hand-carved wooden molds that produce filigran shapes with extraordinary relief details. That’s how I make mine — but sit tight, there are other options for those of you without fancy mold contraptions.

The original cookies depicted the story of St. Nicholas, the bishop of Myra (modern day Turkey), who is said to have brought treats to children in December. St. Nicholas was known as the “Speculator” (overseer or observer), and legend has it that in the evenings he would peer (as in, speculate) through the windows of the poor to see who needed help. This may explain both the curious name and why the speculaas is a customary St. Nicholas Day sweet treat, especially in the Netherlands, where these cookies likely originated. And it’s probably why the most famous speculaas cookie these days depicts a windmill.

Known as speculaas in Dutch, spéculoos in French or spekulatius in German, you might encounter any of the three names while on the hunt for recipes or store-bought cookies. These sweet treats have as much tradition and lovely, wintery warm spices as gingerbread but are much easier to prepare (gingerbread dough is traditionally started two months ahead of time and left to rest) and, dare I say, more refined and delicious.

In place of the wooden molds, lots of folks use a carved or embossed rolling pin or cookie cutters. The simplest way of preparing these is, however, to roll out the dough and slice it into smaller rectangles, which can be decorated with a piece or two of sliced almonds. The recipe I use is adapted from the German Baker’s Guild, which represents a basic version with room for growth — adjust the amount of spices used or add some of your own. To make butter speculaas, increase the amount of butter by 100 grams and add an extra egg. 

Speculaas Cookies

(Makes about 40 pieces)

150 grams butter, room temperature

1 egg

110 grams brown sugar

Zest of 1 lemon

60 grams almond flour

2 teaspoons ground cinnamon

1/2 teaspoon ground cloves

1/2 teaspoon ground cardamom

300 grams wheat flour

Directions

Cream the butter, egg and sugar with an electric mixer for at least 8-10 minutes until light and fluffy. Stir in the lemon zest, spices and ground almond, then add flour into the mixture. Knead all the ingredients together by hand to form a firm dough. Shape the dough into two balls, wrap them in cling film, and chill for about 1 hour. Remove one portion of dough from the refrigerator. If using a speculaas mold, tear off small sections of the dough and press them into the lightly floured molds. Use a knife or a piece of thread to cut excess dough from the mold to create a nice, flat cookie backside and smooth edges, then gently tap the mold on your working surface until the cookies pop out. Transfer to a baking sheet lined with parchment paper. If using cookie cutters, roll out the dough thinly (about 4 millimeters) between two sheets of parchment paper. Dust lightly with flour. Cut out shapes and set them on a baking sheet lined with parchment paper. If using a speculaas (or embossed) rolling pin, gently but firmly roll over the rolled out dough to cut out shapes. Carefully separate the speculaas shapes using a butter or pastry knife and transfer them to a baking sheet lined with parchment paper. Knead the leftover dough together again and roll it out anew. Chill cookies for about 2 hours before baking. Heat the oven to 350F and bake for about 8-10 minutes, but keep a watchful eye on the cookies, they burn quickly. The cookies will seem soft right after baking but will harden once they cool. Repeat with the remaining dough.

Focus on Food

FOCUS ON FOOD

Thanksgiving to Scale

Cornish game hens for two

Story and Photograph by Rose Shewey

Far be it for me to suggest you have anything but turkey for Thanksgiving. Tradition is tradition. But for practical purposes, those big ol’ birds may not be the perfect solution for every household across the land — especially those who celebrate in a more intimate setting or by their lonesome.

Take my family, for instance: There’s Mom, Dad, and a 7-year-old picky eater. If just the three of us opted to celebrate at home, even the smallest gobbler would produce days’ and days’ worth of leftovers. And, quite frankly, we don’t love turkey enough to have it for breakfast, lunch and dinner for an entire week.

Case in point: In 2024 my mom came to visit from Germany, where this very American holiday isn’t celebrated. To give her the complete experience of a traditional Thanksgiving dinner, we bagged the smallest turkey we could find and roasted it in the oven, along with all the usual fixings. The meal was spectacular but in the days that followed, we grew increasingly tired of coming up with ideas on how to use up the leftovers.

Passing on turkey does not mean you have to be content with ordinary, everyday fare on the last Thursday in November. Quite the opposite. While turkey is special, so are Cornish game hens — for the novelty of having a whole miniature bird on your plate, if nothing else. One bird makes about one portion of meat. Cornish game hens are extraordinarily tender and, contrary to their name, not “gamey” at all.

I’m in good company on Thanksgiving since my husband is as pragmatic about large stuffed birds as I am — as long as the substitute isn’t nut loaf.

Autumn Spiced Cornish Game Hens with Roasted Pears

Ingredients

2 Cornish game hens, fully thawed

2-3 tablespoons olive oil

2 pears

Maple syrup, for drizzling

Balsamic vinegar, for drizzling

(For autumn spice rub)

2 tablespoons smoked paprika

1 tablespoon onion granules

1/2 tablespoon garlic granules

1/2 tablespoon ground coriander

1 teaspoons sea salt

1 teaspoon ground cinnamon

1/4 teaspoon ground nutmeg

Directions

Begin by making the spice rub. Combine all the spices in a small bowl and mix with a fork. Set the Cornish game hens in a roasting pan and remove giblets, if your birds have any inside. Brush a little olive oil on the hens, then massage the spice rub into the skin and all over the birds. Tuck the wings and tie the drums together using butcher’s twine. Bake in the oven on a lower rack at 425F for 50-60 minutes, or until the thickest part of the breast reads 165F. Cooking time will vary depending on the size of your hens. Wash, dry and halve the pears, scoop out cores and drizzle pears with a little maple syrup and balsamic vinegar. Arrange them next to the hens in the roasting pan for the final 20 minutes of cooking. Serve roasted Cornish game hens and pears with roasted potatoes and/or vegetable or any of your favorite side dishes. 

Focus on Food

FOCUS ON FOOD

A Pearfect Composition

Poire belle Hélène, compote-style

Story and Photograph by Rose Shewey

Say what you will about King Louis XIV of France — often characterized by his foes as a pompous, philandering tyrant — but he got at least one thing right: The “Sun King” declared the pear to be a royal fruit. Among his more celebrated traits was his passion for fine art and culinary excellence, and with that, the French king recognized the gastronomic value of the often underrated pear.

In the royal kitchen garden at Versailles, the Potager du Roi, Louis XIV planted over 140 different varieties of pear trees! That’s roughly 130 more than the U.S. knows today. There are only 10 key varieties grown commercially across the United States. Europe fares a tad better in this regard: While supermarket pear varieties are also limited, hundreds of heirloom pear types are conserved and fostered by private growers and boutique tree nurseries.

The story of the rise of the pear to Olympic heights continued in France — where else? When composer Jacques Offenbach premiered his hugely successful operetta La belle Hélène in 1864 in Paris, no other than Georges Auguste Escoffier, the “king of chefs and chef of kings,” took it upon himself to create a dish in celebration of the beautiful Helen, the namesake of a dessert that should be known around the globe.

The genius of the recipe for “Poire belle Hélène” lies in its simplicity: poached pears, vanilla ice cream, chocolate. Variations are numerous, and I’m adding my own, slightly simplified version. Instead of a poached whole (or half) pear, I make pear compote, which only takes minutes on the stove and boasts flavor through and through. Vanilla ice cream is hard to top, but a vanilla creme made of yogurt and heavy cream is a stellar, slightly more versatile substitute. Don’t omit any chocolate on my behalf — but cacao nibs are a lovely addition that adds some crunch, in more ways than one.

Pear Compote with Vanilla Crème

(Serves 2)

Vanilla Crème

1 vanilla bean

200 grams heavy whipping cream

1-2 tablespoons sugar

200 grams Greek yogurt

Cut vanilla bean lengthwise and scrape out seeds into a tall bowl, or the bowl of your stand mixer. Add heavy whipping cream and sugar and whip, using a hand mixer or stand mixer, until cream is semi-whipped. Start adding spoonfuls of yogurt while continuing to whip until you have a thick cream, then refrigerate.

Pear Compote

3-4 pears (about 400 grams), such as Bartlett or Red Anjou or any other variety of your choice

3 tablespoons butter

2-3 tablespoons muscovado sugar (or other dark, rich sugar)

Pinch of salt

Wash and peel pears, then cut them lengthwise into thin slices or dice, as desired. Melt butter in a heavy bottomed pan on medium/low heat and gently toss pears, until they are lightly sautéed, about 3-4 minutes. Add muscovado sugar and simmer on low heat until liquids turn syrupy and pears are softened. Add a pinch of salt and serve warm with vanilla creme.

Focus on Food

FOCUS ON FOOD

Flavorful Fungi

To forage or not to forage

Story and Photograph by Rose Shewey

Many moons ago, my mom would — in my memory, at least — merrily skip along the wooded trails of my childhood, wicker basket in hand, humming a little tune while foraging for mushrooms in the later months of the year. We children usually followed along curiously while my dad trailed behind us, ever so doubtful about my mom’s undertaking. And I don’t blame him.

Hunting for wild mushrooms is serious business. Looking at guidebooks that list edible mushrooms together with their toxic doppelgänger, I find myself squinting at the images to spot the difference and still am uncertain. Sadly, I did not pick up on my mom’s traditional knowledge of identifying wild mushrooms. Much like my dad, I have internalized the old adage “when in doubt, throw it out.” Or rather, when in doubt, don’t even touch, let alone add, the ’shrooms to your basket.

Just because you don’t forage for mushrooms doesn’t mean you’re condemned to a life of grocery store portobellos, as tasty as they can be. Thanks to the ever growing number of independent mushroom farmers, we now have access to a wide variety of fungi — even in, and certainly outside, the produce aisles.

As a quasi-flexitarian — someone who eats meat only occasionally — I adore mushrooms as the quintessential meat substitute. With their meat-like texture and plenty of umami (savory flavor) mushrooms have always been, and always will be, my favorite ingredient in vegetarian dishes. 

Mushroom and Chestnut Stroganoff

(Serves 2)

Ingredients

3 tablespoons olive oil (divided)

6 ounces chestnuts, cooked and cut in half

16 ounces mushrooms, such as oyster, maitake, shiitake or cremini, sliced

1 medium onion, chopped

2-3 garlic cloves, minced

1/2 teaspoon smoked paprika

1/4 cup sherry

1 tablespoon flour, such as all-purpose or arrowroot

1 1/2 cups vegetable broth

3/4 teaspoon salt

1/2 teaspoon ground pepper

1 tablespoon whole-grain mustard

1/4 cup crème fraîche (optional)

8 ounces cooked pasta, such as egg noodles or rotini

Parsley or chives, chopped, for garnish

Instructions

Heat a large skillet over medium heat, add one tablespoon of olive oil and gently toast the chestnuts until they are fragrant and golden, about 4-5 minutes. Transfer chestnuts to a bowl and set aside. Without adding any more oil to the skillet, begin sautéing mushrooms. Do not crowd the pan and work in batches, if necessary. Cook mushrooms until they start releasing their juices. Allow juices to evaporate and continue to cook briefly while stirring until mushrooms turn golden brown. Transfer to a plate and set aside. Add two tablespoons olive oil to the skillet and sauté onions for 4-5 minutes; add garlic and smoked paprika. Continue to cook for another minute. Add sherry and allow to cook off. Stir in flour, add broth, salt, pepper and mustard, and continue to stir. Bring sauce to a simmer, then add chestnuts and mushrooms and cook until sauce is reduced by about half, approximately 8-10 minutes. Take off heat, stir in crème fraîche, if using, and serve with pasta. Garnish with parsley or chives.

Focus on Food

FOCUS ON FOOD

Percolate This!

Latte macchiato-style ice pops

Story and Photograph by Rose Shewey

If it takes more than a splash of milk and a spoonful of sugar to enjoy your coffee, I’m afraid you may be among those who like coffee-flavored drinks rather than actual coffee. A little bit of cream and sweetener in your brew is what I call an embellishment. Adding a quart of frothy milk, whipped cream and flavored syrups to your beverage conjures up images of county fair treats but has nothing to do with the ancient art of enjoying a good roast. If you can’t relish the dark, bold taste of an espresso or a simple pour-over brew au naturel, you may not be loving coffee as much as you might think.

Why does it matter? Once I started to cut down on the milk in my coffee, I began noticing how downright terrible a lot of coffees taste. One can hide the stalest, most acidic-tasting beans underneath cascades of cream, sugar and flavored additives that completely conceal the fact you were served an inferior roast. I suspect that many a coffee drinker would quit their habit if they knew how bitter and sour their drink truly tastes underneath fluffy add-ons.

So, many years back, I started taking my coffee black, with the occasional “dry” cappuccino (more foam, less milk) thrown into the mix, and it completely changed the way I approach coffee. For one, I no longer frivolously drink coffee wherever it’s served. I’m not afraid to ask for the origin and roasting style of the beans. If I don’t care for the answer, I pass on coffee in favor of tea or, simply, water.

As particular as I may be with how I drink my coffee, I love tinkering about with coffee-flavored desserts where any amount of milk, cream, yogurt or mascarpone can make its way into the mix. Since we avoid turning on the oven in the heat of the summer, I am resorting to ice pops. In memory of my first ever coffee drink, I like making latte macchiato-style pops. When the “latte” is served the traditional way — in glass tumblers — you are rewarded with beautiful layers of milk and coffee, creating a stunning ombre effect.

Latte macchiato — most definitely a gateway drink into a lifelong coffee habit — is not just visually pleasing as a coffee drink, it makes for some extraordinary ice pops, both in how it tastes and looks.

Latte Macchiato Ice Pops

(Serves 6)

10 ounces coffee, such as espresso or filter coffee, freshly brewed and chilled

12 ounces plain yogurt (see notes)

Sweetener, such as honey, maple syrup or granulated sugar, to taste

1 teaspoon vanilla extract

Add sweetener to your coffee — start with a tablespoon and work your way up to a sweetness level of your liking. Note that once frozen, it will taste less sweet so consider adding a little extra sugar. Sweeten the yogurt in the same manner and stir in vanilla extract. To achieve a layered look, add about 1 1/2 tablespoons of yogurt to the base of your ice mold and freeze for 30 minutes. Add more yogurt to each mold until they’re a little more than half full, then slowly pour in the coffee. Inserting sticks will give it a nice stir but for more visual drama, do a figure 8 with your stick in each mold before affixing them properly. Freeze for about 3 hours before serving. (Notes: Using whole milk or plant milk instead of yogurt will result in a less pronounced layered effect but will also taste delicious.)

Focus on Food

FOCUS ON FOOD

Lowcountry Culture

Bringing summer to a boil

Story and Photograph by Rose Shewey

Lowcountry boil is a culinary tradition I like to show off to trans-Atlantic friends and family that visit us in North Carolina. It’s American food culture few people abroad know exists — and it’s a showstopper. The moment you spread out a stockpot full of seafood, sausages and corn on the dinner table, conversations halt, anticipation rises, and strangers become instant friends digging into this delicious feast.

Surprisingly, though, Lowcountry boil doesn’t go back as far in history as I had expected. In the 1960s, a young chap named Richard Gay joined the South Carolina National Guard, where he cooked for his mates at the Beaufort Armory during weekend drills. On one such occasion, he gathered up chow hall leftovers, threw them in a large pot together with fresh shrimp he had sourced from his father’s seafood company, and began cooking. Once finished, he spread out the meal across the tables of the banquet hall — and the legendary low country boil was born.

While most folks call it Lowcountry boil these days, it was originally known as “Frogmore stew.” Frogmore, which technically doesn’t exist anymore, was part of St. Helena Island, near Beaufort, South Carolina — Richard Gay’s hometown community. Perhaps the name Frogmore stew fell out of favor because, well, it’s not really a stew. All liquids are drained off. But don’t get hung up on names. Give this one-of-a-kind Lowcountry feast recipe adapted from The Food, Folklore and Art of Lowcountry Cooking, by Joseph E. Dabney, a try this summer.

Lowcountry Boil

(Serves 6)

Ingredients

4 tablespoons Old Bay seasoning (or make your own, see notes)

1/4 pound (1 stick) butter

4 tablespoons salt

2 pounds kielbasa sausage, cut into quarters

1 large onion, roughly diced

2 pounds small new red potatoes, cut in half

6 ears fresh corn, cut in half

3 pounds peeled deveined shrimp (with tail on)

Fill a large pot (6-quart or bigger) two-thirds full of water and bring to a rolling boil. Add Old Bay seasoning and reduce heat to a simmer. Next, add butter, salt, sausages, onion and potatoes and simmer for about 15 minutes. Add corn, cook for an additional 3-5 minutes then add shrimp. Cook shrimp for roughly 3-6 minutes, until they turn pink and white (instead of opaque). Turn off the heat and allow ingredients to set for a few minutes, drain liquid and serve with more seasoning, cocktail sauce, melted butter dip and coleslaw, if desired.

To make your own Old Bay seasoning, combine 1 tablespoon celery salt; 1 tablespoon hot paprika; 1 tablespoon smoked paprika; 1 1/2 teaspoons mustard powder; 3/4 teaspoon cayenne pepper; 1/2 teaspoon ground black pepper; 1/2 teaspoon ground white pepper; 1/4 teaspoon ground bay leaves; and a pinch each of ground cinnamon, ground cloves and ground nutmeg. Store in an airtight container.

Focus on Food

FOCUS OF FOOD

Skagenröra, Anyone?

A shrimp salad for midsummer

Story and Photograph by Rose Shewey

Our kitchen has always been the hottest room in the house — a 1920s bungalow in the heart of Aberdeen. Even after we had a brand new HVAC system installed about a year ago, the kitchen remains stuffy, with little air flow. While the air conditioning, usually set to a pleasant 72 degrees, has you reaching for a throw blanket in the front room, you’ll be wiping sweat off your brow just a few feet down the hall in the kitchen, with or without the oven on. It’s a mystery that apparently cannot be solved, but it’s a good reason to keep our cooking and baking to a minimum this summer season.

Fortunately for us, my German upbringing has taught me how to turn bread and a few simple ingredients into a satisfying meal. Sure, sandwiches — the American way of life — are quite filling, but it’s not the same experience as having a slice of stout pumpernickel or rye bread layered with exquisite homemade spreads, decoratively presented on a plate right in front of you, begging the question: Do I need to use a knife and fork with this?

While Germans have a firm grasp on Brotzeit, which literally translates to “bread time,” with liverwurst, pickles, crackling lard and other rustic ingredients, Scandinavians have a more exotic variety. Skagenröra, one of the most popular dishes in Sweden, is a simple seafood salad made of shrimp, crème fraîche, mayonnaise and dill. Most people use tiny shrimp, but we like to cut up larger shrimp, which doesn’t hurt the flavor in the least.

Skagenröra shrimp salad neighbors well with smoked salmon as well as other spreads, egg salad being one of them. For either one — shrimp or egg salad — you can lighten up by substituting a portion of the mayonnaise with yogurt, or ditch the mayo and use a combination of yogurt and plain hummus.

However you plan on spending “midsommar” — the longest day and shortest night of the year — keep the kitchen cool and try Skagenröra for a simple but worthy solstice snack.

Skagenröra Shrimp Salad

(Makes 4 open-faced sandwiches)

1/4 cup mayonnaise (or a yogurt and mayo combination)

1/3 cup crème fraîche

1 small shallot, finely minced

4 tablespoons chives, finely chopped

3 tablespoons dill, finely chopped

Lemon zest of 1/2 lemon

1/2 teaspoon prepared mustard

Lemon juice, freshly squeezed, to taste

12 ounces small shrimp (or larger shrimp, sliced)

Salt, pepper, to taste

4 slices of pumpernickel or rye bread

2 handfuls butter lettuce

Mixed sprouts (e.g., broccoli, radish, cress)

2-3 tablespoons capers (optional)

Add mayonnaise, crème fraîche, shallot, chives, dill, lemon zest, mustard and lemon juice to a bowl and mix well. Gently fold in shrimp and add salt and pepper to your liking. Refrigerate the shrimp salad for at least two hours before serving. To serve, layer lettuce on a slice of bread, top with a generous helping of Skagenröra and other toppings, such as sprouts and capers. 

Focus on Food

FOCUS ON FOOD

French Squared

Croissants jazz up a traditional dish

Story and Photograph by Rose Shewey

If I see French toast on a breakfast menu, I inevitably think: old bread. I can’t help it. Jazzed up old bread, yes, but old bread nonetheless.

For a start, it’s always been my belief that French toast is a “make at home with leftovers” food. Stale bread soaked in an eggy milk mixture? In various languages, most of Europe calls this dish “poor knights.” It sure sounds like something starving wayfarers would have appreciated. Then I came across a version of this meal that had me at the very edge of my seat: Croissant French Toast Bake.

Initial enthusiasm was quickly replaced by the sinking of my heart. Since French toast works best with dry bread, the implication was clear: You need to have day-old croissants (not just one, but several) lying about to make this dish. In our home, freshly brewed stovetop espresso and golden-baked, just-out-of-the-oven croissants are the raison d’être, the pinnacle of a dignified life, so to speak. Fresh croissants typically don’t make it to lunchtime, let alone the next day.

So, special arrangements were made to get this meal underway. I ventured out and bought prepackaged croissants. Naturally, if you have an abundance of homemade croissants, or access to artisanal baked goods, you may not need to go this route but grocery store croissants are a fine option for this purpose. I opted to add strawberries — after all, ’tis the season — but pick your favorite fruit and make the dish your own. This version of French toast is a departure from the traditional recipe, but it makes for a celebratory upgrade of the original.

Croissant French Toast Bake with Strawberries

(Serves 6)

4 eggs

1 1/4 cups milk

2 tablespoons sweetener, such as maple syrup or honey

2 teaspoons vanilla extract

1/2 teaspoon ground cinnamon

Pinch of salt

6 croissants, cut in half (or torn into larger pieces)

5-6 tablespoon strawberry jam

6 ounces cream cheese, room temperature

1/4 cup butter

Fresh strawberries and whipped cream for serving

Add eggs, milk, sweetener, vanilla extract, cinnamon and salt to a large bowl and whisk. Dip the bottom halves of the croissants into the egg mixture and place into a 8×10-inch greased baking dish. Spoon jam and dollops of cream cheese over top. Dip the remaining croissants into the egg mixture and lay on top of the bottom halves, pouring any remaining egg mixture over the croissants. Refrigerate for at least one hour or overnight.

Preheat oven to 375°F. Slice butter and place on top of the croissants, then bake for 40-45 minutes. If needed, cover the dish with a lid or foil to prevent croissants from browning too much.

Focus on Food

FOCUS ON FOOD

A Cake for Every Season

No-bake Easter sweet treats

Photograph and Story by Rose Shewey

Today, I am going to answer a question you didn’t know you had: The humble carrot cake — is it a fall treat or a spring dessert?

It’s a bit of a conundrum. With carrots being harvested both in the spring and autumn, one could argue carrot cake can be either one — a celebration of spring and fall. Case closed. However, there are those — in my experience, mainly hobby pastry chefs — determined to limit this modest delight to just one season. To me, the correct answer is, and always has been, carrot cake is an anytime cake. Spring, summer, fall or winter. It’s truly a cake that fits just about any occasion.

The much more pressing question is, come Easter, should I make carrot cake or cheesecake? Cheesecake is the quintessential spring dessert in my book. Indecision being my biggest vice, I am making both and combining them — a folksy carrot cake as the supporting act for opulent cheesecake is exactly what I want to adorn my Easter brunch array.

That’s not the whole story. I am making this entire affair a no-bake event.

If you want to serve them alone, it’s worth noting that this no-bake carrot cake makes for some scrumptious carrot cake bars, should you be short on time or if cheesecake isn’t your cup of tea. Vice versa, if carrot cake isn’t your jam, this no-bake cheesecake will happily go atop any crust of your choosing.

No-Bake Carrot Cake and Cheesecake

(Serves 6)

Carrot Cake Ingredients

1 cup coconut flakes, toasted

1 cup cashew nuts or walnuts

1 teaspoon ground cinnamon

1/4 teaspoon nutmeg

Pinch of sea salt

6-8 medjool dates, pitted and sliced

1 cup grated carrots

1/3 – 1/2 cup coconut flour, as needed

Cheesecake Ingredients

16 ounces cream cheese, room temperature

1/3 cup powdered sugar

zest of 1/2 lemon

1 tablespoon lemon juice, freshly squeezed

8 ounces heavy whipping cream

Method

To make the carrot cake base, add coconut flakes, cashews or walnuts, cinnamon, nutmeg and salt to a food processor and pulse until the nuts are crumbly. Now add in the dates and mix until you have a dough-like consistency but do not over-process — you don’t want a puree. Add in the carrots and pulse until everything is well incorporated.

Scrape out mixture into a bowl and add about half of the coconut flour and stir with a fork or spatula; if the mixture is still overly wet or sticky, work in the remainder of the coconut flower.

Line a 6-7-inch springform pan with parchment paper and press the carrot cake mixture into the bottom. Use a flat-bottom glass to achieve a smooth layer. Set aside.

To make the cheesecake, add the cream cheese to a bowl and sift in the powdered sugar. Mix with a fork until roughly incorporated, add lemon zest and juice and mix with a handheld mixer until well combined and creamy. Set aside.

In a separate bowl, whip heavy cream until soft peaks form and fold into the cream cheese mixture. Pour cheesecake mixture into the prepared springform, atop the carrot cake base, and refrigerate for at least 4 hours before serving.

Focus on Food

FOCUS ON FOOD

Open Season

It’s strawberry o’clock somewhere

Photograph and Story by Rose Shewey

Eating seasonally makes for an interesting lifestyle. The practice of only buying and eating foods that are grown locally and harvested at peak flavor is a worthy undertaking but also a commitment I’m not ready to make just yet. I can easily enjoy locally harvested foods all summer long, especially in North Carolina, where we grow an abundance of exciting warm weather crops — but I don’t foresee myself mastering the art of exclusively eating root vegetables and canned goods for months on end during the winter.

I do have some principles, though. These past few months at the grocery store, I had to use all my power of persuasion to talk my 6-year-old out of bagging strawberries that were grown thousands of miles away and, frankly, a bit pale and sorry looking. So, that’s a “no” to buying imported berries, as well as “winter tomatoes,” the epitome of blandness. On the other hand, I have a hard time turning down avocados from south of the border, or especially plump and juicy-looking citrus from across the country, if the opportunity presents itself.

In the case of the strawberry, which is native to Northern America, it makes a lot of sense to wait for the local harvest. Not only will the berries look better, they’ll be their most nutritious and aromatic. But here again, I fall off the wagon by stretching the term “locally grown.” As soon as the first strawberries harvested anywhere in the Southeast hit the shelves, all bets are off.

So, come March — the month I typically start noticing Florida-grown strawberries in the markets — we’re in the strawberry business, just a few weeks before our (truly local) Sandhills strawberries are ready to be picked. To bridge the gap between the cold season and the tender beginnings of spring, I like to prepare a strawberry fruit salad and mix in wintry grapefruit. Make it into a meal and serve this fruit salad with waffles. A grain- and gluten-free almond and oat waffle is the ideal accompaniment to this fruity affair — and not just for breakfast.

Strawberry and Grapefruit Salad with Almond Oat Waffles

Fruit Salad

(Serves 4)

2 grapefruit, peeled

400 grams strawberries

2 tablespoons strawberry syrup or other liquid sweetener (optional)

Dice grapefruit (peel off the membrane, if desired) and slice the strawberries. Add cut fruit to a bowl and toss with strawberry syrup or sweetener of choice. Refrigerate until ready to use.

Almond Oat Waffles

(Makes 4-6 waffles)

1 cup oat flour

1 cup almond flour

3/4 teaspoon baking powder

Pinch of salt

3/4 cup milk (nut milk or whole milk)

2 tablespoons honey (softened) or granulated sugar

3 eggs

2 teaspoons vanilla extract

3 tablespoons butter (melted) or coconut oil

Preheat your waffle iron. Combine oat flour, almond flour, baking powder and salt in a bowl and whisk to combine. In a separate bowl, whisk together the milk, honey or sugar, eggs, vanilla extract and butter. Pour the dry ingredients into the wet ingredients and stir until well combined. Ladle batter into your waffle iron and cook until golden and slightly crisp.